- CLIENTI: miHoYo
- PRODUCER: TakeOff Studio
- EDITOR: Confidentail team, Samuele Lilliu
- FEATURED IN: Knowing the Universe Galactic Rhapsody | Honkai Star Rail
- SOFTWARE: Unreal Engine 5.1 and 5.2, Brushify, Amberify, Ocean System for Rendered Cinematics, Ultra Dynamic Sky, Ice Cool, Embergen, Space creator Pro, FluidNinja, World Creator, Adobe Substance, Blender, VDB plugin
Progetto di Animazione 3D per Videogioco
Il progetto ha comportato la creazione di animazioni 3D ed effetti visivi per un video promozionale che presentava un’intervista con un Premio Nobel per un imminente videogioco sviluppato da una società multimiliardaria nel settore dei videogiochi. Inizialmente partito come un semplice compito di animazione, il progetto si è rapidamente evoluto in un incarico complesso che richiedeva la produzione di animazioni in stile documentario.
L’obiettivo principale era la creazione di 22 animazioni realistiche che rappresentassero paesaggi extraterrestri plausibili. A tal fine, ho utilizzato principalmente Unreal Engine 5.1 e 5.2. I paesaggi sono stati accuratamente progettati per riflettere la ricca diversità degli esopianeti nel contesto del nuovo gioco. Utilizzando la mia esperienza in CGI e scienza, ho impiegato le più recenti tecnologie di intelligenza artificiale testo-immagine e motori di gioco per semplificare il processo di storyboard e produzione. Per adattarmi alle specifiche in evoluzione del progetto, ho integrato una serie di plugin e software di supporto. Ad esempio, Embergen è stato usato per simulazioni di fumo, un software di simulazione fluida PDE per effetti acquatici e MindManager per la gestione del tempo e il monitoraggio dei compiti.
Il progetto è stato eseguito con successo, con la consegna di 22 animazioni realistiche di paesaggi esopianeti immaginari, il tutto entro la tempistica definita. Il prodotto finale non solo ha soddisfatto le aspettative del cliente, ma ha anche offerto uno sguardo evocativo sulla multifaccettata universo degli esopianeti ai giocatori. Illustrando questa diversità cosmica, il progetto ha funto da unico connubio tra intrattenimento ed educazione, potenzialmente accendendo un interesse più profondo nella ricerca astronomica tra i giocatori. La speranza è che questa festa visiva di possibilità planetarie possa persino ispirare alcuni ad intraprendere una carriera nella scienza.
<>
The following is a breakdown of the project’s workflow.
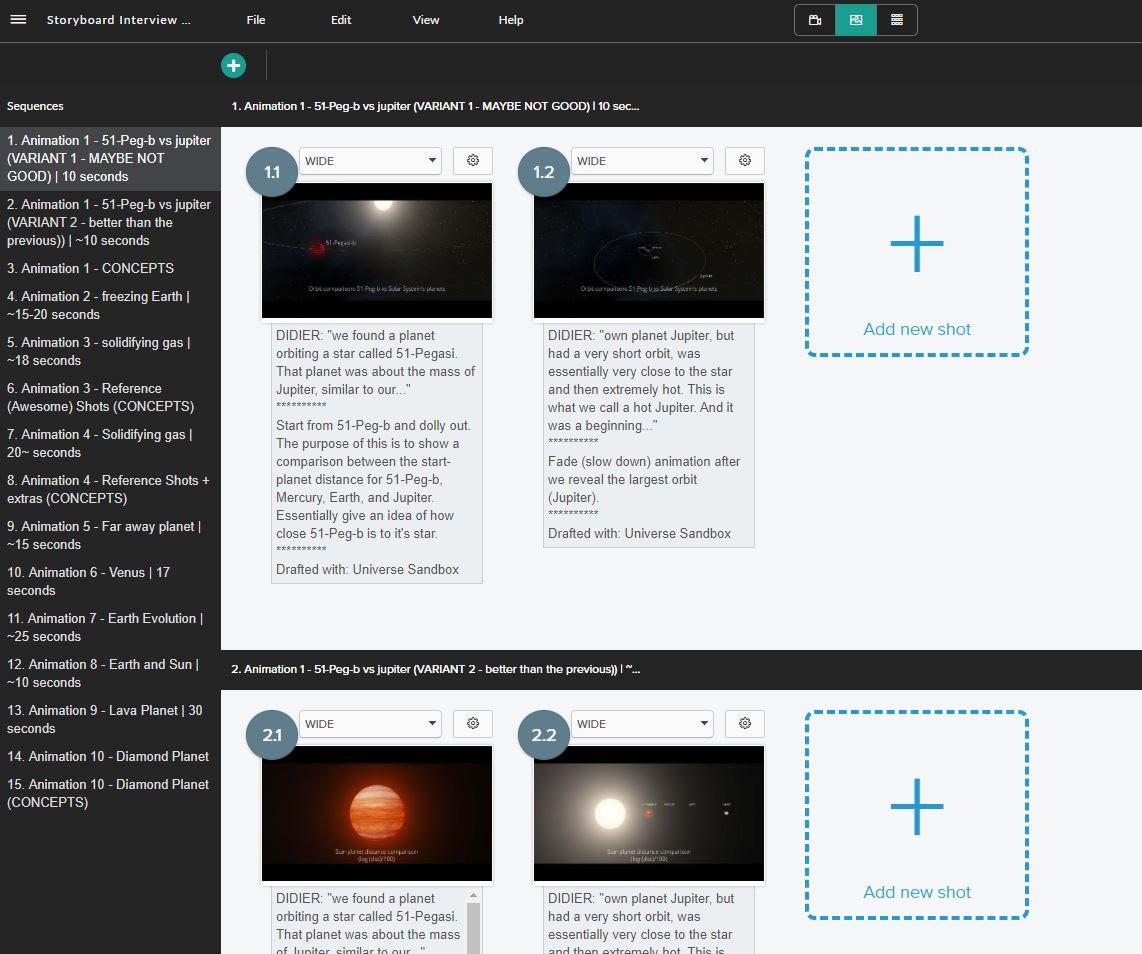
Storyboarding
In the initial stages of the project, the storyboard was meticulously crafted using CeltX, a comprehensive software tool known for its robust scriptwriting and storyboarding capabilities. This tool offered the structure and flexibility needed to map out the complex array of scenes involved in this project. However, to truly bring this storyboard to life and offer a more concrete vision of the proposed scenes, I decided to leverage the power of AI. I employed a state-of-the-art text-to-image AI technology, capable of transforming textual descriptions into corresponding visual elements. This advanced AI tool remarkably accelerated the storyboard process, by generating visual drafts from the descriptive scripts in CeltX. This combination of CeltX for structural planning and AI for visual generation resulted in an efficient and effective storyboarding process. The storyboard, equipped with AI-generated visuals, was then presented to the client for their review. After a thorough discussion and incorporation of their inputs, the storyboard was finalized, laying a clear, client-approved blueprint for the subsequent stages of animation creation.
Unreal Engine 5 Animations
System Specifications
For the creation of the animations, I relied on a custom-built, liquid-cooled computer system. While this setup may not be considered the cream of the crop in the industry, it carried a commendable range of components. My system was equipped with an Intel(R) Core(TM) i9-10920X CPU clocked at 3.50GHz, a decent 34 GB of RAM, and an RTX 3080 graphics card, a solid performer for 3D rendering and animation tasks. The system ran on Windows 10, a user-friendly and well-supported operating system. Even though my machine wasn’t the most advanced in the market, it capably managed the demands of this complex and intricate animation project, resulting in the high-quality production of the envisioned exoplanet landscapes.
Exoplanet 51-Pegasi b
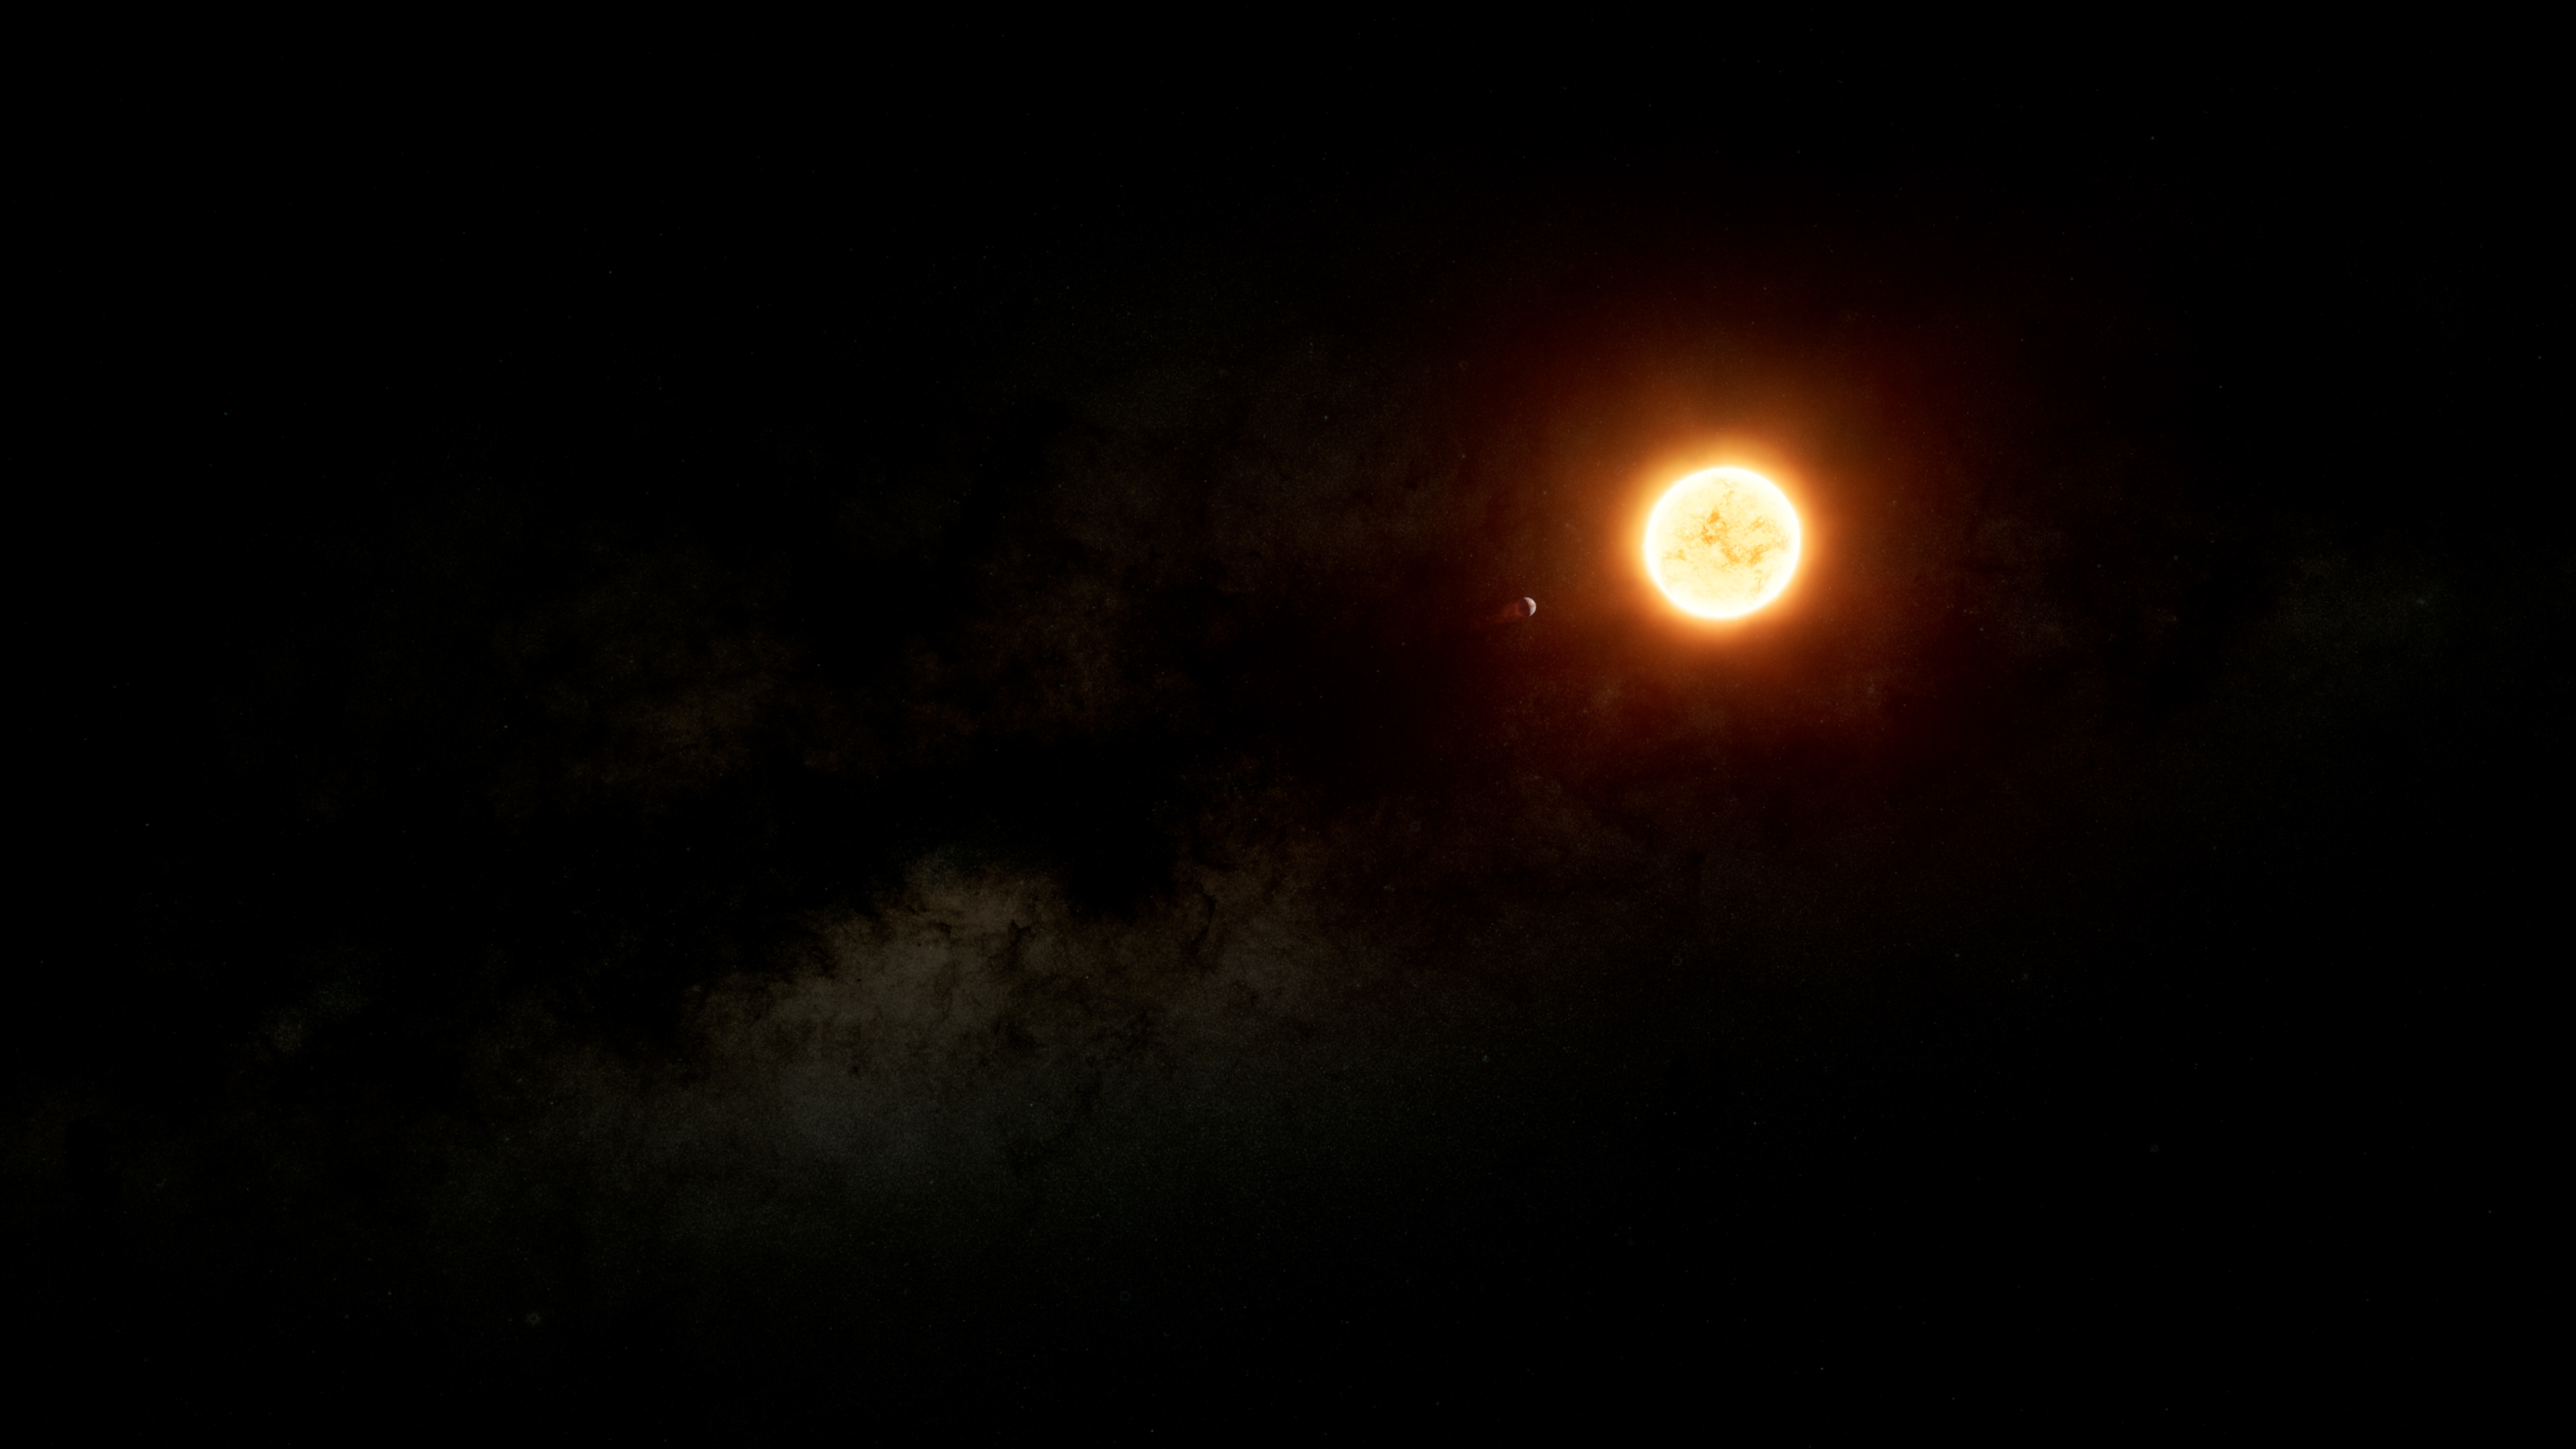
First identified by Michel Mayor and Didier Queloz in 1995, 51 Pegasi b is a ‘Hot Jupiter’ – an oddity in its own right. The discovery of such an exoplanet shook the foundation of planetary system formation theories, particularly concerning the process of planet migration. This paradigm-altering find earned Mayor and Queloz the Nobel Prize in 2019, marking a significant advancement in our comprehension of the universe.
Project Setup
The powerful tool of choice for this endeavor was the Unreal Engine 5 plugin “Space Creator Pro” by MakeMake. This plugin, superior to Arghanion’s Puzzlebox, comes packed with Blueprints and Materials designed to help create high-quality space scenes. I set up four unique levels or scenes, each depicting the star-planet system from a unique perspective.
Lighting the Cosmos: Sky Dome
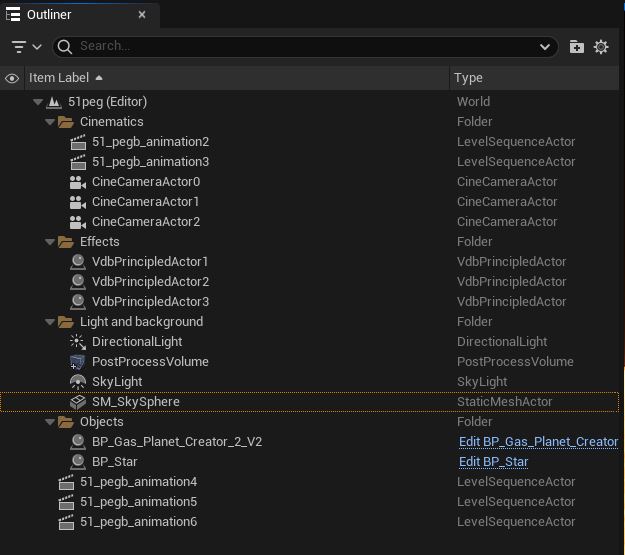
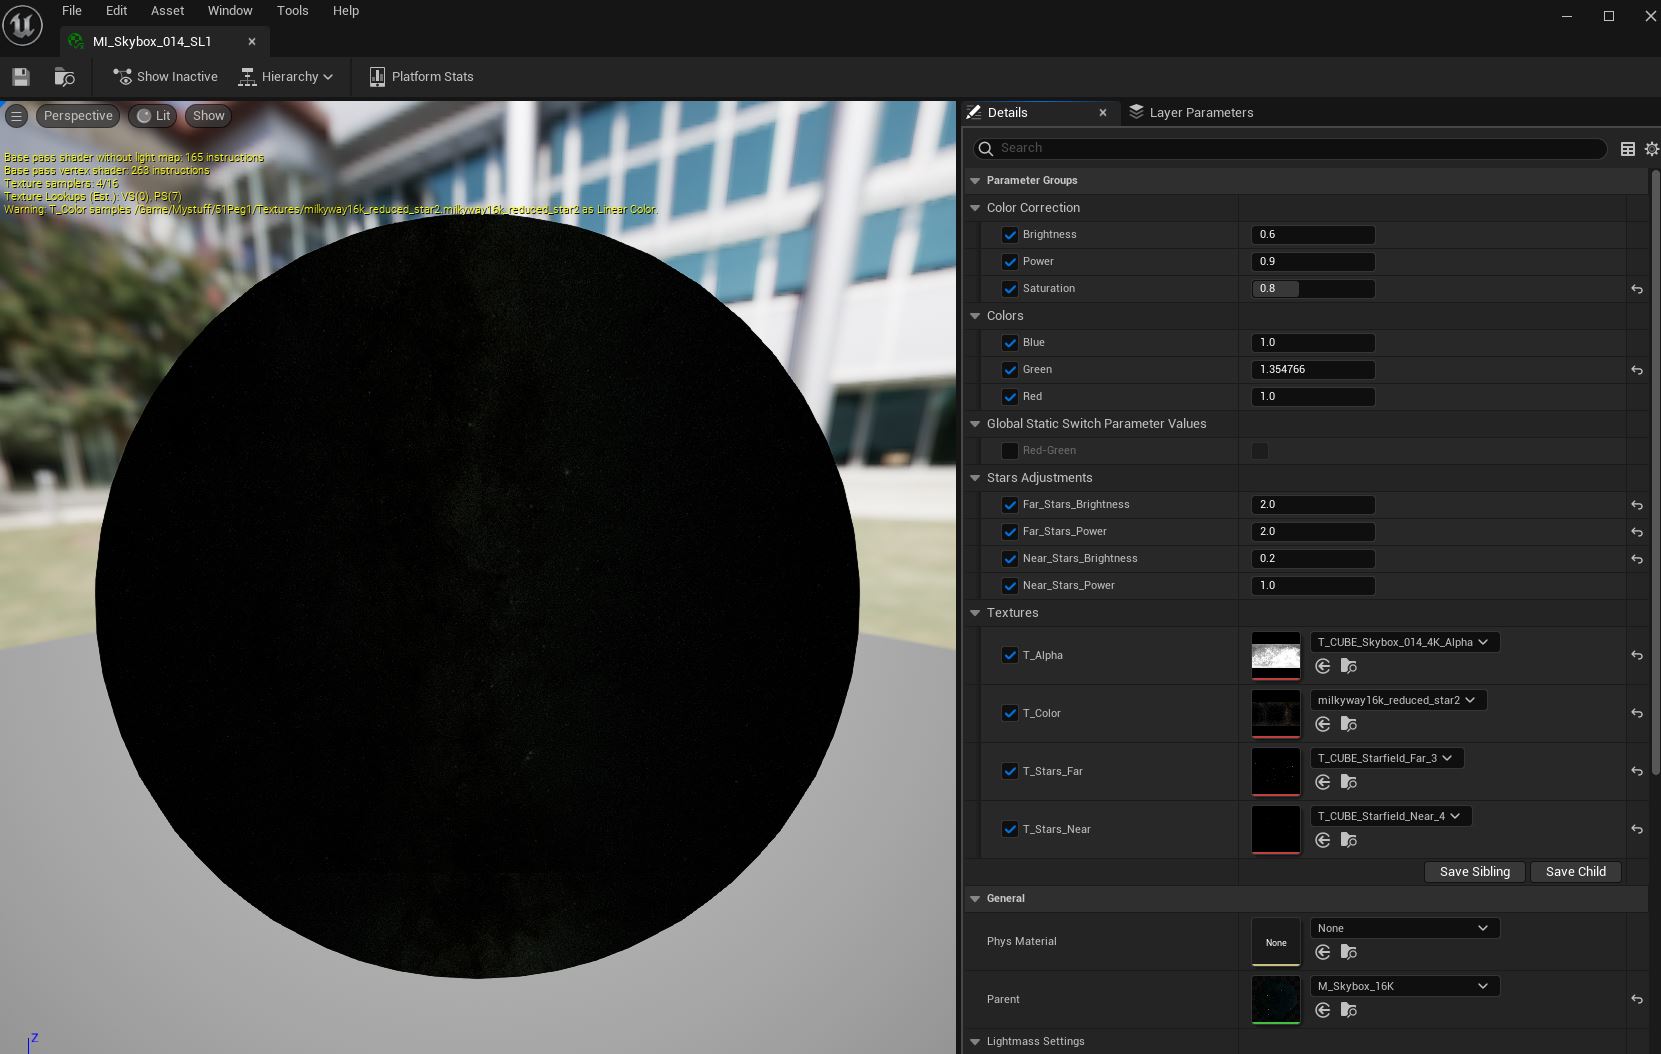
The SM_SkySphere, a part of Space Creator Pro, a key role in crafting the perfect celestial dome or skybox. I used a high-resolution image of the Milky Way obtained from NASA’s official website, transformed into a 4096x4096x6 cubemap via Photoshop. This allowed me to realistically replicate the magnificent galaxy for the backdrop. Adjustments in brightness, power, and saturation within the Material Instance “MI_Skybox_014_SL1” added further authenticity to the celestial representation.
BP_Star and BP_Gas_Planet_Creator_2_V2
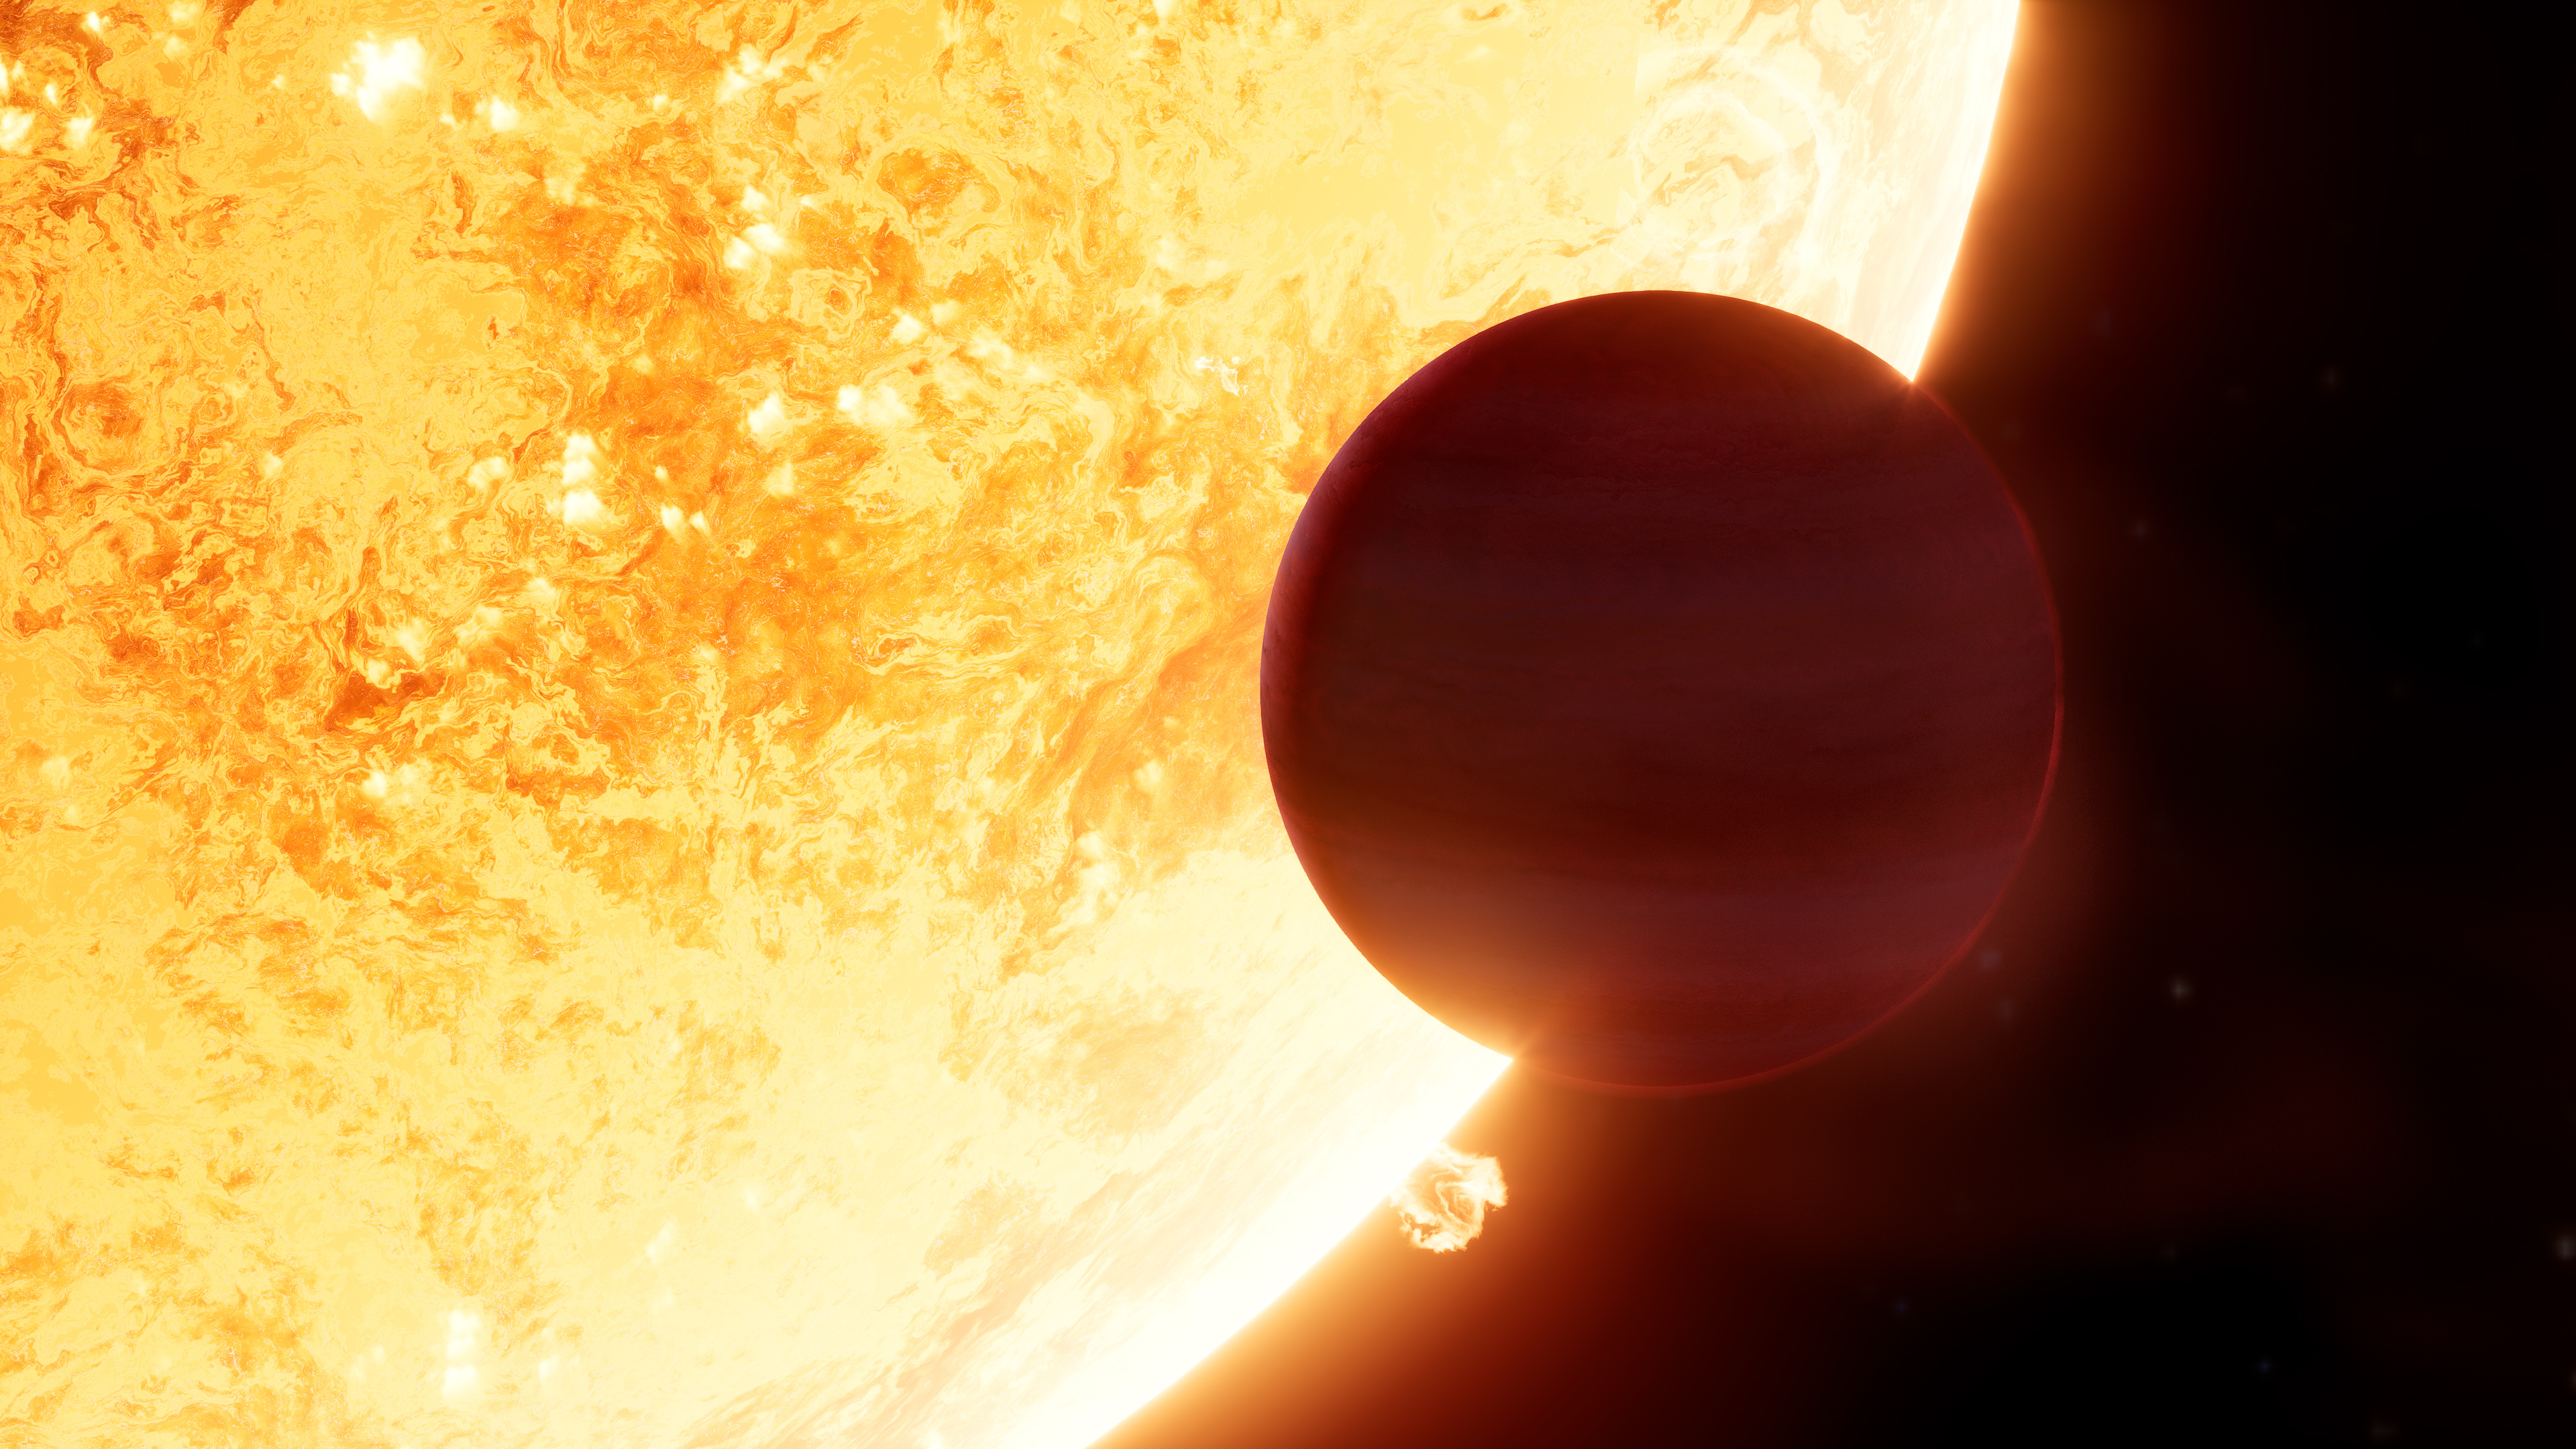
The heart of the project revolved around accurately representing our stellar duo: BP_Star (51-Pegasi) and BP_Gas_Planet_Creator_2_V2 (51-Pegasi-b). These customizable Blueprints from the Space Creator Pro plugin, when tweaked and manipulated, breathed life into the star and the planet. Linking the planet to the Directional Light in the composition ensured that the light falling on the planet convincingly originated from the star.
Special Effects: The Gas Trail
The gas trail behind 51-Pegasi-b was artfully crafted using three animated VDBs (Volumetric Bitmaps) - an advanced method for simulating intricate volumetric effects like smoke. Here, Embergen, a cutting-edge smoke simulator, was of great help. Although Unreal 5.1 doesn’t inherently support VDBs, I bypassed this restriction using a plugin developed by Thibault Lambert.
Smooth Animation Sequences: Blueprint and VDBPrincipledActor(s)
The sequence animation process required me to include VDBPrincipledActor(s) and enable certain settings at the Blueprint level to animate the properties of BP_Star and BP_Gas_Planet_Creator_2_V2. These include:
- Open the Blueprint, click on the variable node and enable “Expose variable to Cinematics”.
- Click on “Class Settings” and enable “Run Construction Script in Sequencer”.
- Drag your Blueprint into the sequencer, add a track, add your variable.
- In the BluePrint, copy the entire Construction Script, and paste that into the Event Graph.
- Add an “Event Tick” to the Event Graph and connect it to the input of the Sequence node you just pasted.
This ensured smooth transitions and consistent animations throughout the scenes.
Rendering: The Final Step
The rendering stage called for specific settings adjustments: r.TextureStreaming was set to True and r.Streaming.PoolSize was raised to 1000 to enable high-resolution rendering of the planets. With a custom Movie Render Queue preset, “Samuele_4k_12bit_2”, I opted for Apple Pro Res 12bit export. This preset also involved enabling Deferred Rendering and Anti-Aliasing, with a Spatial Sample Count of 1, Temporal Sample Count of 8, Render Warm Up Count 8, and Engine Warm Up Count 8. Also, settings for Console Variables (r.ForceLOD 0, foliage.ForceLOD 0, r.ScreenPercentage 100) and High Resolution (Tile Count 1, Burley Sample Count 64) were adjusted to ensure the highest visual fidelity.
Snowball Earth
The Snowball Earth hypothesis posits that our planet underwent extreme glaciation events during the Cryogenian period, approximately 720-635 million years ago. According to this hypothesis, Earth’s surface was almost entirely covered in ice, with even the oceans freezing over. This dramatic scenario is supported by geological evidence, such as glacial deposits found in tropical latitudes, which suggests that ice sheets once extended to the equator. However, the Snowball Earth hypothesis remains a topic of debate among scientists, as some propose alternative explanations for the observed phenomena.
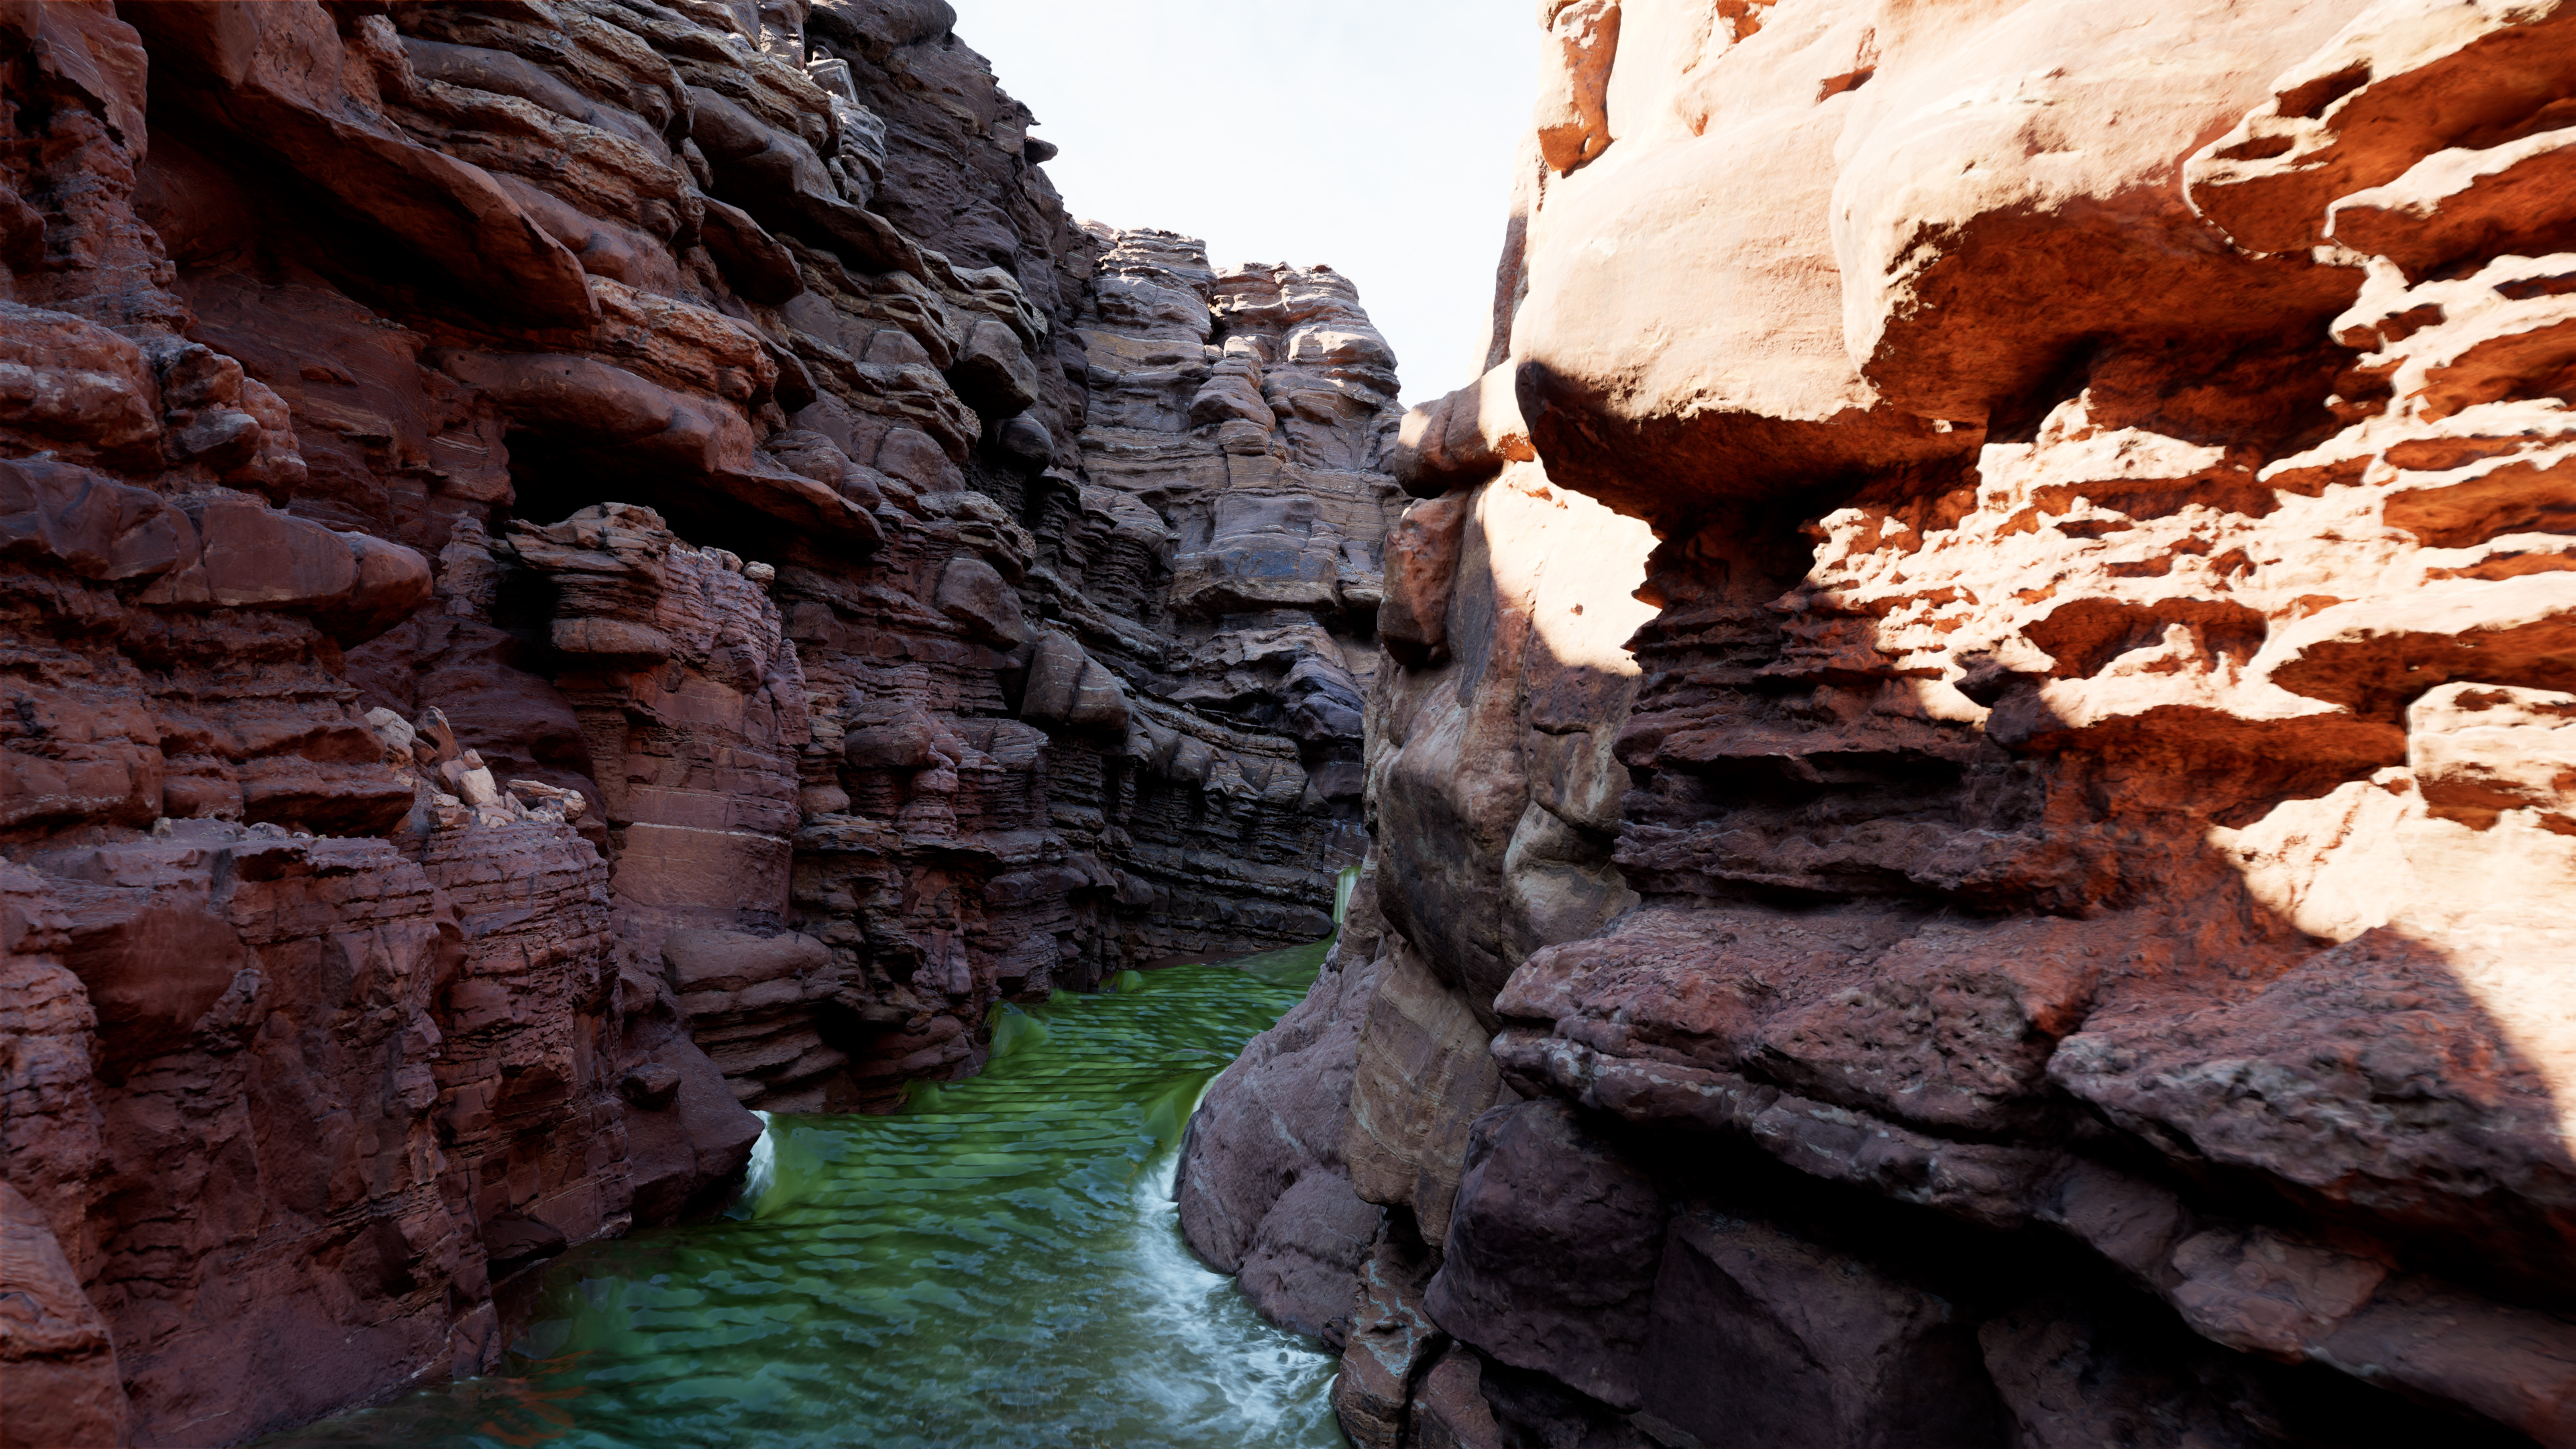
The first animation showcases a canyon environment built through the integration of photogrammetry scans in Unreal Engine 5. The terrain was complemented by a simulated river, which was generated with a plugin featuring a Shallow Water Equations PDE solver. This solver enabled a reasonably realistic representation of water flow and interaction within the canyon.
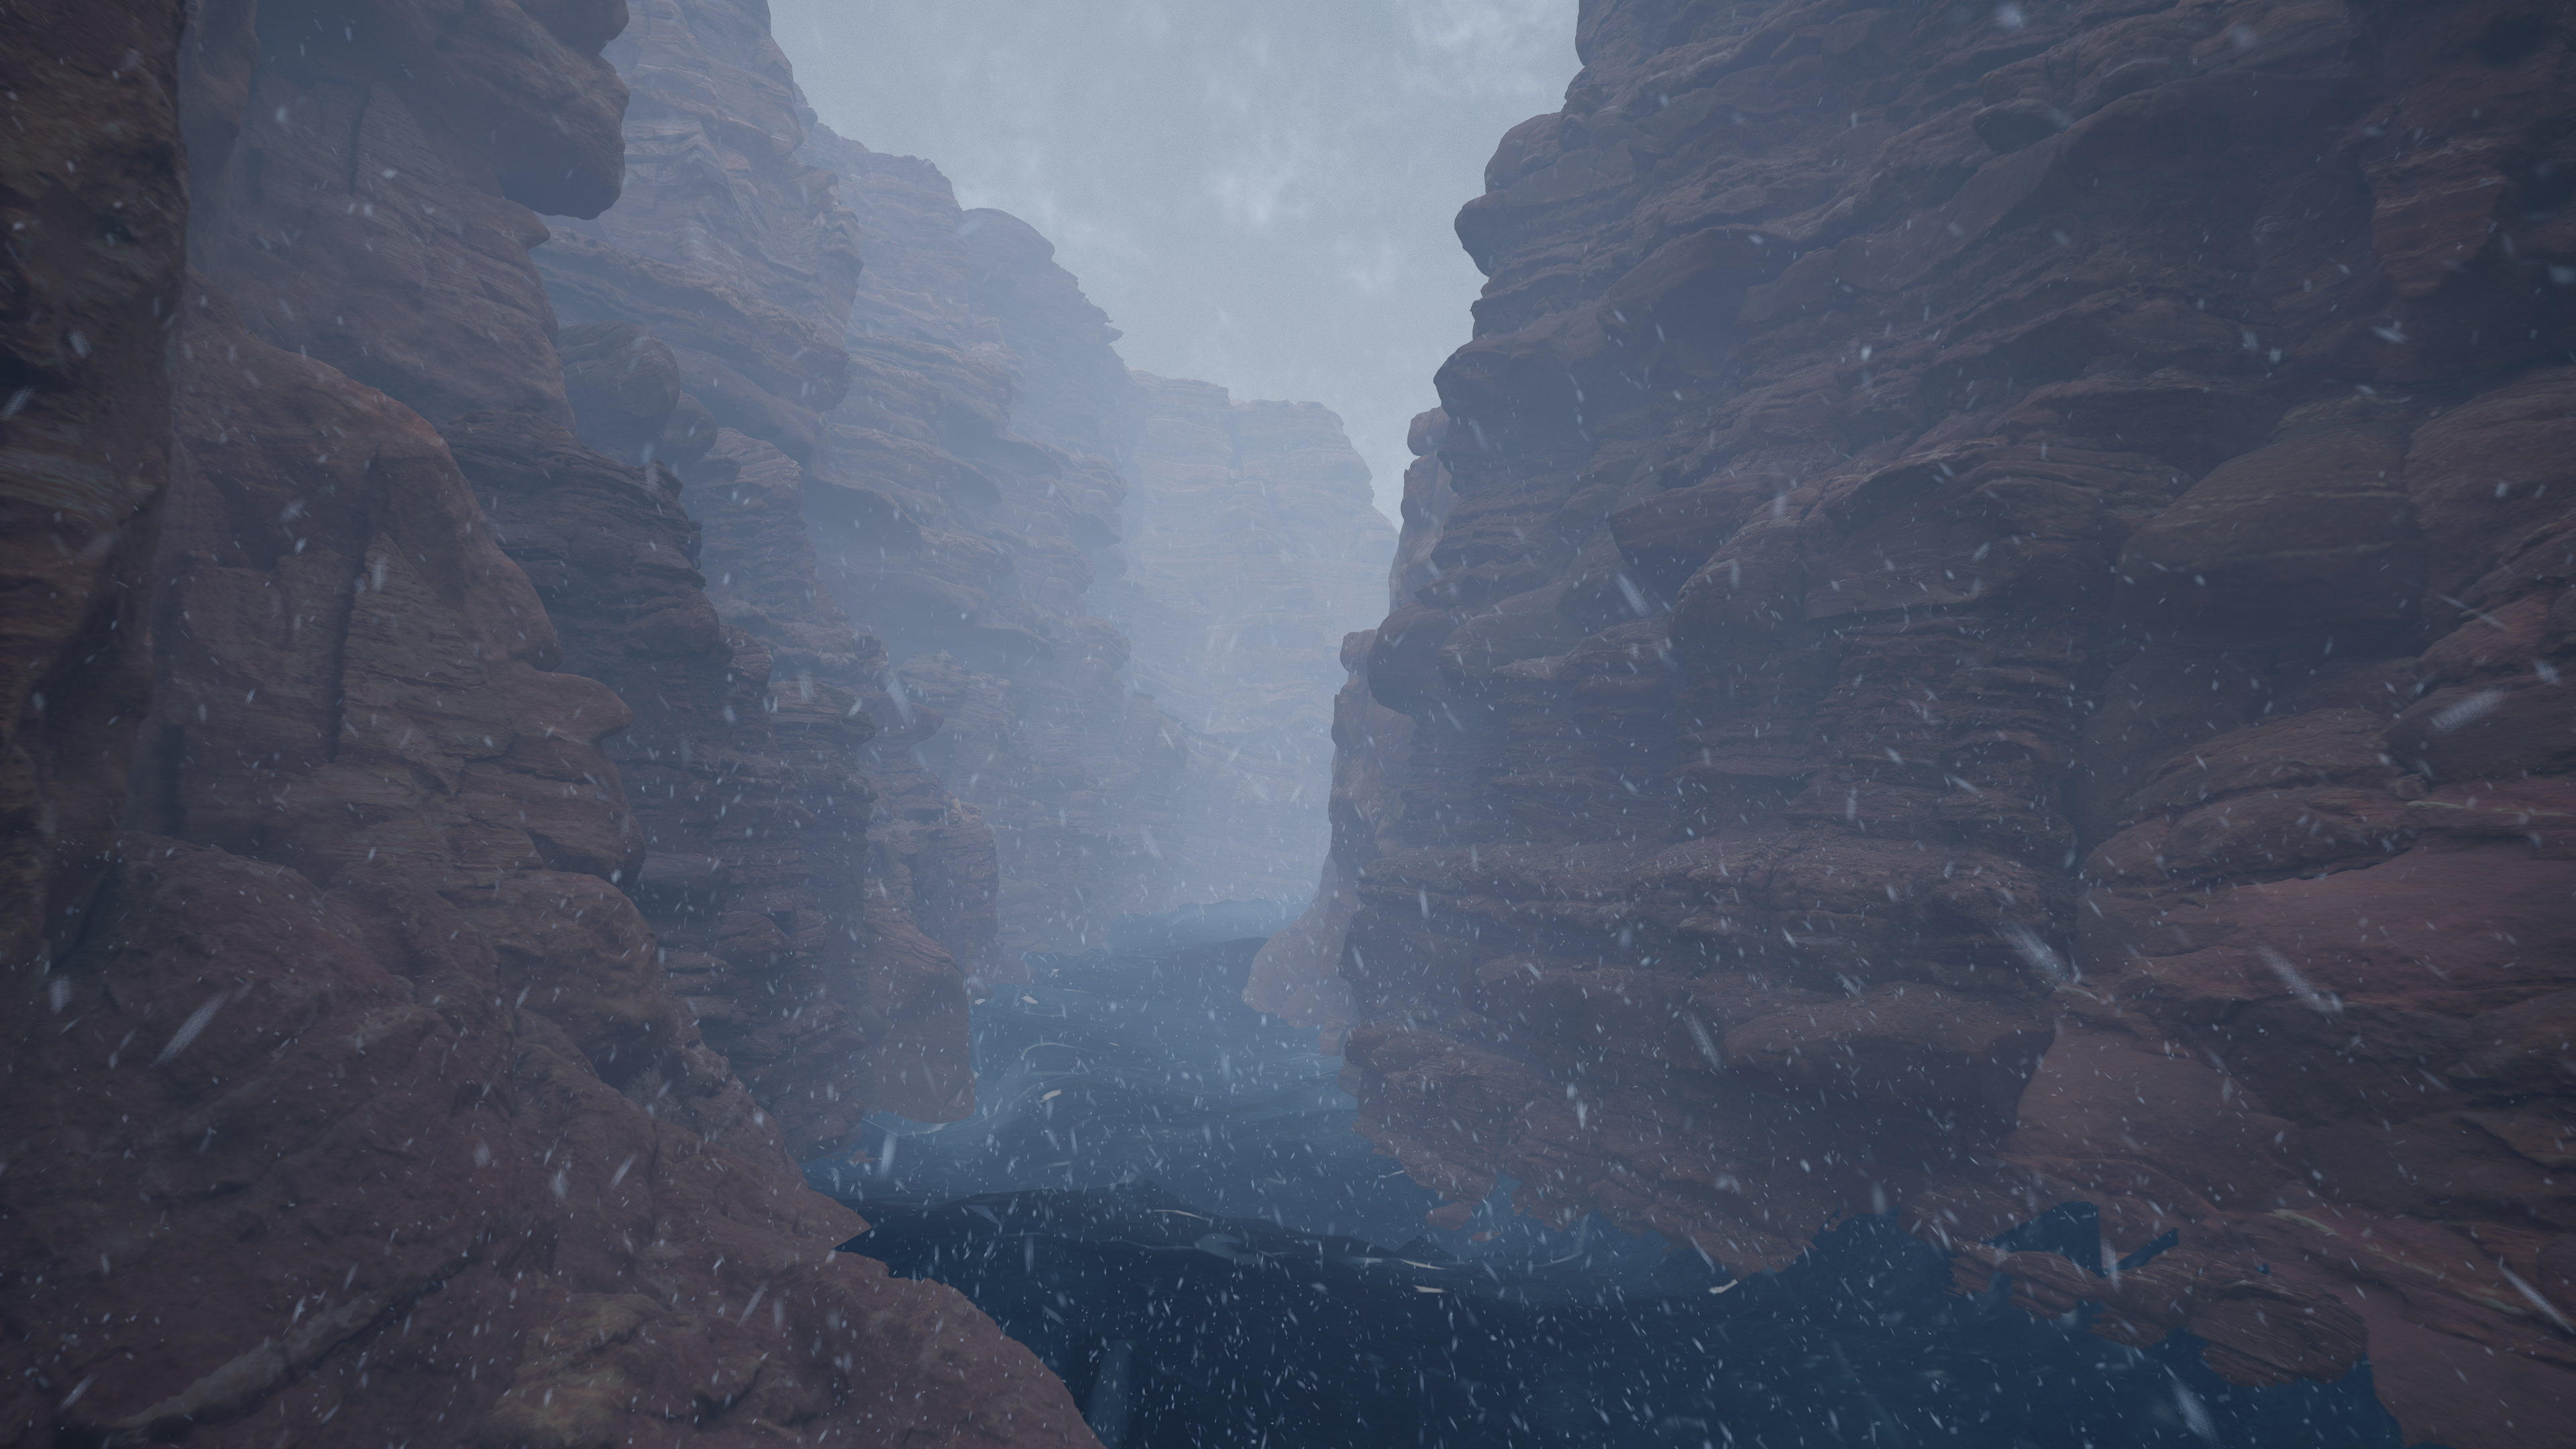
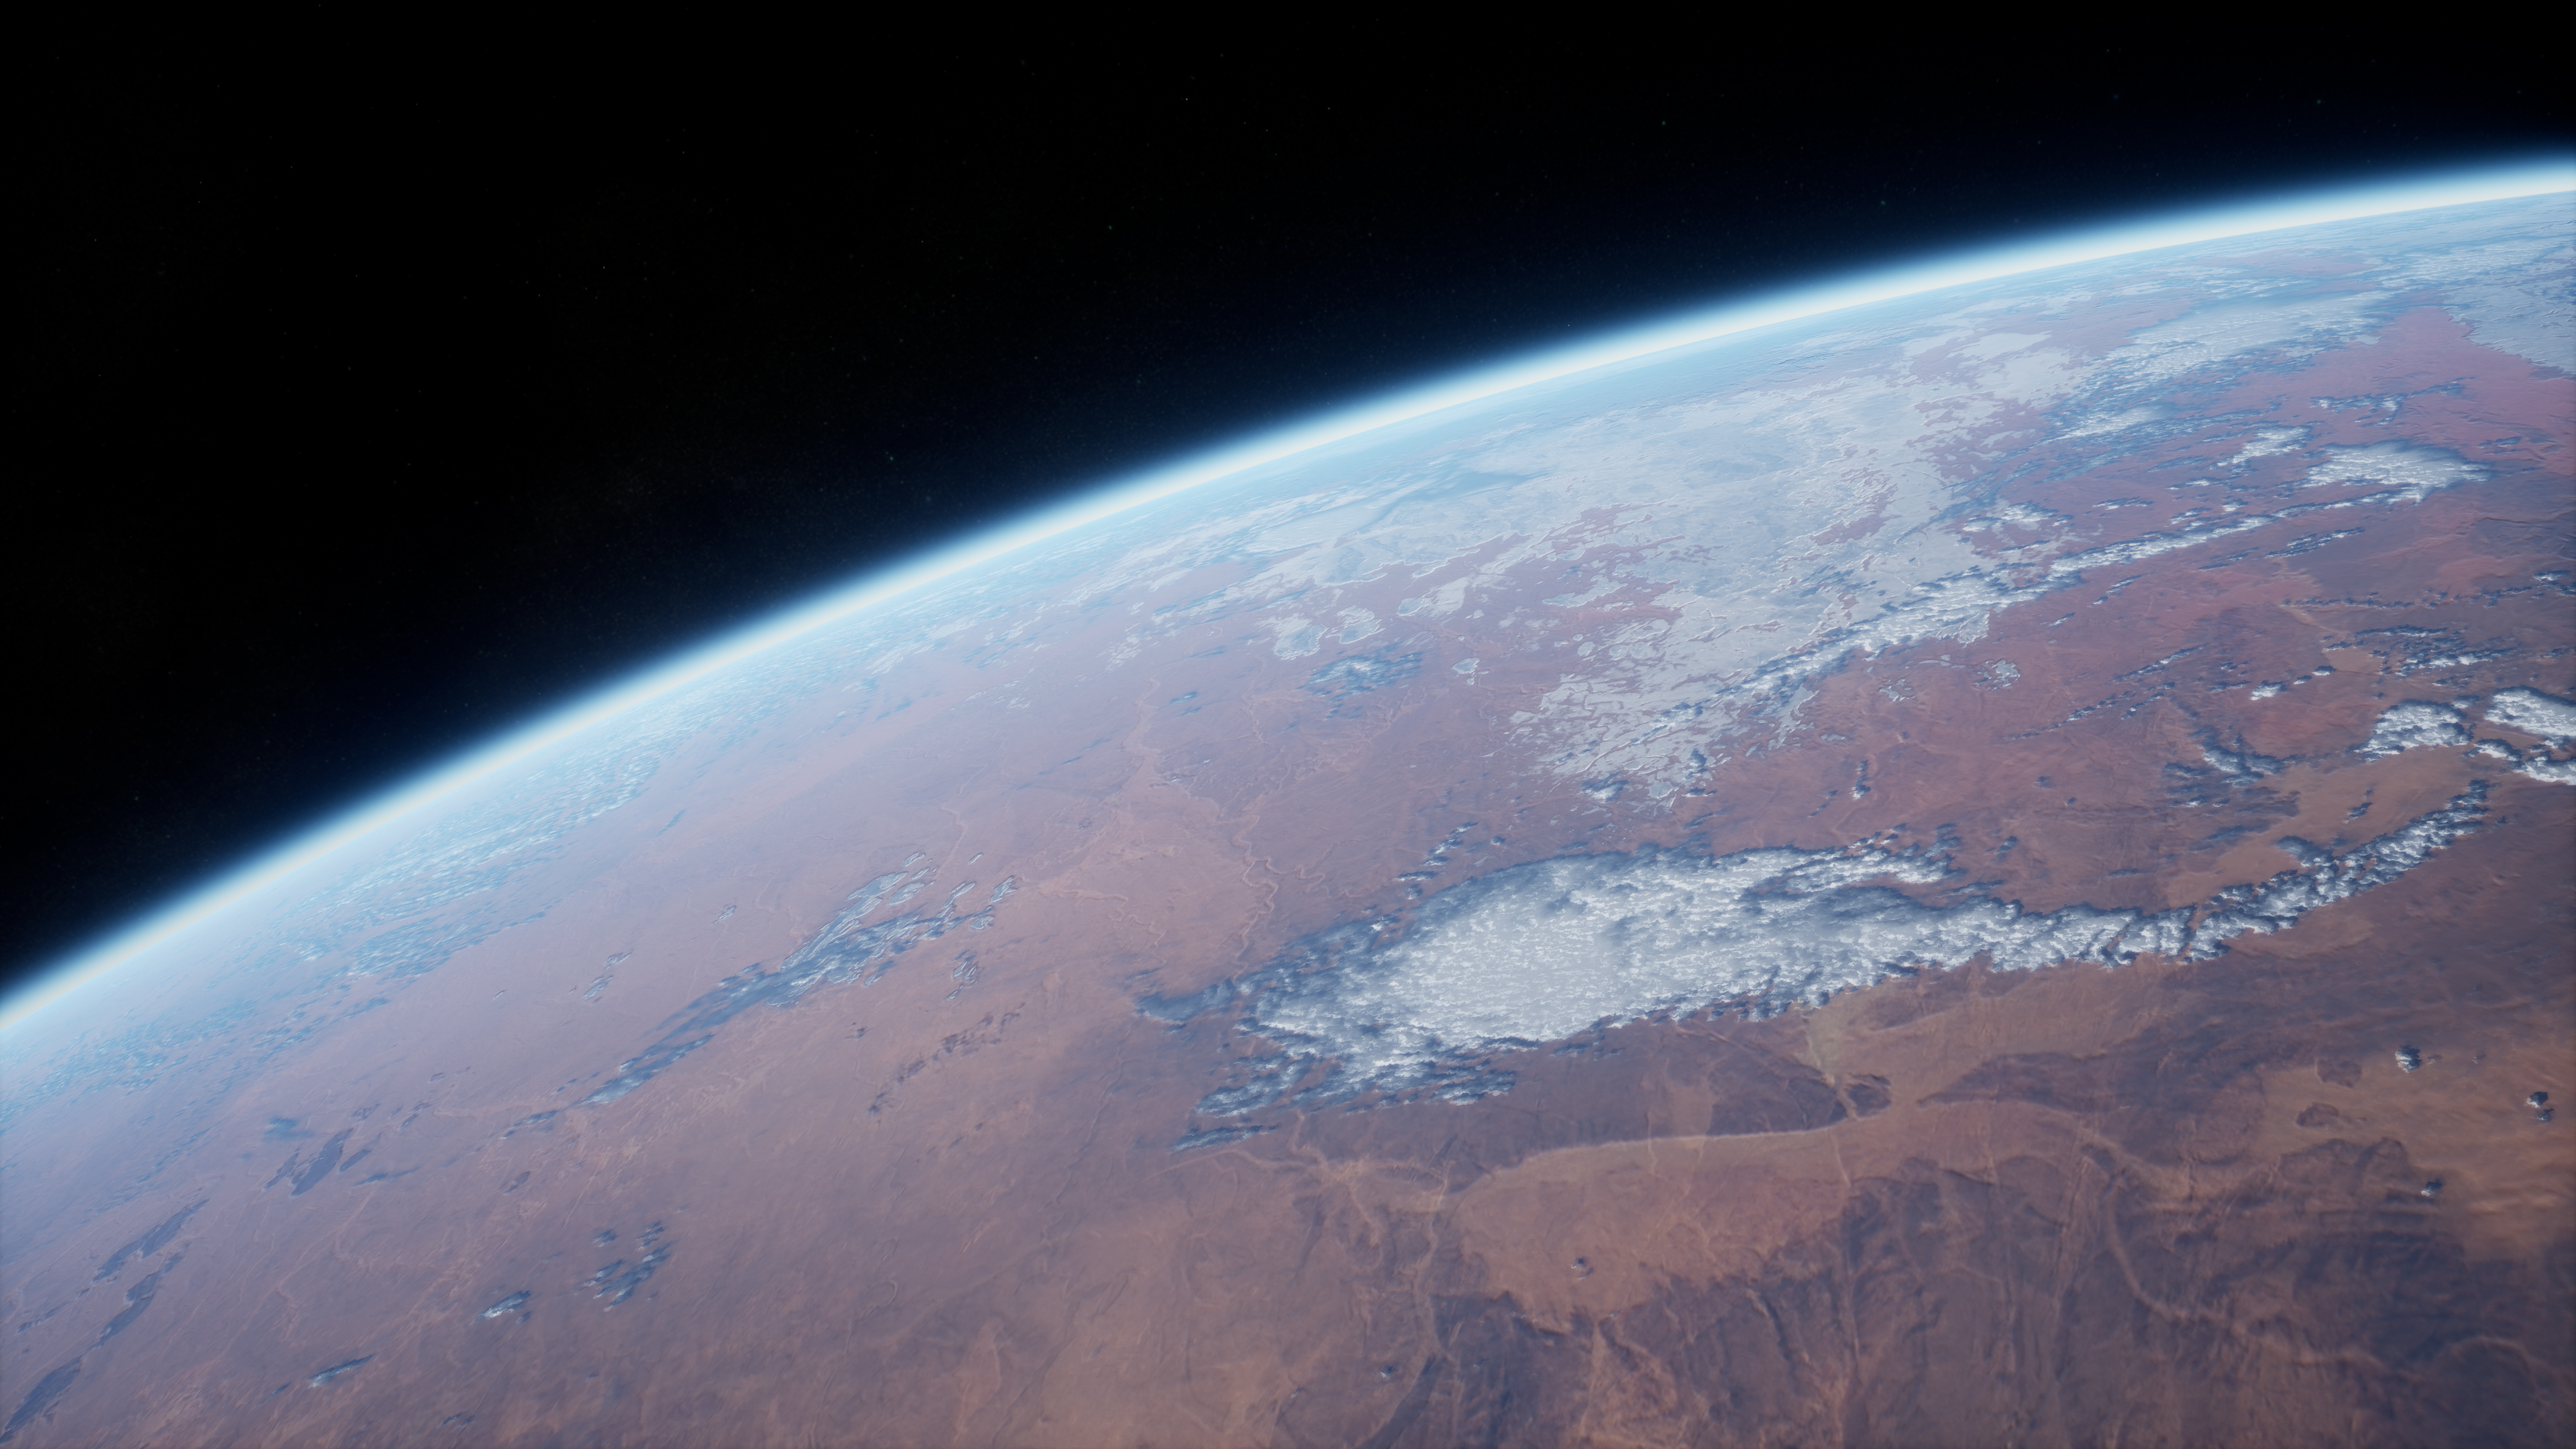
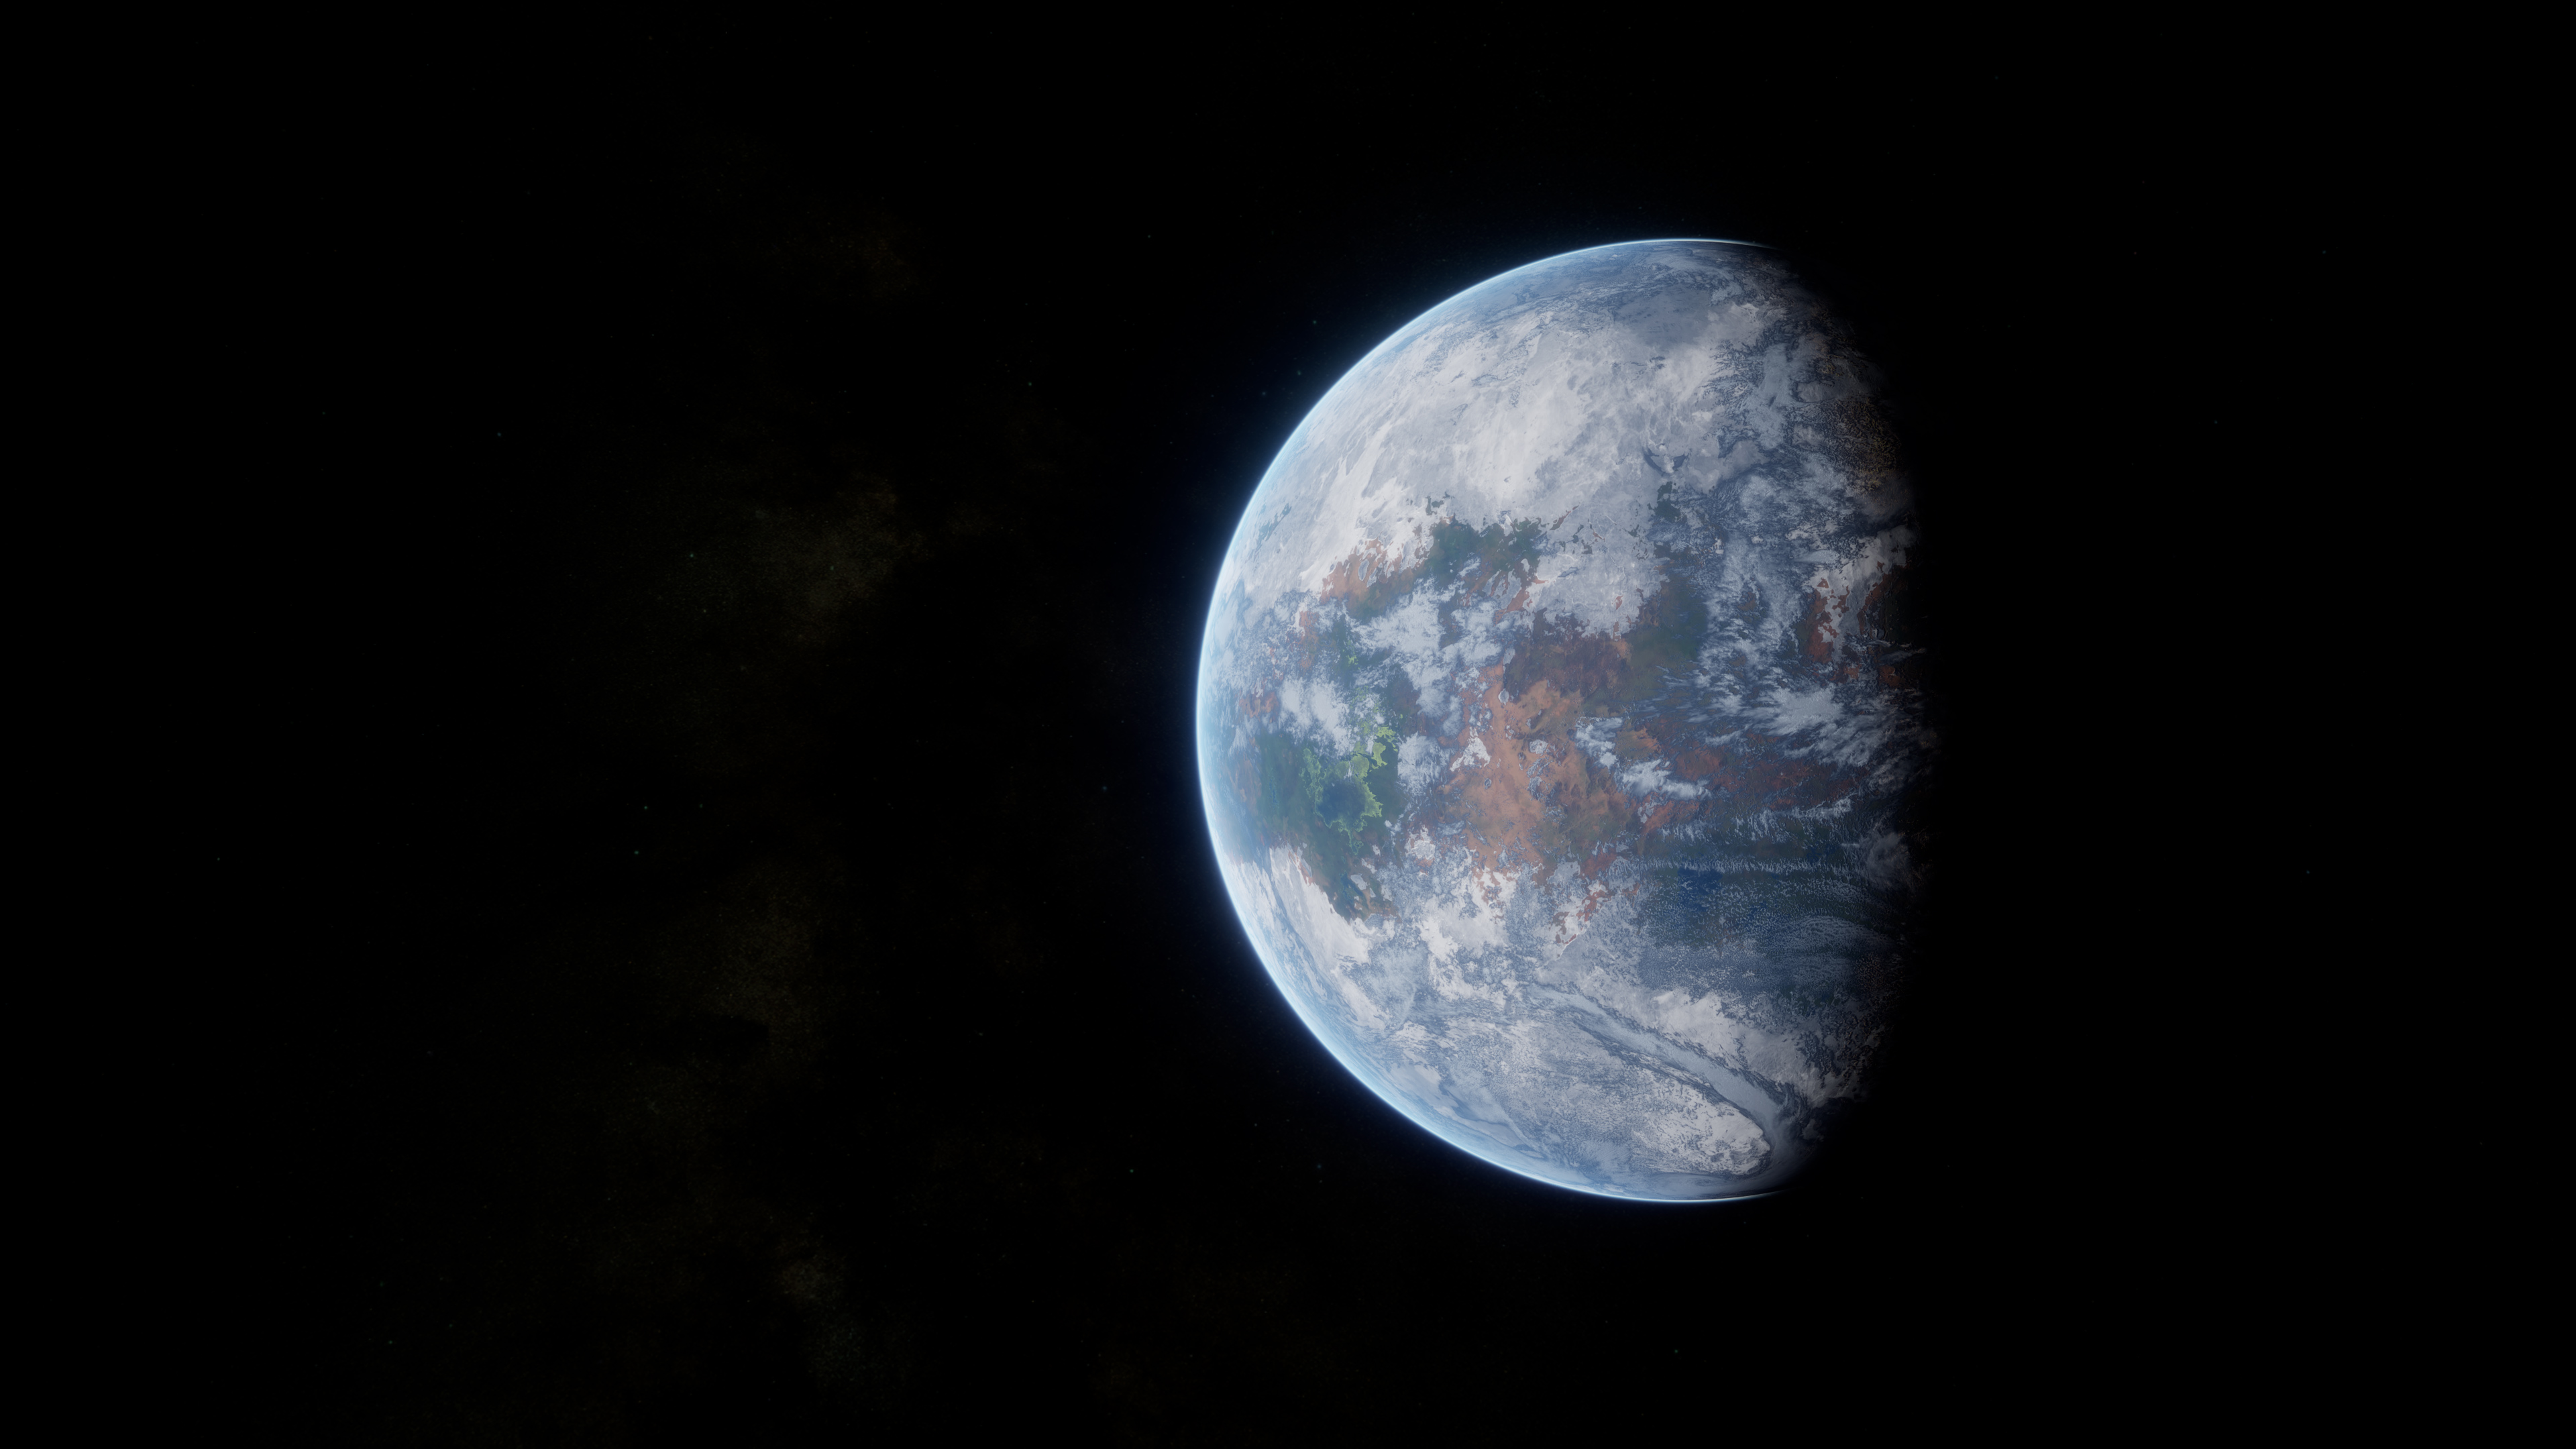
The second animation portrays the hypothesized freezing of Earth during the Cryogenian period. This visualization was achieved by leveraging a procedurally generated planet, where landscape and weather conditions could be dynamically adjusted. The combination of these elements allowed for the seamless portrayal of the Earth’s transformation into a frozen state, providing an immersive and educational experience for the viewer.
Project Setup
My project’s initiation involved shaping a 1k x 1k canyon landscape using World Creator, an innovative real-time Terrain and Landscape creation tool that leverages GPU parallel processing. This ensures a combination of procedural power and a real-time workflow that optimizes creative freedom and efficiency.
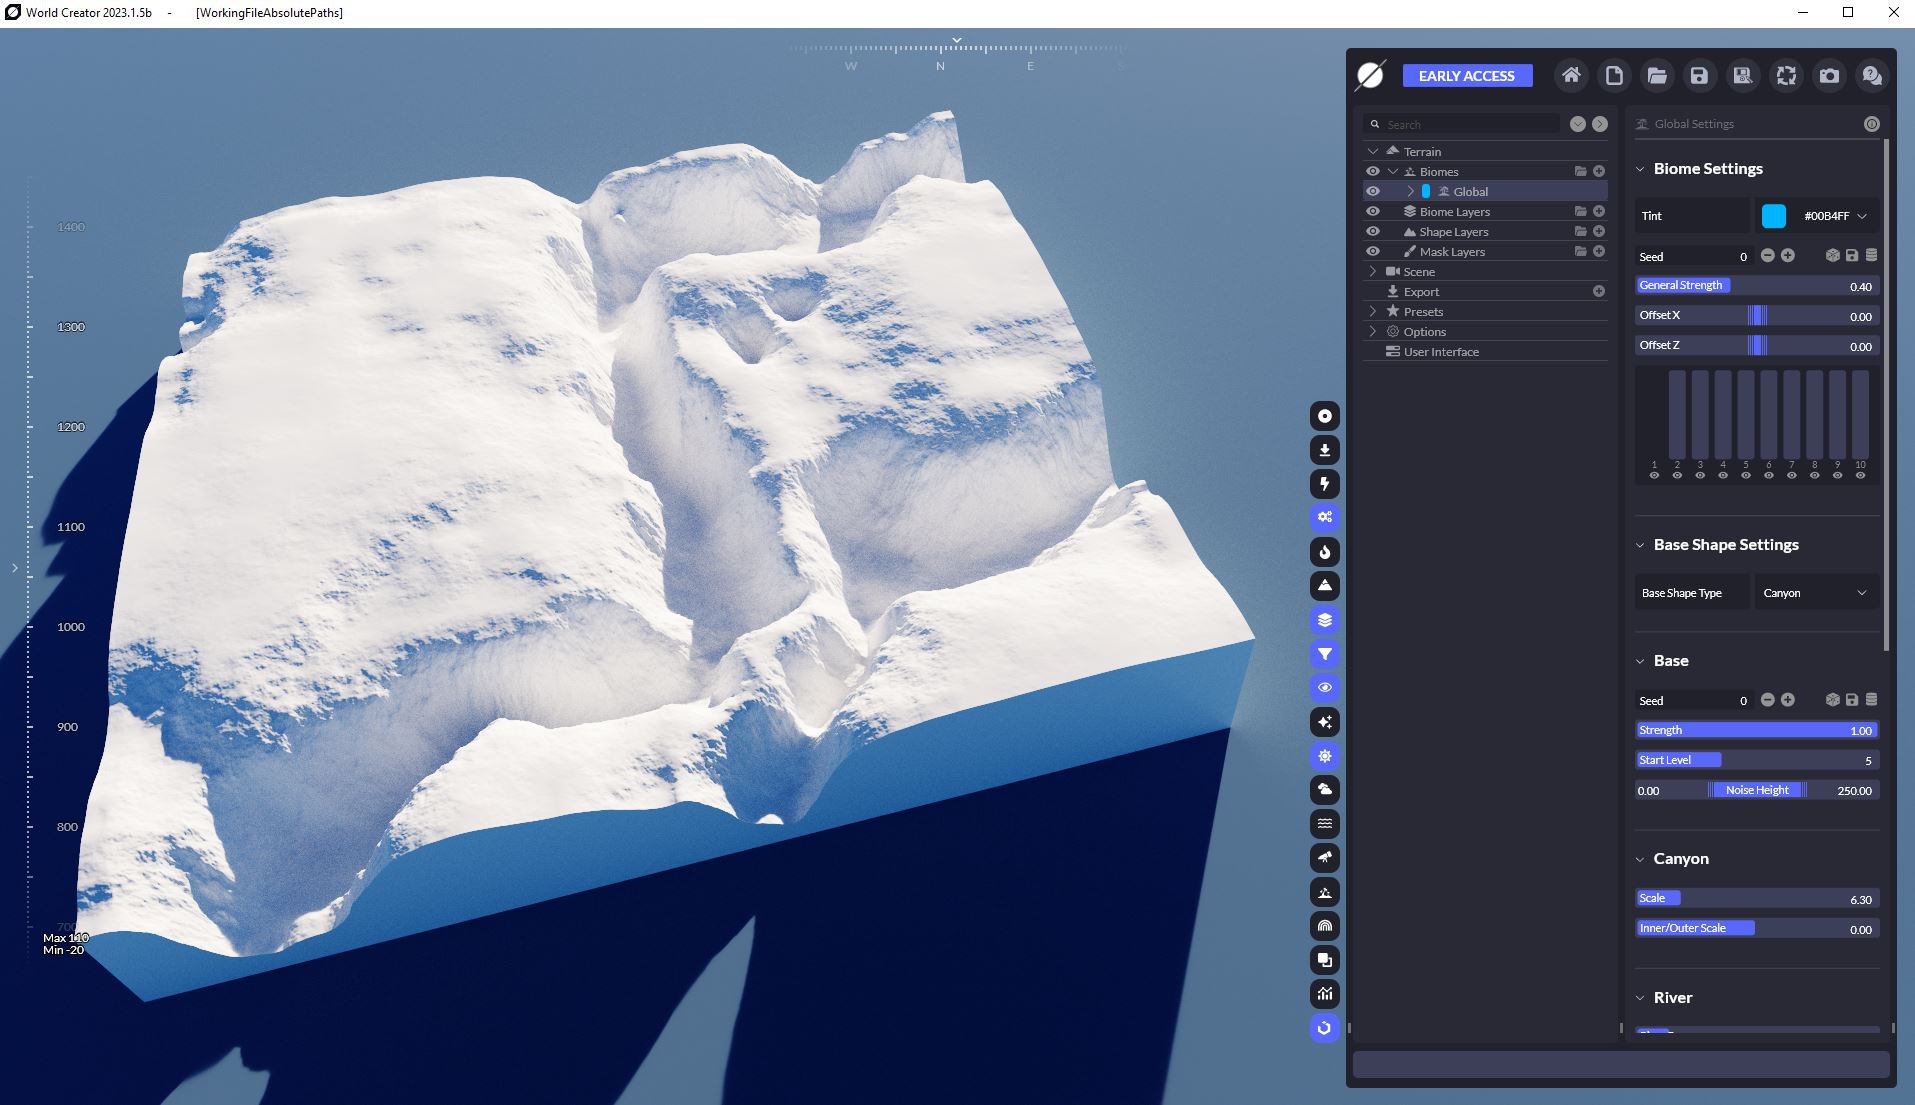
Post completion of the landscape design, the next step is to export the height map along with other splat maps as a high-resolution *.png file. A splat map is just like a height map but represents which materials belong to which parts of your terrain. However, the constant alteration of the User Interface and options in World Creator can be a hassle. This was evident when I found that the project files I created with the previous version were non-existent in the new beta version.
Following the landscape’s design in World Creator, the next phase involves importing it into Unreal using the landscape panel and adjusting the scale and position as recommended by World Creator. An important note is that while importing a landscape with a height map, other spat maps can be imported as well. For instance, I utilized splat maps to define different geological features such as the river bed, hill tops, and slopes in my project.
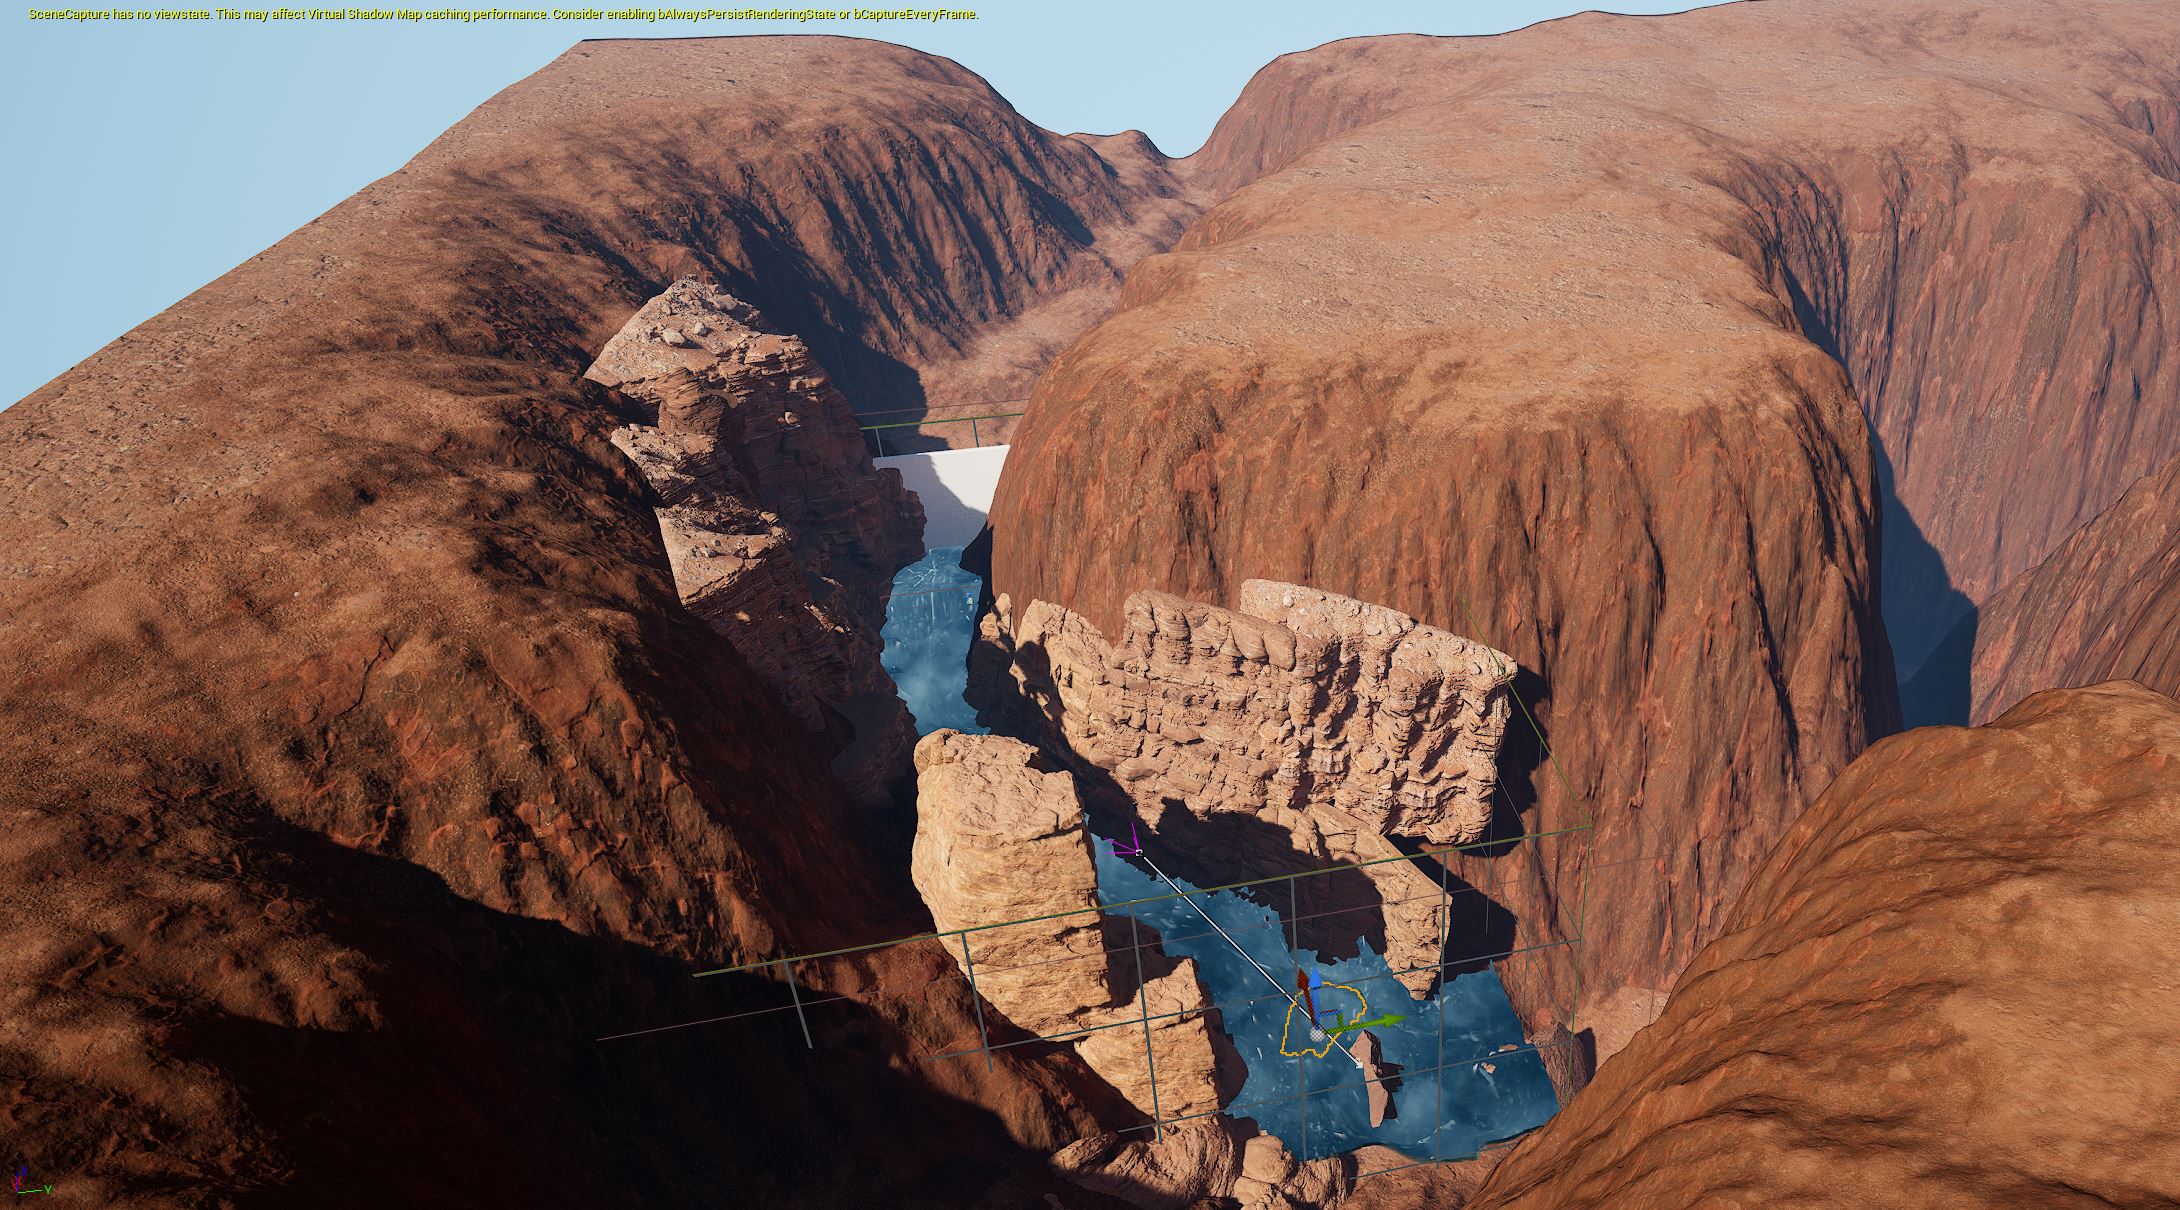
The landscape properties in the Outliner allow you to assign specific Landscape materials to each height and splat map upon their import. For this project, I used MI_Landscape_Frozen2, a landscape material instance derived from the Landscape materials designed by Joe Garth for Brushify, a UE5 plugin.
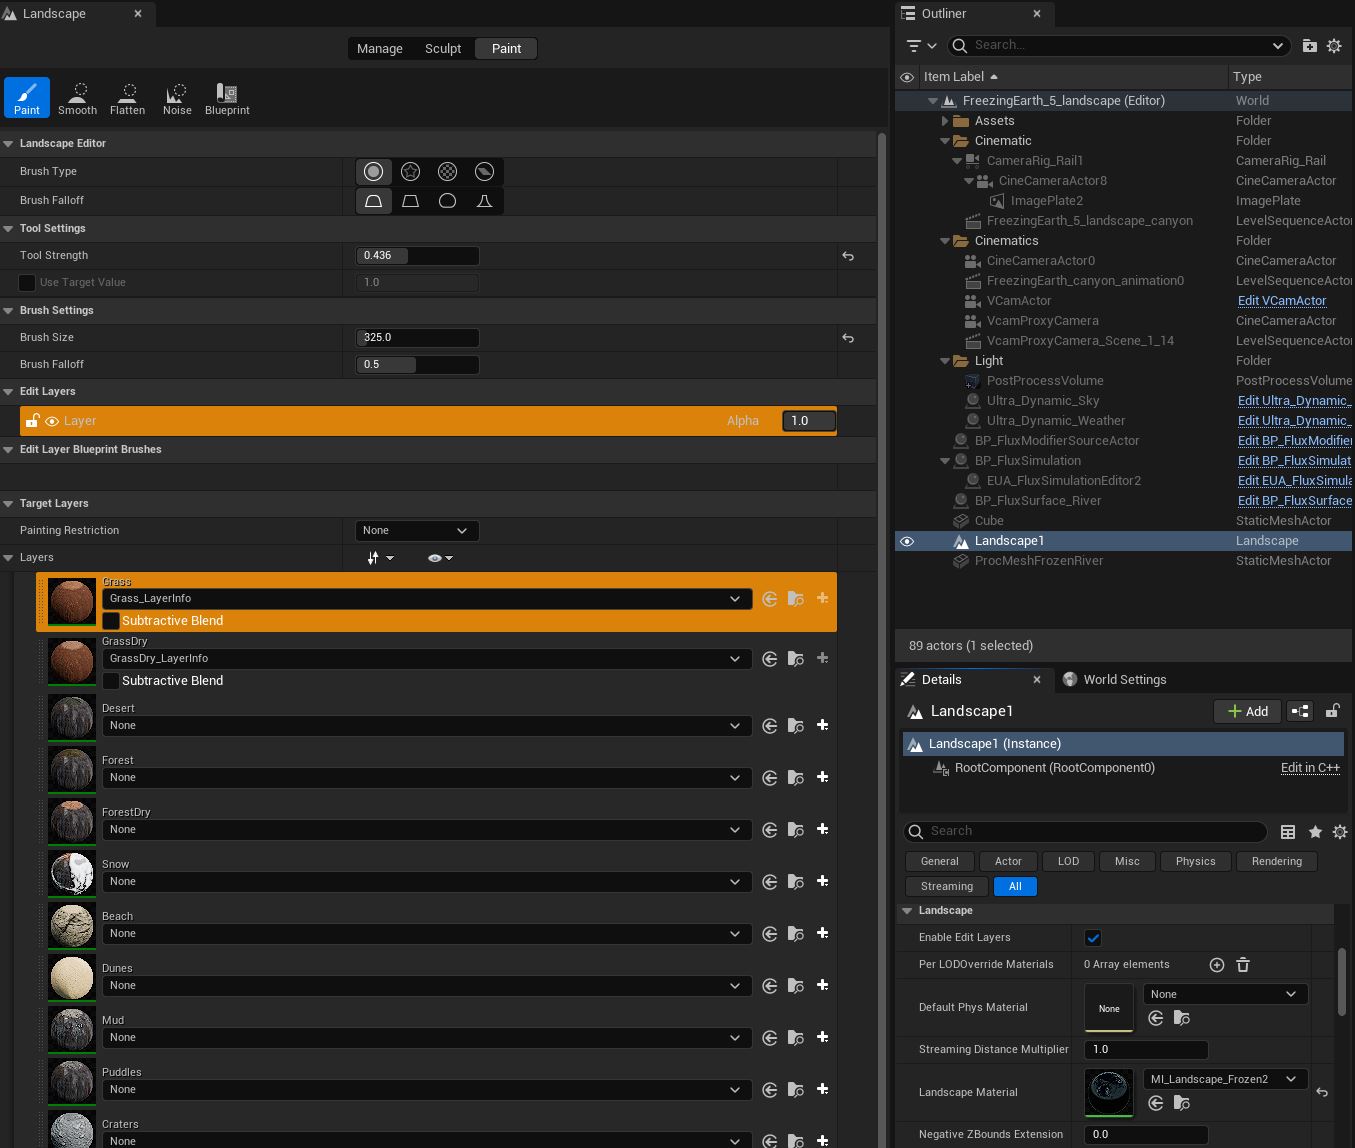
This approach enables various manipulations with a landscape material, like altering the local texture corresponding to each splat map (layer). It’s possible to apply distinct textures for the hill tops and other textures for the river bed. Also, it’s possible to populate each layer with unique meshes obtained from Quixel Bridge, such as rocks, trees, etc. To control the material’s behavior, modifications are required in the parent material, M_Landscape_Frozen2. Hence, it is advisable to create a new master material and instance for each landscape to avoid any undesirable changes affecting other projects.
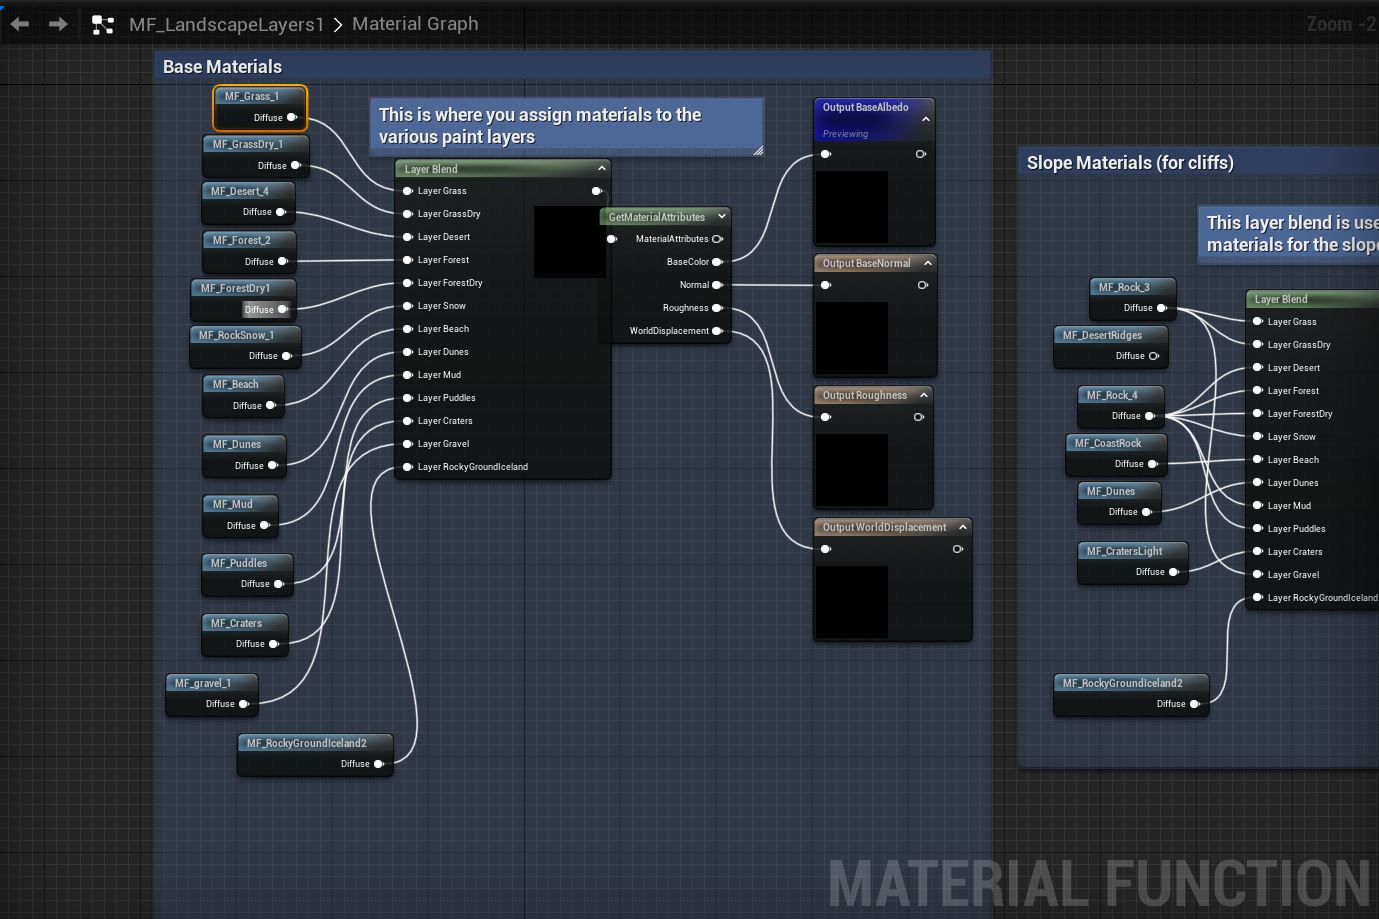
The master material has a complex structure. The first thing to do is navigate to MF_LandscapeLayers1, a material function. Similar to master materials, it’s suggested to create a new material function if you plan to modify it. Inside MF_LandscapeLayers1, there are two primary areas, the first being Base Materials. From here, control of the single layers of your landscape material is possible. The base layer is generally referred to as grass.
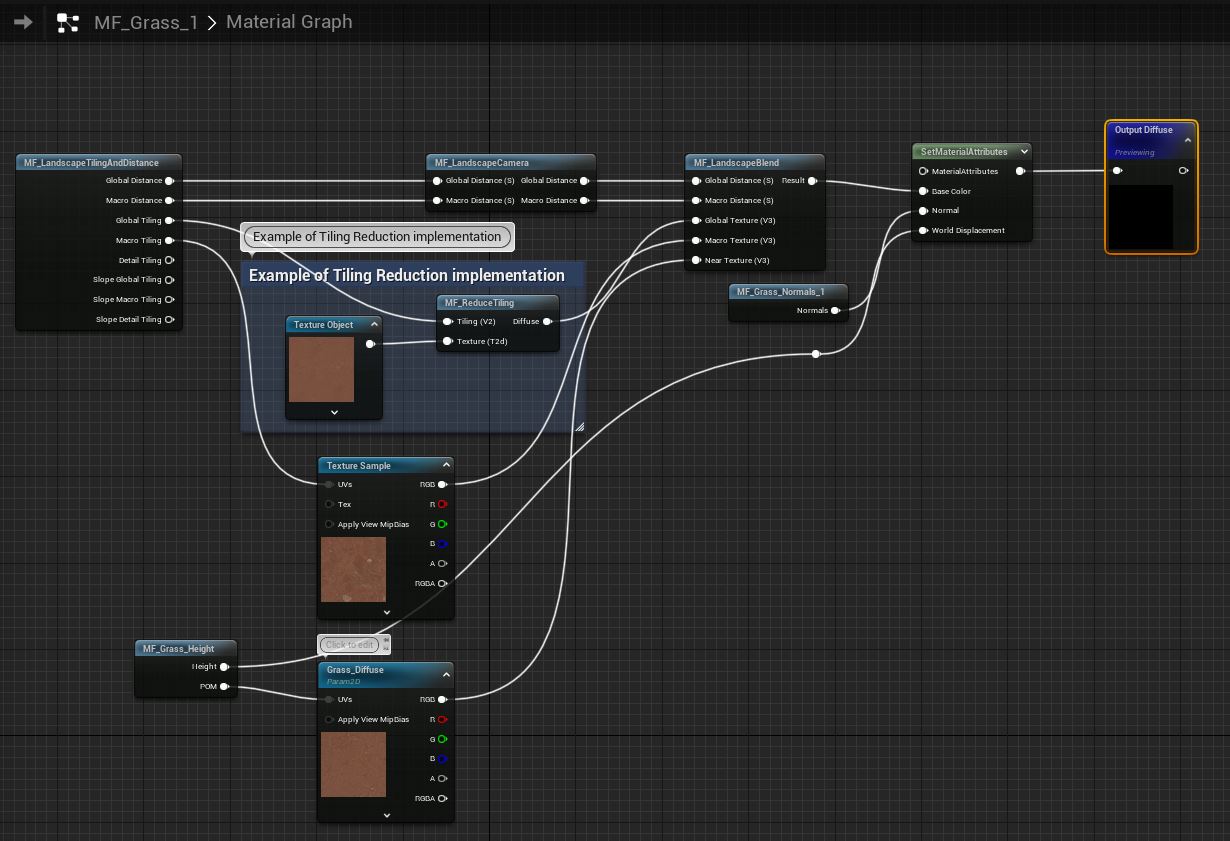
Another material function, MF_Grass_1, permits customization of your base material. For example, you can download a terrain texture from Quixel Bridge and apply the diffuse map (D) to Texture Object, Texture Sample, and Grass Diffuse. Utilizing MF_Grass_Height, you can apply texture roughness (H), and with MF_Grass_Normals_1, you can apply the normal map (N). Again, creating new instances of MF_Grass_1, MF_Grass_Height, and MF_Grass_Normals is a good practice to avoid messing with other levels.
Returning to MF_LandscapeLayers1, under Slope Materials, you have the power to define the appearance of slopes and cliffs, similar to the process described for MF_Grass_1. For instance, the first two nodes, MF_Rock3 directly connected to LayerGrass and LayerGrassDry, denote that both layers will share the same cliff type as defined by MF_Rock3.
The next question is, how do we automatically populate each landscape layer with meshes? For this, we go back to M_Landscape_Frozen2 and look for the Grass Node.
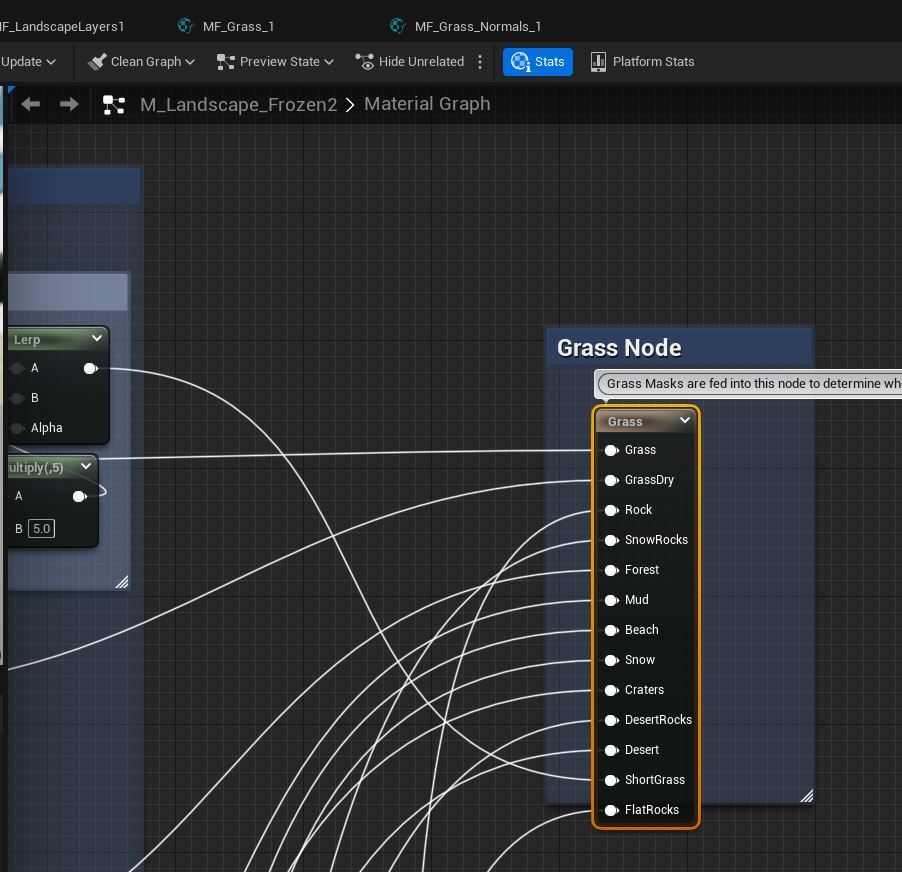
When you click on the node and view its details, you’ll see a list of elements, such as LG_Grass1, LG_GrassDry1, etc. These elements represent Landscape Grass Type.
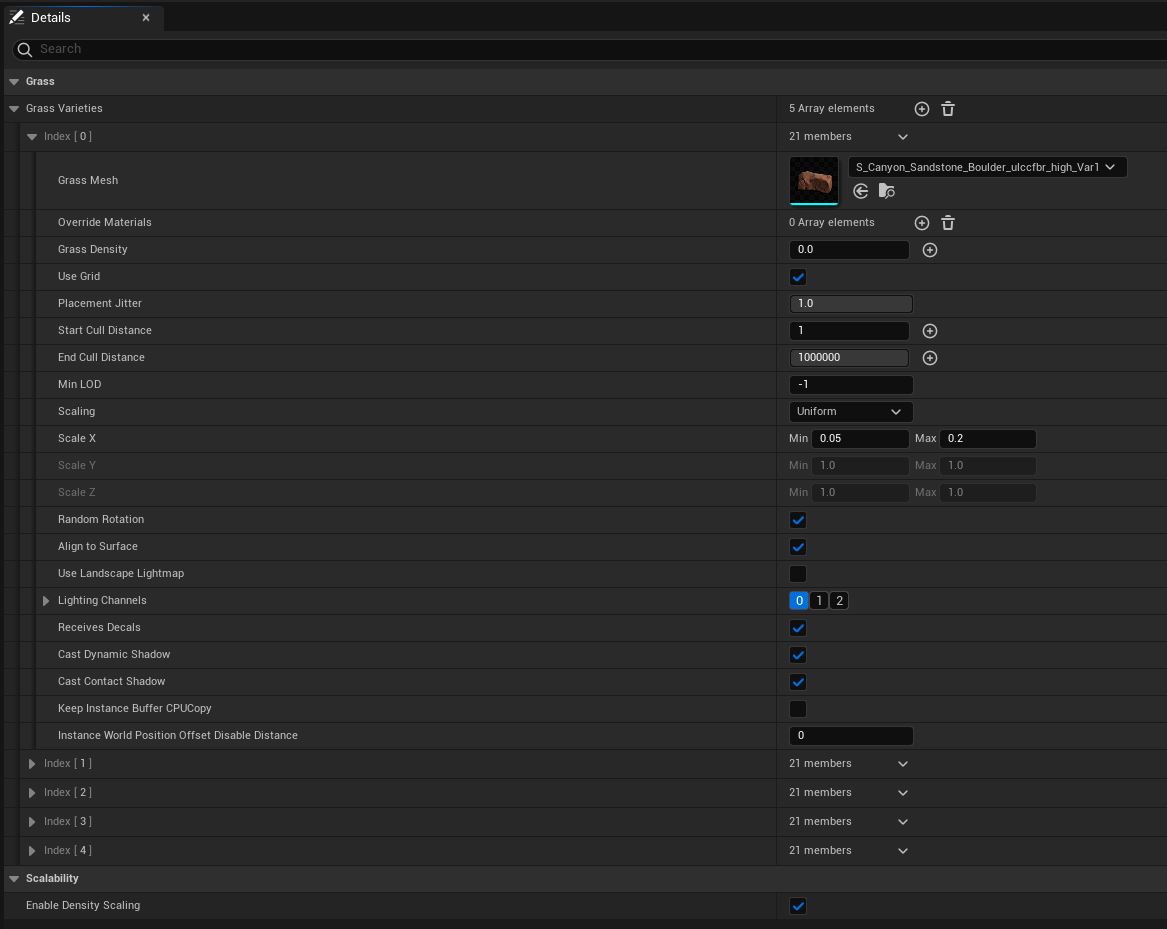
Inside each Landscape Grass Type, control over the types of meshes you wish to display in each layer is possible. In this specific case, I’ve set the density to zero due to the level’s increasing complexity and the consequent slowdown. However, the interesting part is the control you have over many properties like density, scale range, and so on.
While this approach may be ideal for designing a video game, it might not offer the same level of control for an animation where you might need more precise control over mesh placement. Therefore, it might be more fitting to place your foliage meshes, which could include rocks, plants, and more, either using the foliage tool or placing them individually by hand.
It’s crucial to note that landscape texturing is merely a starting point, and achieving a realistic look is not always feasible. Consequently, I decided to directly “decorate” the cliffs with canyon rocks from Quixel Bridge. The key is not the number of meshes used, but how they are integrated into the landscape through appropriate rotations and scaling.
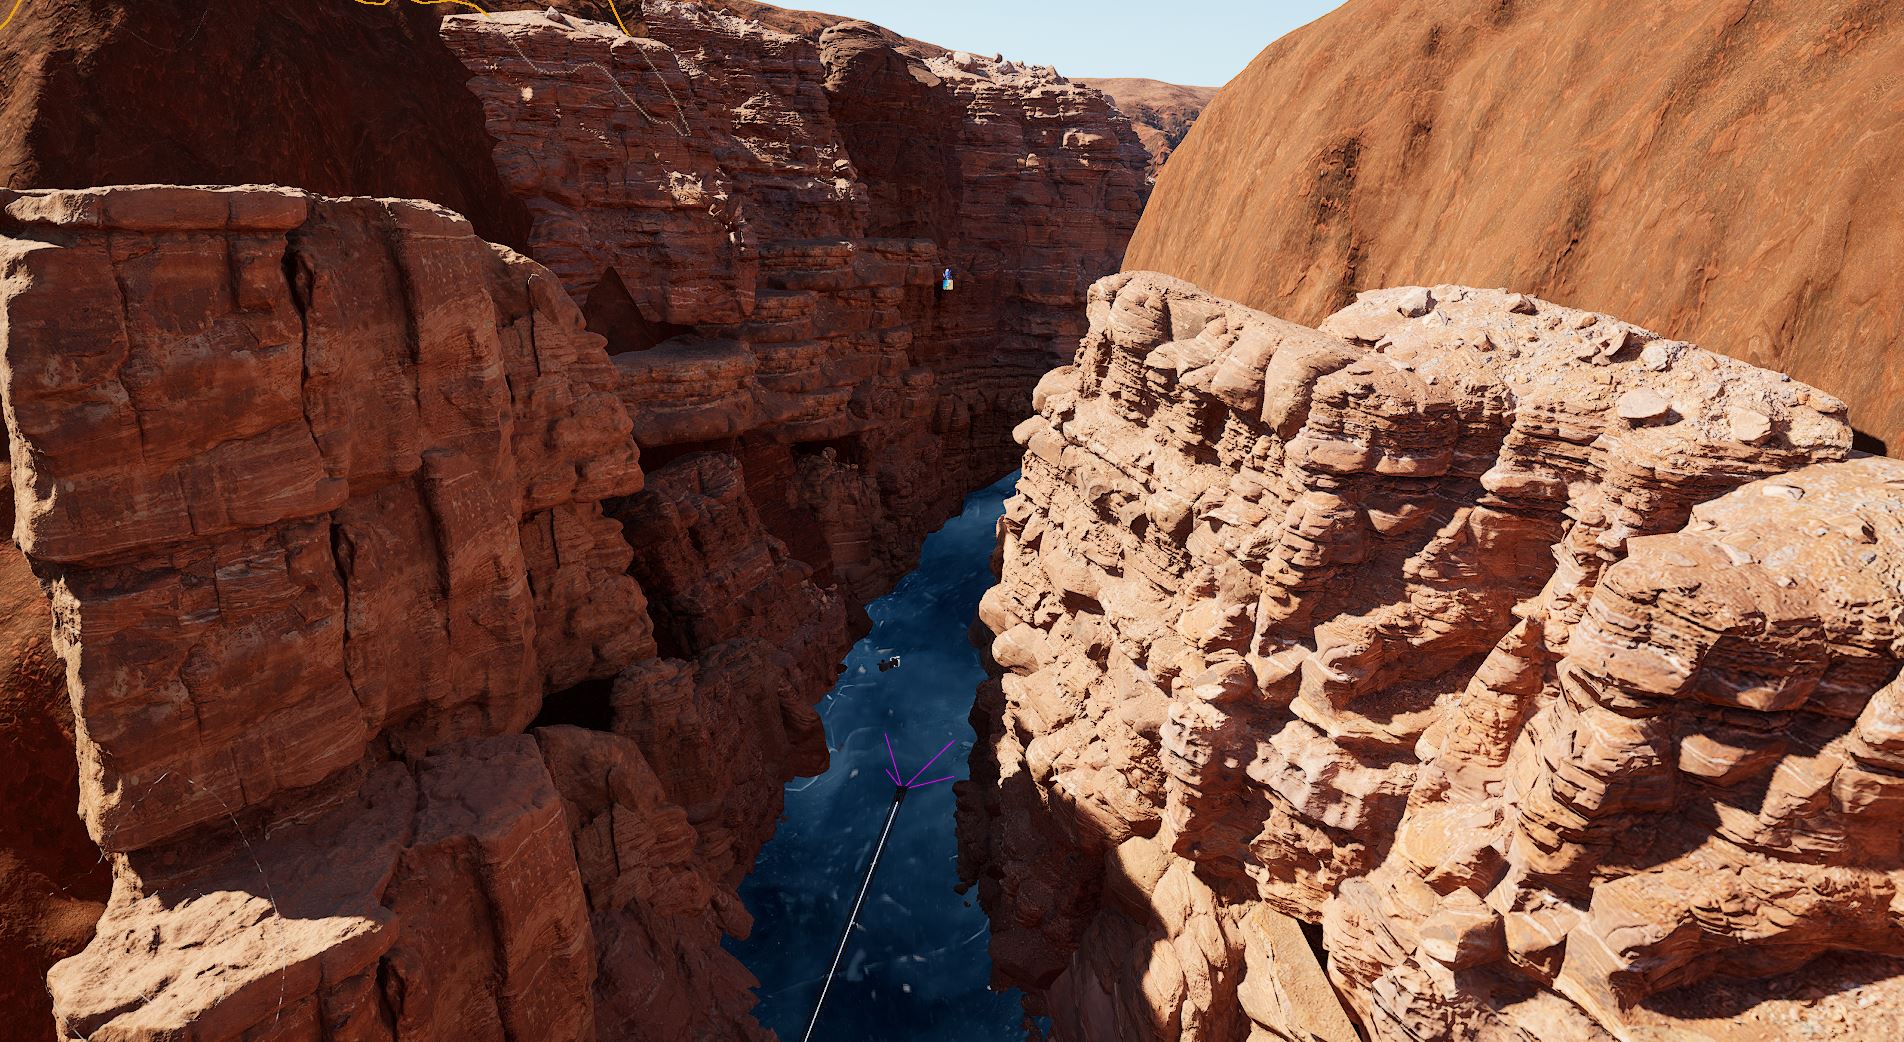
Fluid Simulation
The process of river creation in Unreal Engine is slightly complex as it doesn’t include a native water simulation toolbox. Niagara exists but, in my opinion, it’s a bit intricate and fails to produce realistic results. Currently, the most effective fluid simulator available for Unreal Engine is Fluid Flux by Krystian Komisarek. It stands out as it solves actual partial differential equations unlike some other purported fluid simulators.
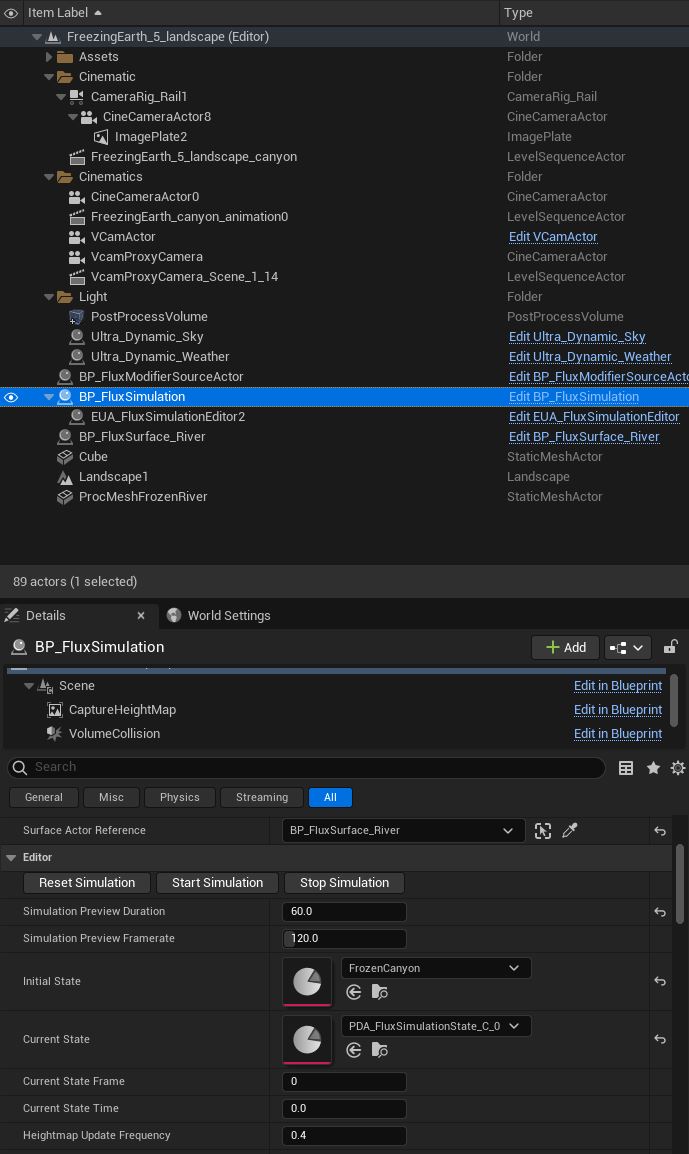
To initiate a water simulation, you need to import BP_FluxSimulation along with BP_FluxSurface_River and BP_FluxModifierSourceActor. As with any simulation, you need to establish a simulation domain and initial conditions. From BP_FluxSimulation, you can regulate the simulated volume (1024 x 1024 x 4500), its resolution (or pixel size - 10), gravity, damping, friction, etc. While it may seem surprising, more realistic results can be achieved by tweaking some of these parameters, including gravity. For my setup, the slope scale and clamp were set to 300 and 100, respectively, and the simulation delta time was set to 0.2.
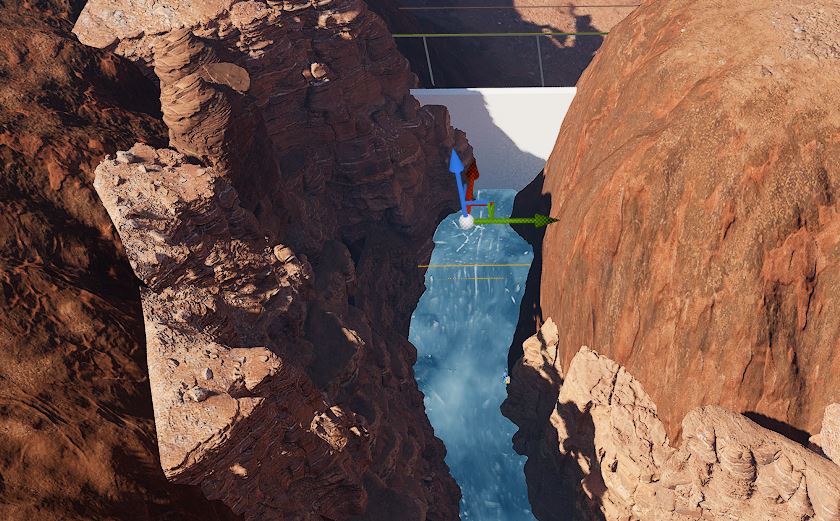
BP_FluxModifierSourceActor is responsible for setting up the fluid’s initial conditions or source - essentially, our water source. From its inner object, FluxModifierSource, it is possible to alter its size, shape, and duration.
BP_FluxSurface_River is another crucial object that helps control the water’s appearance, whether it’s a river or an ocean. It is recommended to set SurfaceMeshMode to the highest possible value.
Overall, the most realistic water simulation was obtained by running a simulation, saving the current state, and using it as the starting point for my simulation. For instance, I’d let the simulation run up to 120 seconds to ensure the river is filled up, and when rendering the scene, Fluid Flux would begin the simulation from where I left it - the saved state.
Sequencer Animations
My animation sequence is broken down into three essential elements:
- The camera’s movement along a set track (a dolly or tracking out shot)
- Incorporation of weather effects
- The transformation of water into ice
Below is a visual representation of the varied tracks in my sequencer.

Capturing the Camera Movement (rail)
This aspect of the project isn’t overly complicated. I initiated the process by adding a rail and aligning it along the path where I wanted my camera to carry out the dolly out motion. Upon adding a straight rail, it’s a simple task of associating (parenting) a camera with it, as shown in the image below. The camera and the rail are then added to the sequencer. This allows me to key the camera’s position on the rail directly from the rail.
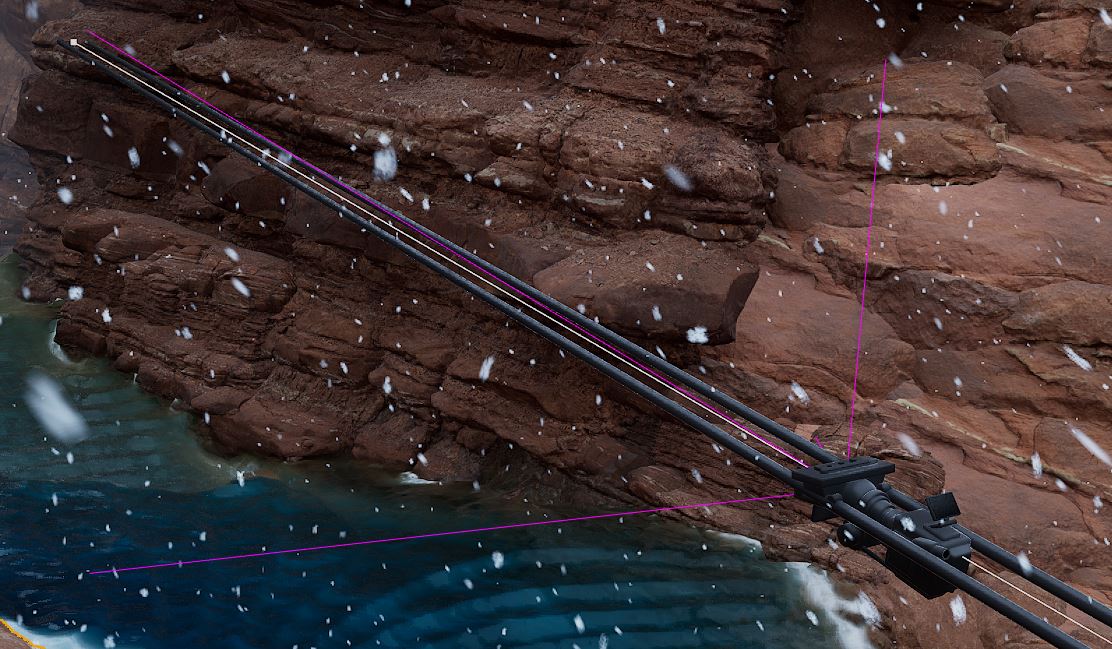
Just as in the previous animation, I chose a 16:9 DSLR filmback, but this time opted for a 20mm lens, with an aperture of 2.8, and again used a motion value of 0.5.
Generating Weather Effects
For the creation and manipulation of weather effects, I utilized the Ultra Dynamic Sky plugin by Everett Gunther for UE5. Ultra Dynamic Sky is a sky system engineered to create more natural and dynamic skyscapes than conventional solutions. It provides significant flexibility and customization options, with a user interface designed for speed and simplicity. All I had to do was incorporate the Ultra_Dynamic_Sky and Ultra_Dynamic_Weather blueprints into my Outliner and adjust the parameters. In the sequencer shown below, I animated Cloud Coverage, Fog, and Snow.

The animation kicks off with a clear sky, which progressively becomes more covered by clouds and snowfall. Concurrently, a dense, volumetric fog rolls in towards the camera. I initially attempted to use animated VDBs for the fog, but this caused the level to become overcomplicated and excessively heavy, leading to UE5 crashes (you’ll need to disable the VDB plugin to open the level, right now).
The process of animating Ultra Dynamic Sky parameters and rendering a sequence that mirrors these animations wasn’t available out of the box. I had to modify some parameters in the respective Blueprint. The only significant alteration I believe I made was enabling the “Run Construction Script in Sequencer” option under ClassSettings.
Animating the Freezing River
For creating the effect of the river freezing over, I employed a creative workaround. Fluid Flux generates a moving surface representing a fluid, but it does not provide a function to halt the simulation or simulate the freezing process in response to a drop in temperature. However, Fluid Flux does allow you to export a mesh (ProcMeshFrozenRiver) of the fluid surface to which you can apply a material.
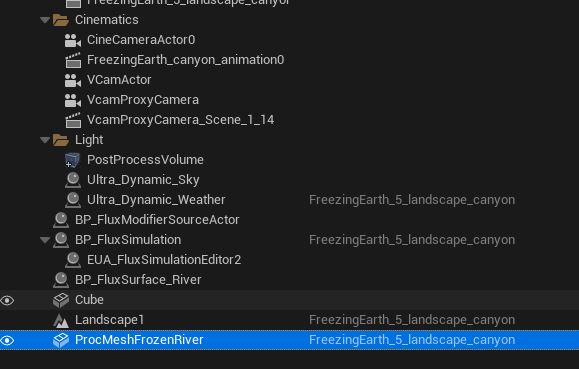
The subsequent step is to apply an Ice material to ProcMeshFrozenRiver. This material needs to have a transparency gradient, creating an impression that the river begins to freeze from the farthest point and moves towards the camera. I used a modified version of a Substance Material from Adobe’s paid materials library. One significant advantage of Substance Materials is their parameters can be modified directly within UE5, with changes immediately reflecting on the textures (e.g., D, H, N). The master material I employed is M_crackedlakedisappearing, demonstrated in the Blueprint below. Naturally, I created a Material Instance and applied it to the mesh. Another crucial step involved animating FadeAmount and Refraction, which are parameters within the master material. To incorporate these parameters into the sequence, I had to add the lake mesh to the sequencer, then add Material Element 0, and finally, add the relevant parameters and key their values.
Figure 24 | M_crackedlakedisappearing BluePrint.
Finalising the Render
The rendering process aligns with the description given above. By exporting in Apple Pro Res 12 bit, I ensured a sufficient color range for color grading.
Cold Planet
The artistic vision I had in mind for this scene was to depict a gaseous planet where unique conditions have led to the entire planet being frozen. Imagine the far-flung, frosty reaches of our solar system, where the extreme cold turns gas to ice and landscapes are etched from strange, alien elements.
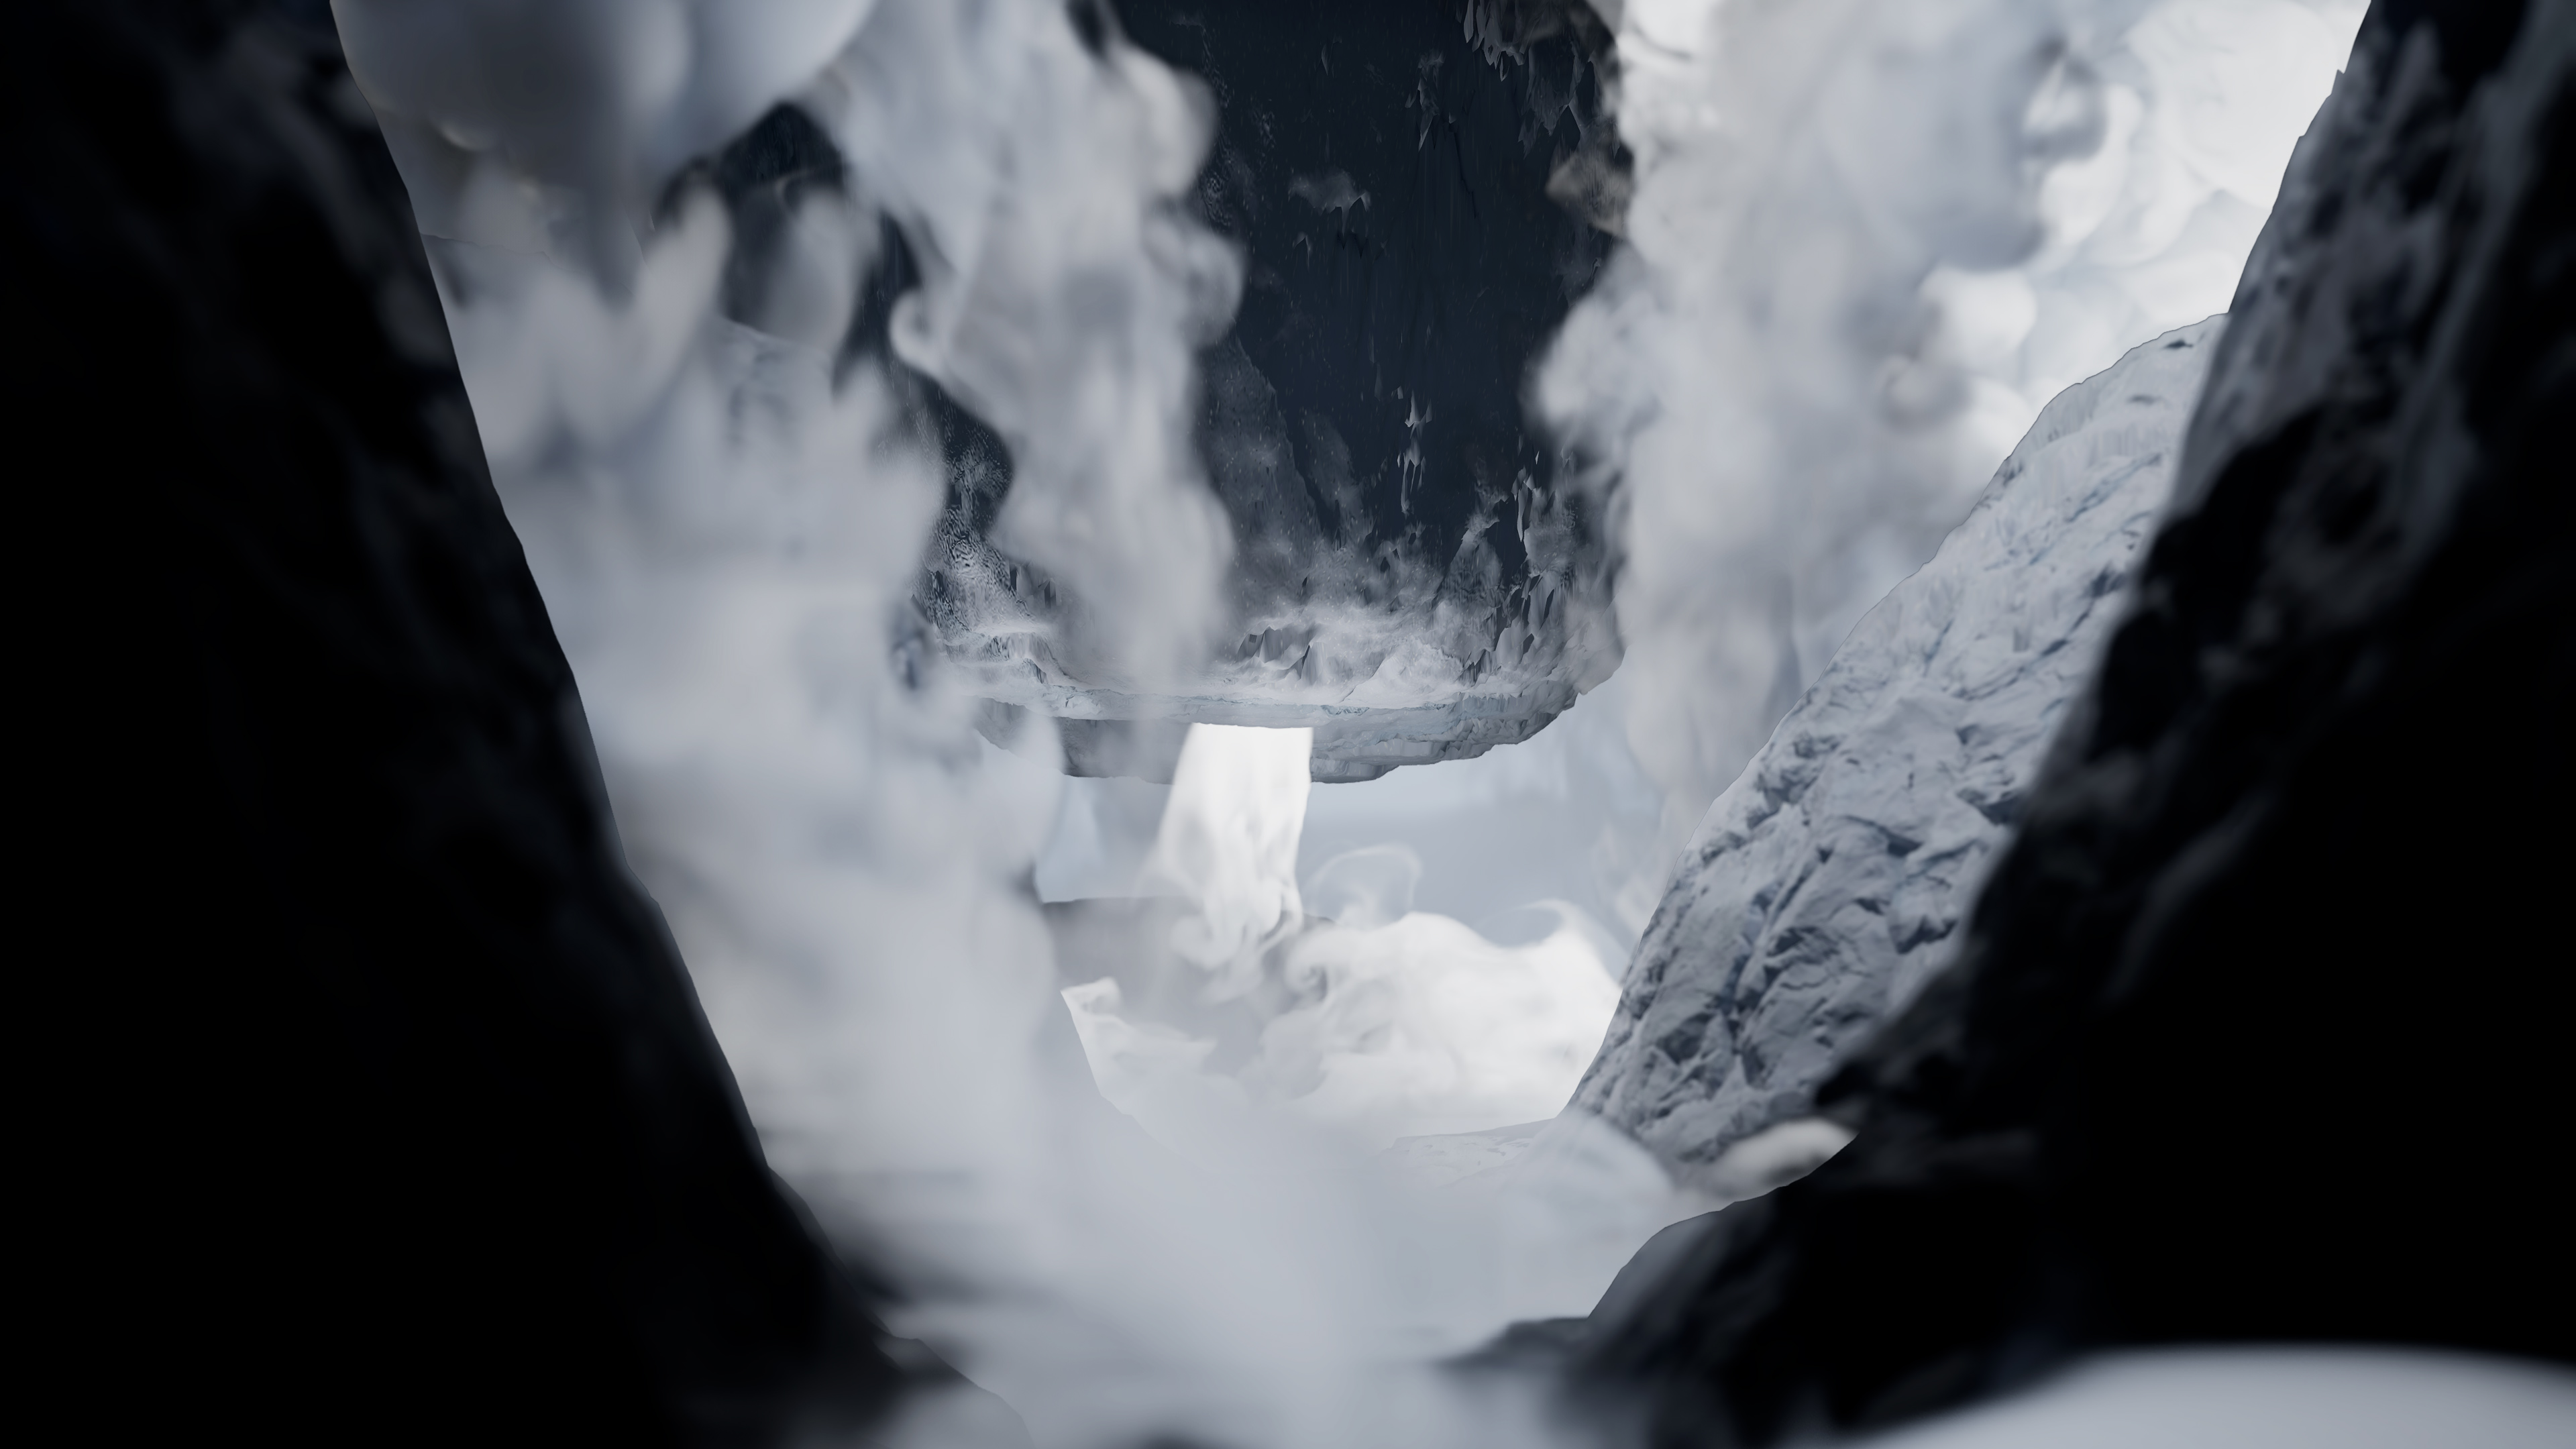
I found myself drawn to the concept of rendering icy, undulating landforms, hemmed in by a gas that behaved akin to liquid nitrogen or dry ice. However, in the final implementation, we opted for a different aesthetic, which I’ll discuss further down.
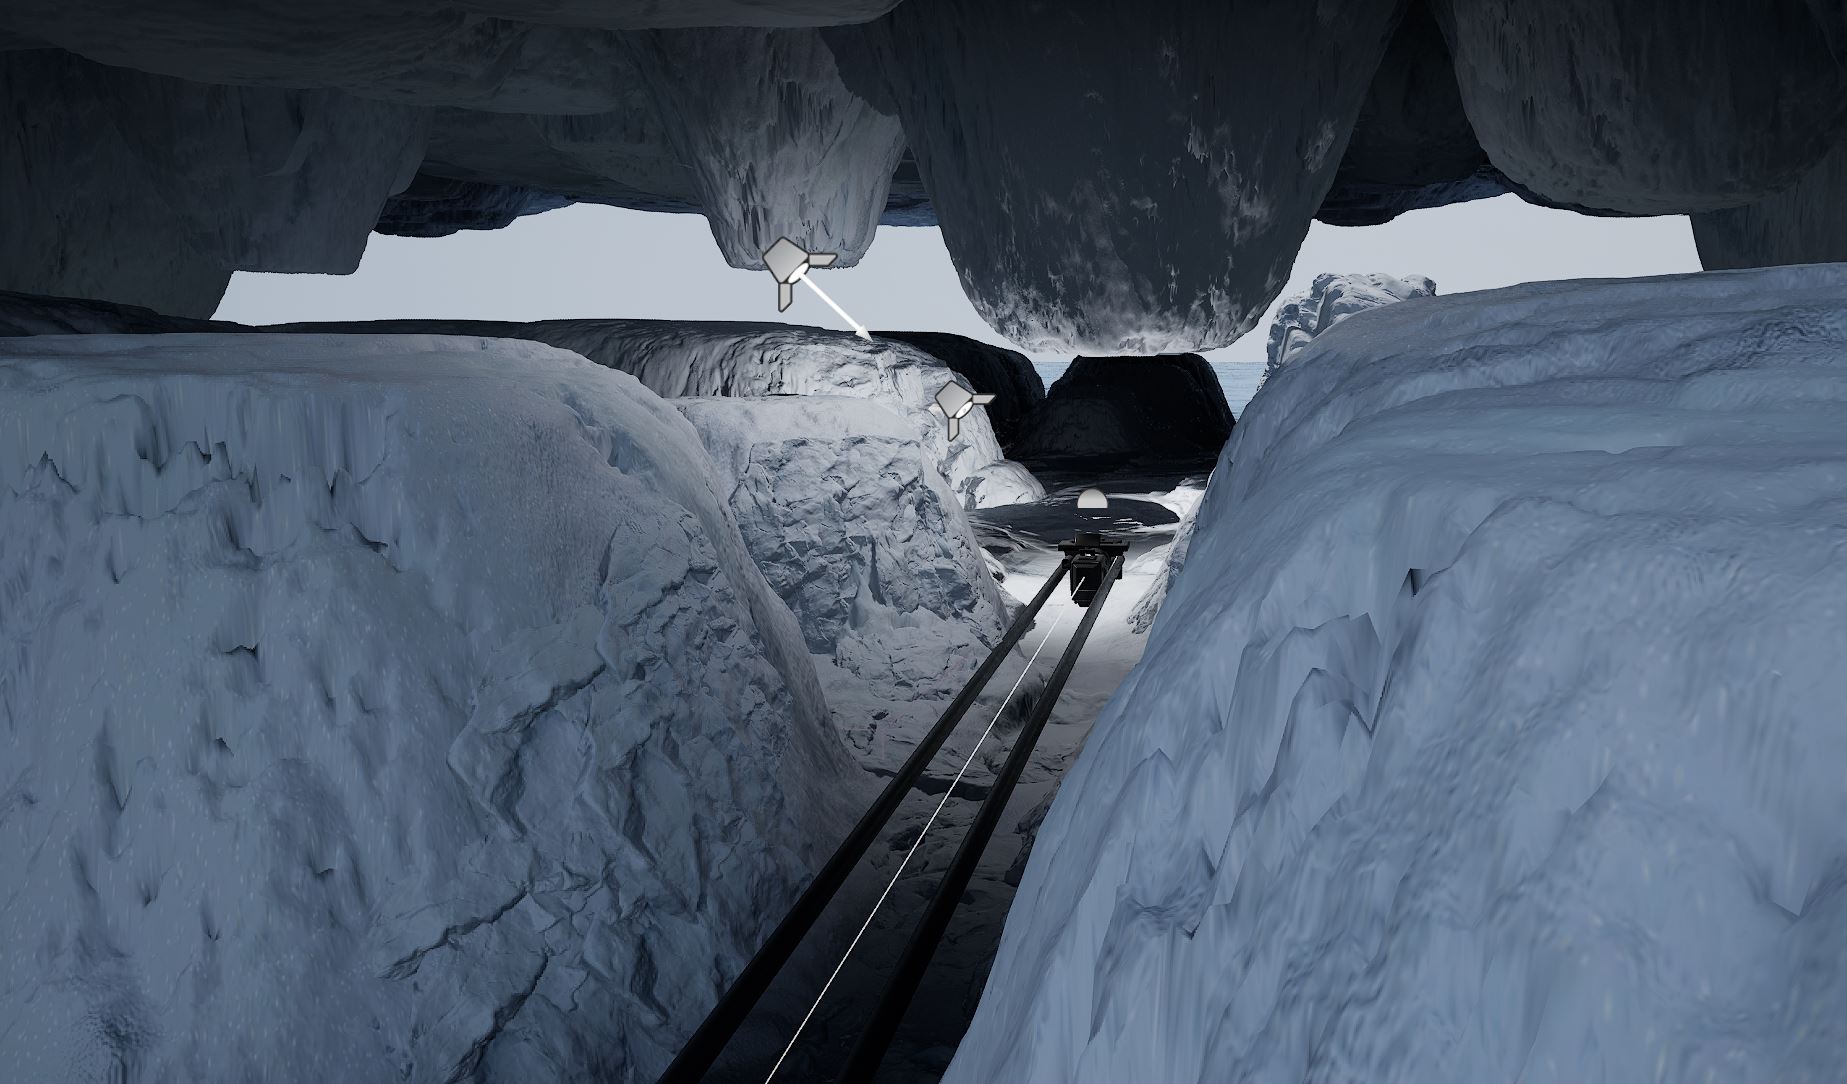
To create the icy landscapes, I employed World Creator. A technical snag led to the unfortunate loss of all the original files, but the landscapes were then imported into Blender as a height map and transformed into meshes. Some adjustments were made for scaling purposes. I also duplicated the landscape mesh, resulting in an almost otherworldly cave formation with an icy ceiling.
I added texture to the ice using Adobe Substance Painter and its procedural material, which allows for live modifications directly from UE5. An icy landscape, no matter how well textured, can feel lifeless and dull. To overcome this, I utilized photogrammetry scans from Quixel Bridge to create mesh versions of actual ice formations, which were then scattered across the slopes.
A camera was then set on a rail and animated for a smooth dolly-in sequence.
As I moved to the smoke animation phase, I opted to use an image plate in UE5. Now, there are two ways to export smoke simulations from Embergen to Unreal. The first method, via VDB workflow, can be quite computationally demanding and often leads to difficulties with lighting. The second method involves using image plates, which was my method of choice.
Image plates in UE5 are used to project pre-rendered image sequences onto a simple polygonal surface, such as a plane or cylinder. It’s similar to projecting a movie onto a screen in a theater, but in 3D space. It offers a practical and flexible way to incorporate high-quality, pre-rendered images or animations into a real-time rendered 3D scene.
Setting up an image plate in UE5 is slightly complicated, with steps outlined in this tutorial. One crucial aspect to remember is that the image plate must be set before adding elements to the Sequencer.

Post-animation, I exported the dual mesh (the icy landscape known as “fromSubstance2”) from the sequencer into a *.fbx file. The export needs to be precise to ensure compatibility with Embergen.
Embergen Smoke Simulation
Embergen is a real-time fluid simulation software that allows for the creation of high-quality smoke, fire, and explosion effects. It is a powerful tool that can be used to create realistic simulations of a wide range of phenomena, from smoke plumes to volcanic eruptions. Embergen’s intuitive interface and real-time feedback make it easy to experiment with different parameters and quickly iterate on ideas.
In Embergen, I used the dual mesh as a smoke collider, with smoke primarily emitted from a massive block on the floor and ceiling. I added extra emitters to increase the smoke density, giving it a thick, heavy appearance akin to dry ice.
The Embergen project (dry_ice_smoke_gasplanet.ember) used for this had various nodes, the most important of which I’ll discuss in a moment.
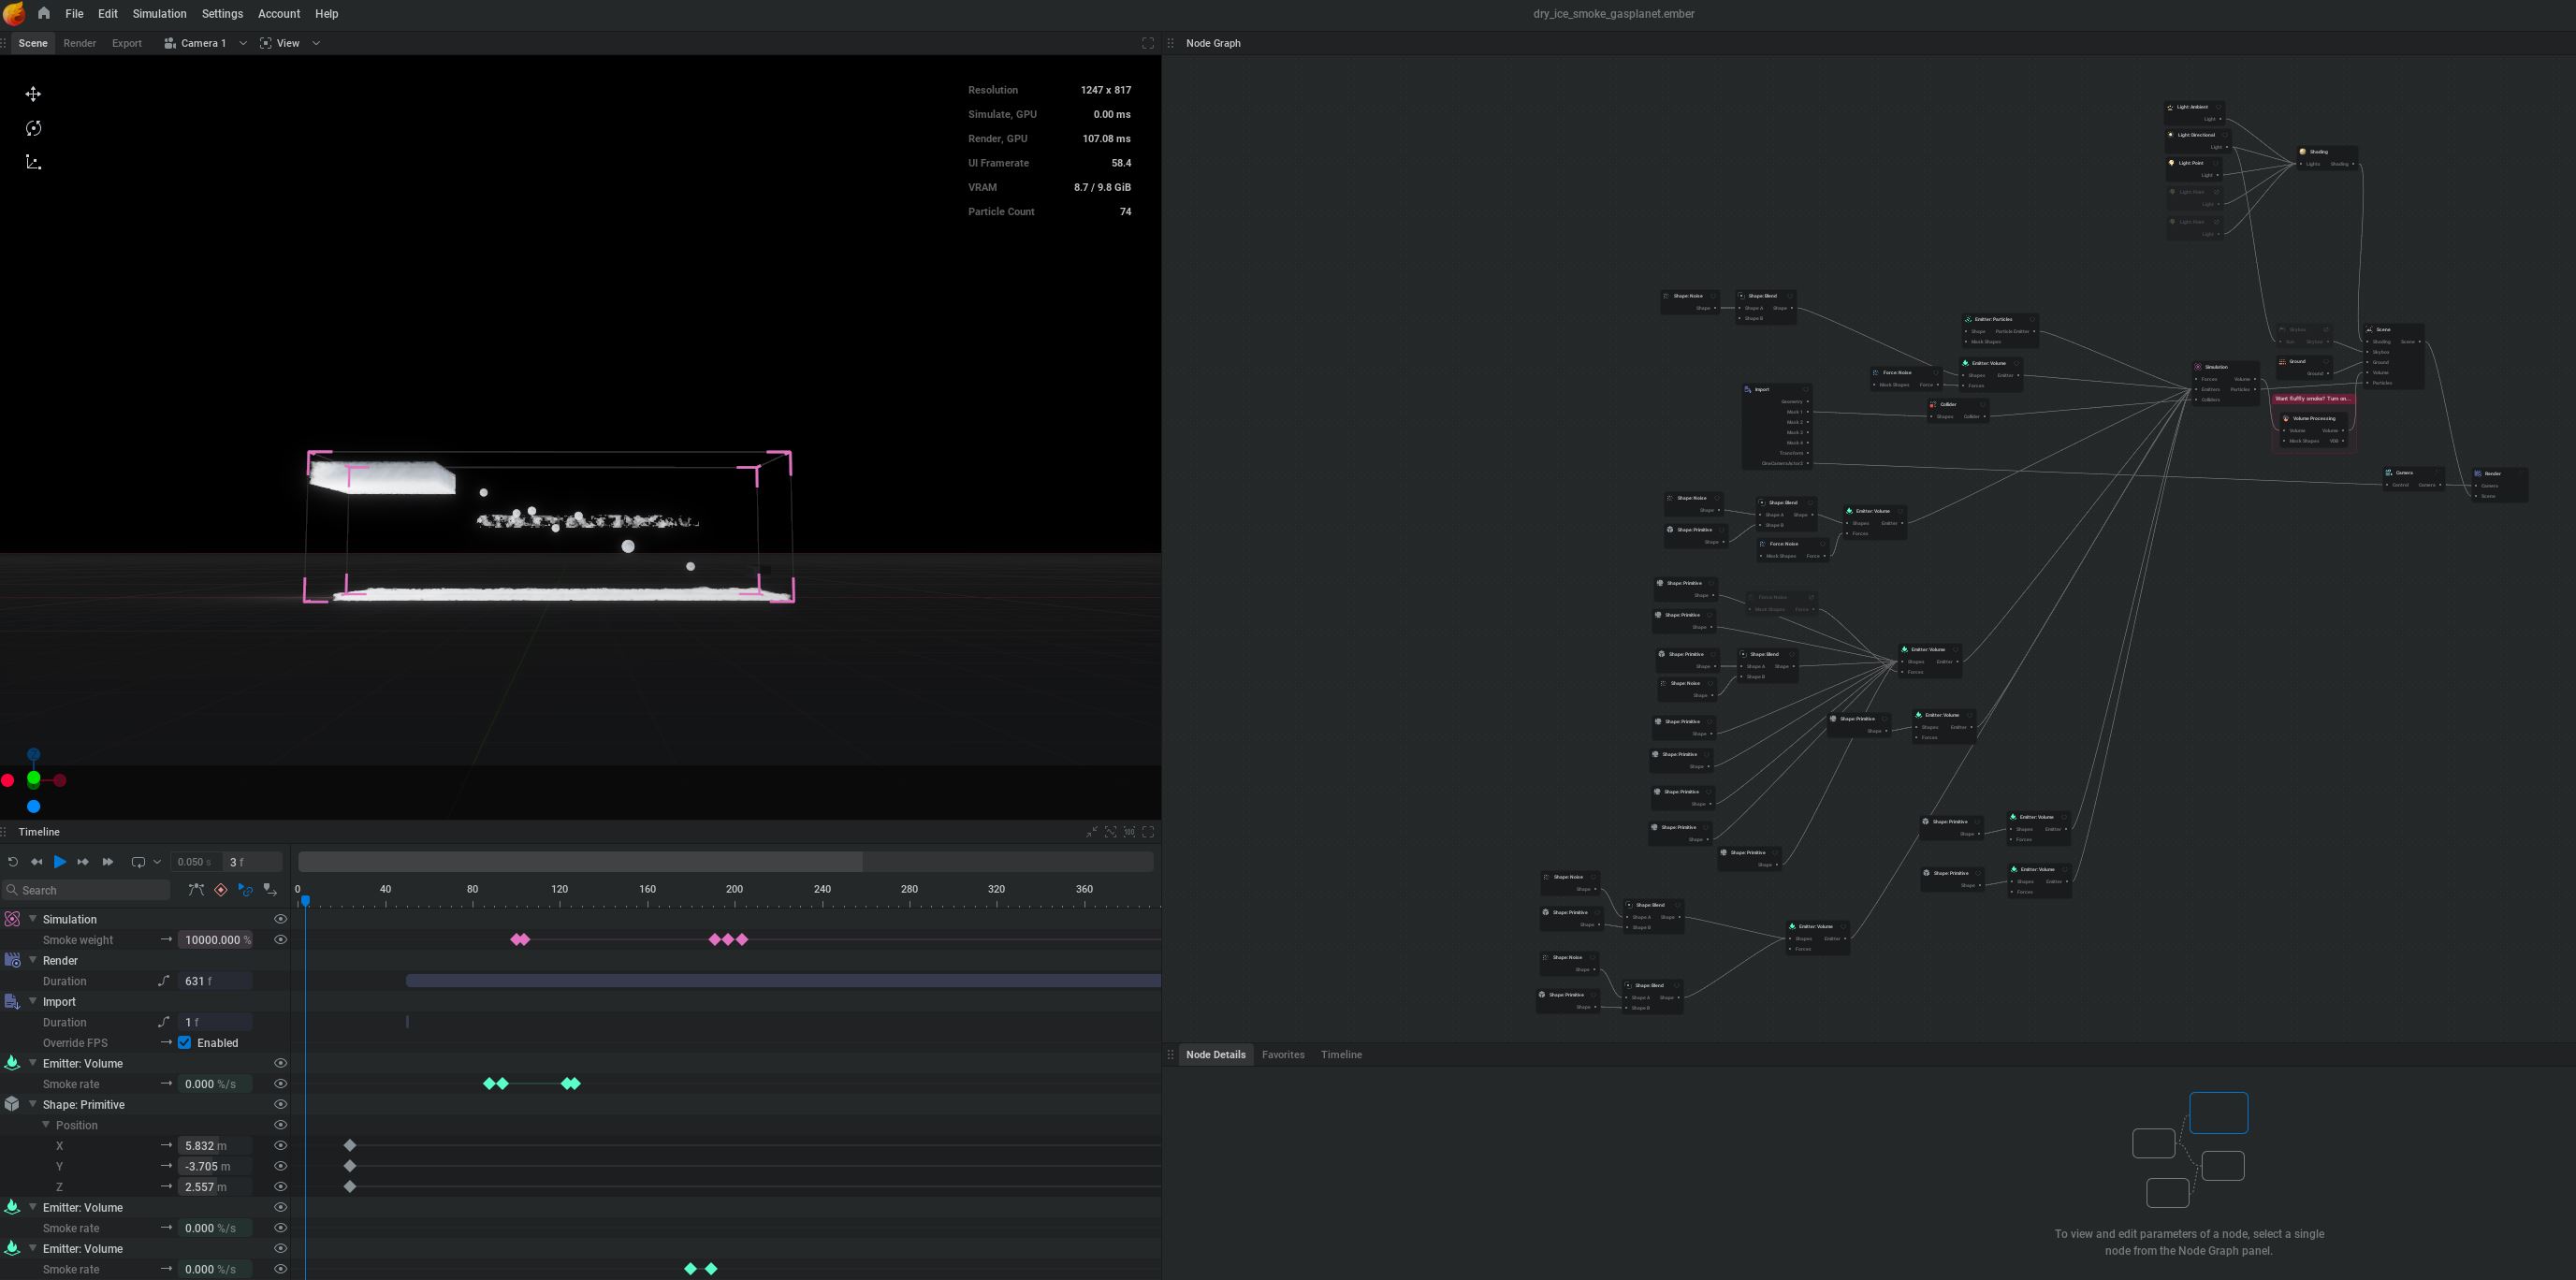
The Embergen version used for this project was the new release v1.0.1, which had considerable improvements compared to the beta version.
I won’t delve into all the nodes, but the essential ones involve overriding the original frames per second (fps) to control the speed of the smoke animation. The mesh exported from Unreal, along with the camera movements, fps, camera properties, and others, are included in the export. Therefore, I had to override the original 30 fps to 60 fps to achieve the desired effect.

In the camera node, I kept everything as-is, except for adjusting the resolution to a standard 4K (3840 x 2160). The render node’s critical aspect is the alpha node, which ensures exported clips are transparent where there isn’t smoke, allowing it to blend with the rest of the scene.
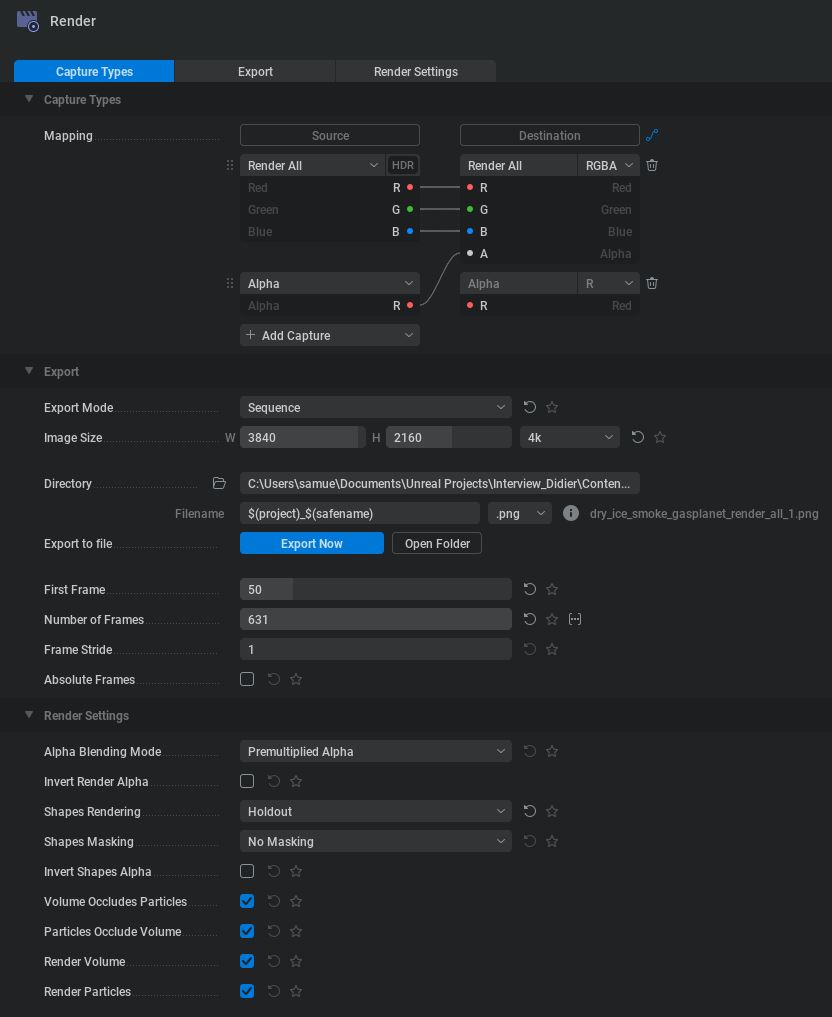
After exporting the smoke animation and linking it to the image plate, the stage was set for final rendering.
Comments
For lighting, I strategically positioned lights to craft the desired atmosphere, ensuring consistency between Embergen and UE5. I relied on Ultra Dynamic Sky again for overall lighting and atmospheric effects.
In reflection, the project’s bulk lay in establishing a workable workflow and iteratively refining it. The most time-consuming task was tweaking the smoke parameters for realism. Nevertheless, the final outcome was a uniquely mesmerizing frozen gas planet brought to life.
Enceladus-like exoplanet
My creative vision for this animation was inspired by Enceladus, the sixth largest moon of Saturn, noted for its icy surface. Enceladus, one of the shiniest objects in our solar system, is largely covered by fresh, clean ice, making it highly reflective. This small moon was put in the limelight following the Cassini mission, a collaborative project designed to explore Saturn’s system. A pivotal discovery from this mission was the identification of an ocean beneath Enceladus’s icy surface. This ocean of liquid water, combined with the moon’s geological activity, has led scientists to consider Enceladus a potential candidate for hosting extraterrestrial life within our solar system.
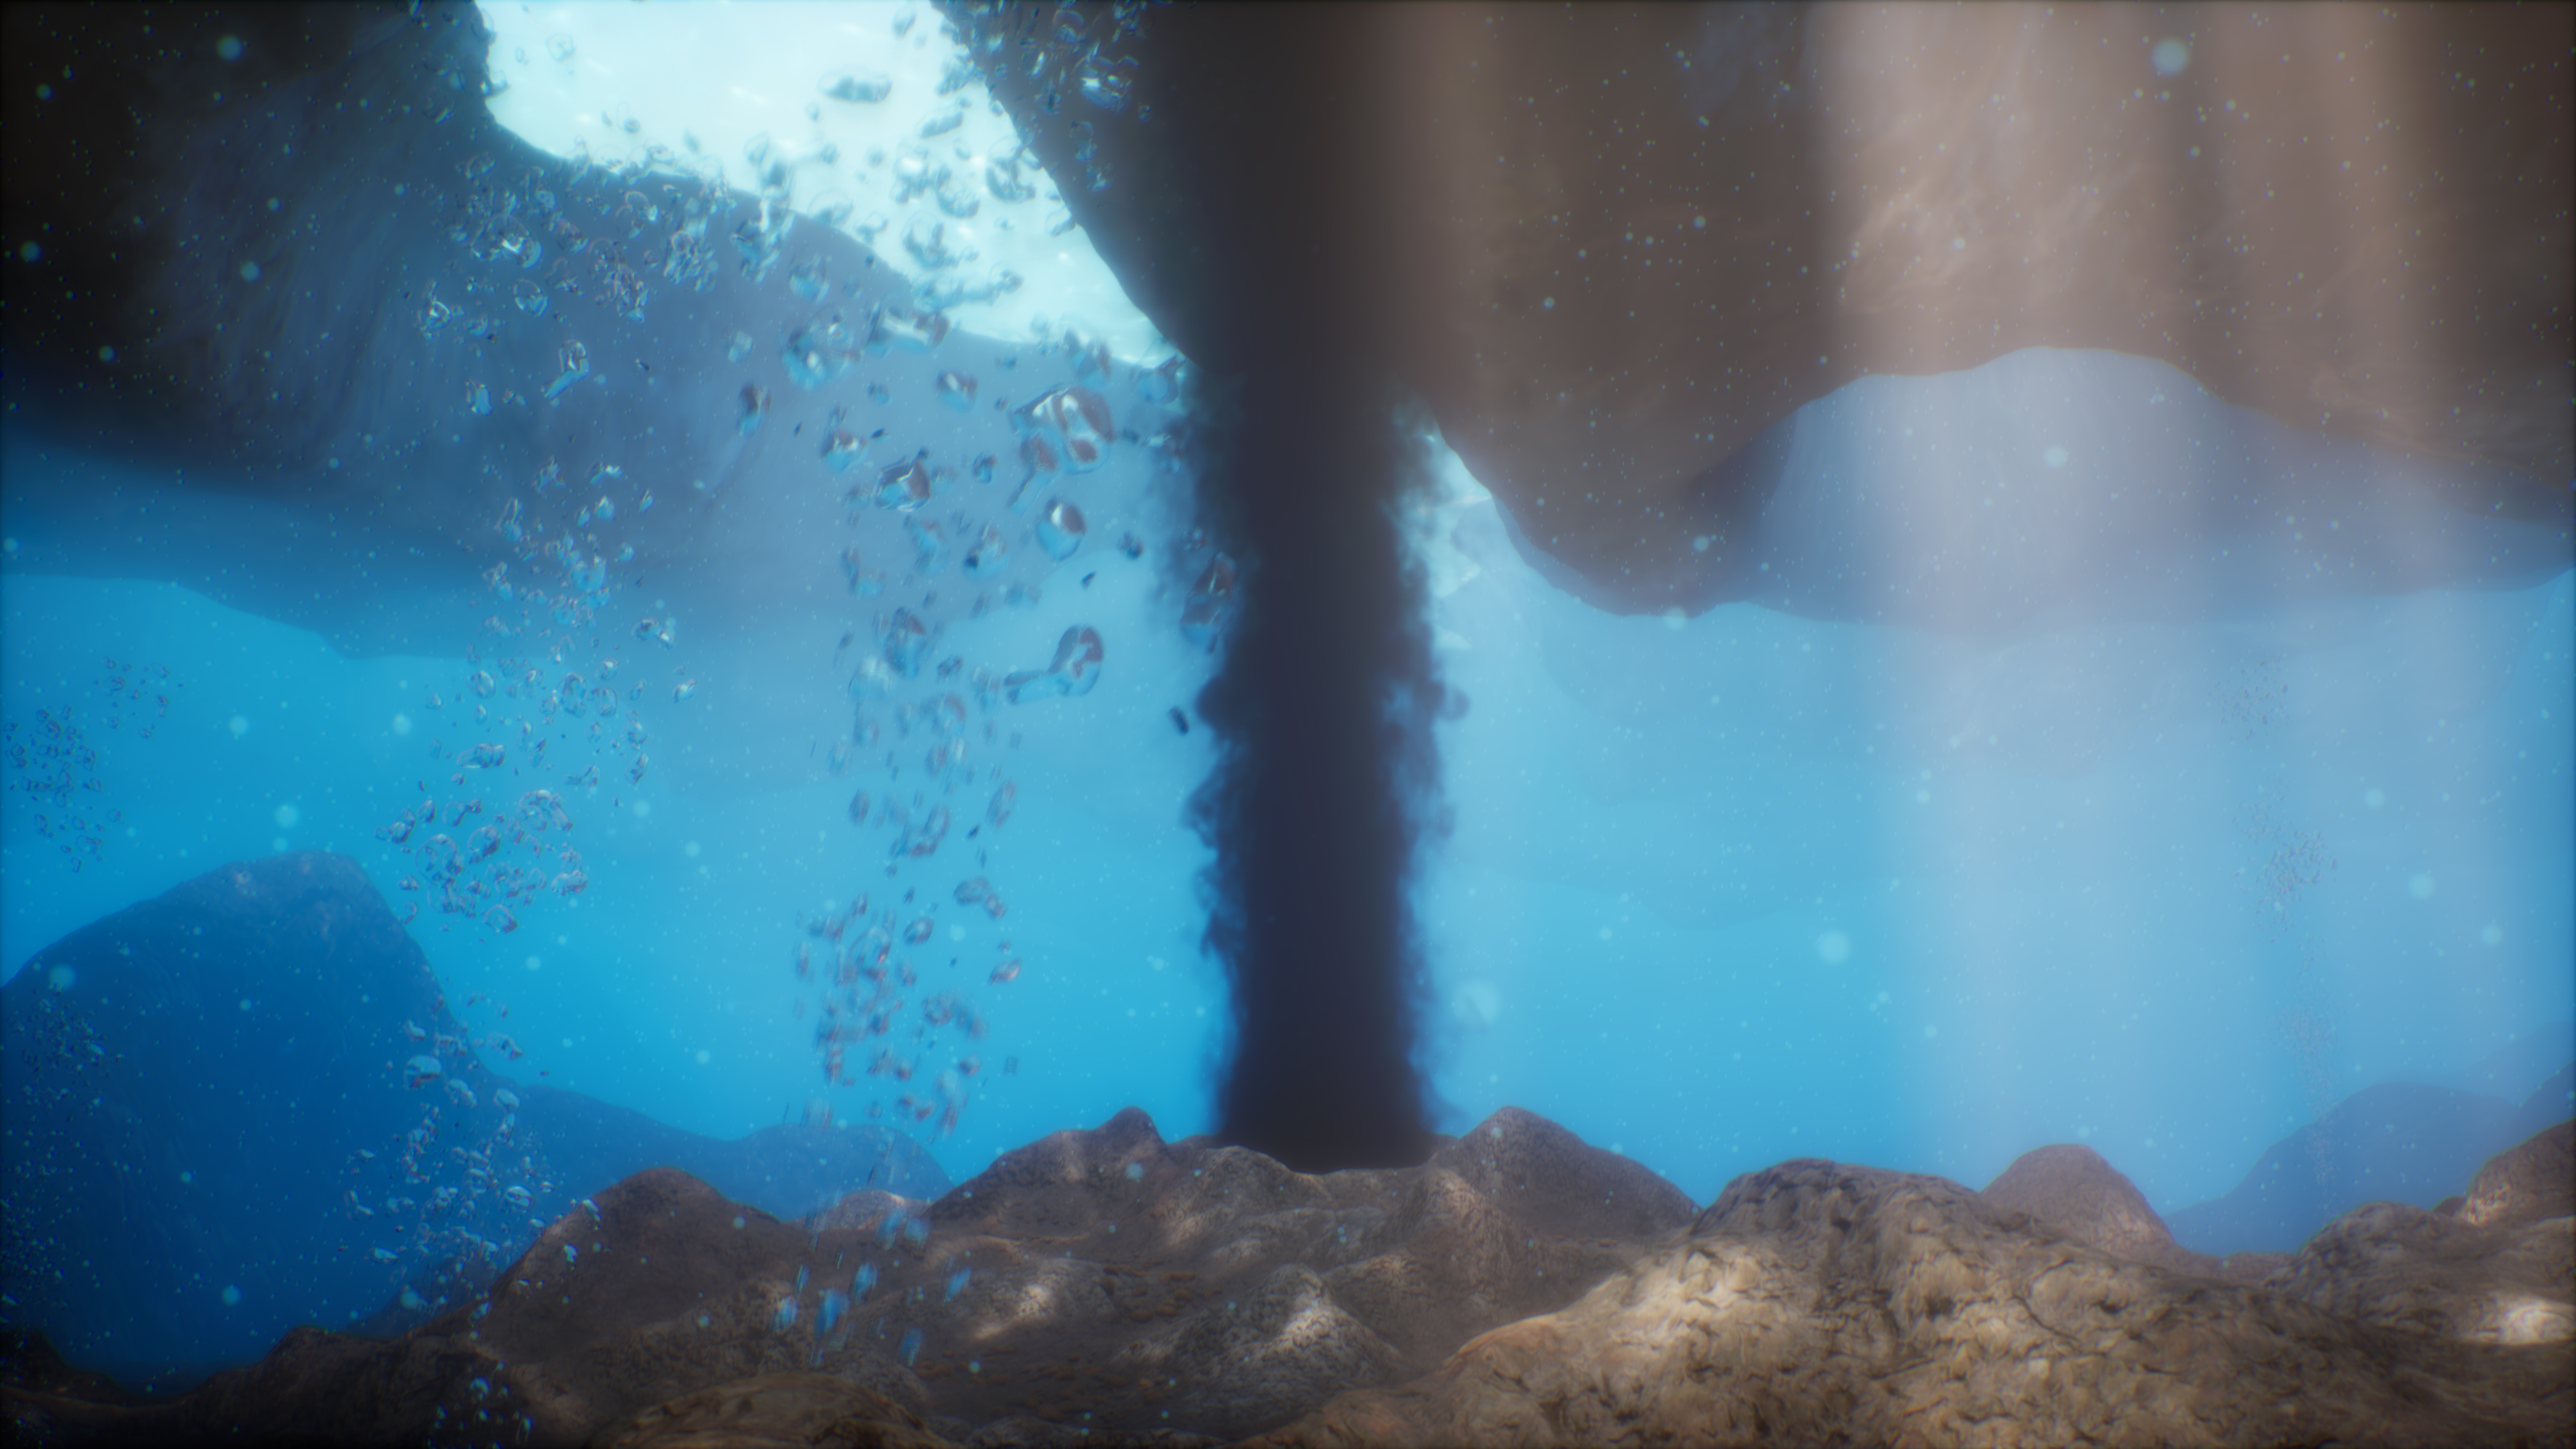
With the inspiration drawn from Enceladus, I embarked on crafting an animation that could encapsulate its icy charm and geological intrigue. Given the constraints on animation length, I designed an underwater sequence revealing geological activity akin to a “black smoker” before panning up to an icy cap.
In the depths of Earth’s oceans, “black smokers” are a common sight. These are essentially hydrothermal vents that emit superheated water laden with minerals. As this mineral-rich water comes into contact with the cold ocean water, the minerals precipitate out, creating billowing clouds of particle-laden fluid, giving the impression of smoke. This process contributes significantly to the chemical and thermal dynamics of our oceans and is crucial for sustaining diverse biological communities.
Back to my Enceladus-inspired animation, one of the features that needed careful representation was the icy surface. Enceladus has a unique icy shell characterized by numerous cracks and fissures. This cracked terrain acts as a gateway for the ocean below, enabling the ejection of water plumes into space.
The landscapes, including the icy cap and the seafloor, were initially designed in World Creator. To generate the unique cracked terrain, I had to export the height map into Blender to create holes. Ensuring that the mesh was two-sided was vital for the integrity of the scene (if the mesh is one sided shadows will be all wrong). The modified mesh was then imported into Unreal Engine 5 (UE5).
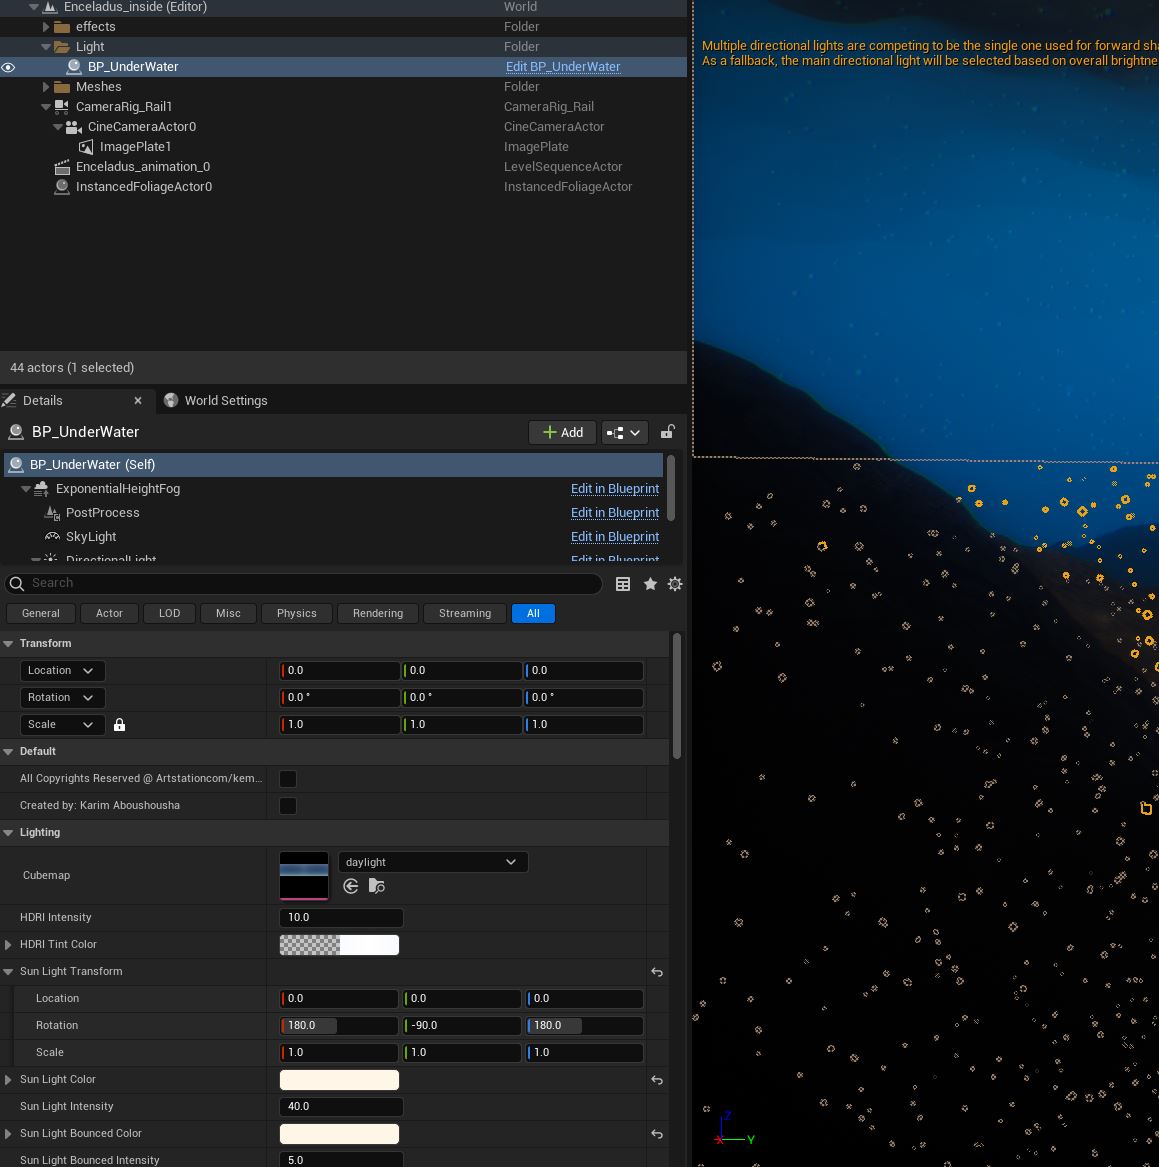
Upon entering UE5, the next challenge was to create an immersive underwater environment. Luckily, I found a brilliant underwater plugin named “Underwater Blueprint” by Karim AbouShousha, which I promptly integrated into the project. This plugin offered excellent control over various underwater parameters.
Although the “black smoker” in the scene was eventually omitted from the final animation due to client preference, I believe that the representation of such geothermal activity adds an intriguing layer of scientific authenticity to the depiction of Enceladus. This is because some scientists posit that Enceladus may have its own hydrothermal vents, akin to the black or white smokers found on Earth’s ocean floors. The possibility of such geological activity hints at the potential for conditions necessary for life as we know it.
The chosen camera movement for this sequence was a leftward dolly shot, achieved with a rail-mounted camera. As the shot progresses, the camera tilts upward, revealing a spectacular view of the sunbeams, or god rays, penetrating the ocean’s surface - another impressive effect offered by the BP_Underwater plugin.
A Frozen Planet
In this project, I set my creative sights on visualizing a frozen exoplanet adorned with a majestic ring. The frozen exoplanet in question is envisioned as a gas giant, a massive planet primarily composed of hydrogen and helium, much like our familiar giants Jupiter and Saturn in our solar system.
Gas giants often harbor fascinating phenomena, and a frozen gas giant would carry an extra layer of mystique. Imagine a world where the atmospheric gases and possible water bodies are frozen solid due to extremely low temperatures, transforming the planet into a magnificent winter wonderland on a planetary scale.
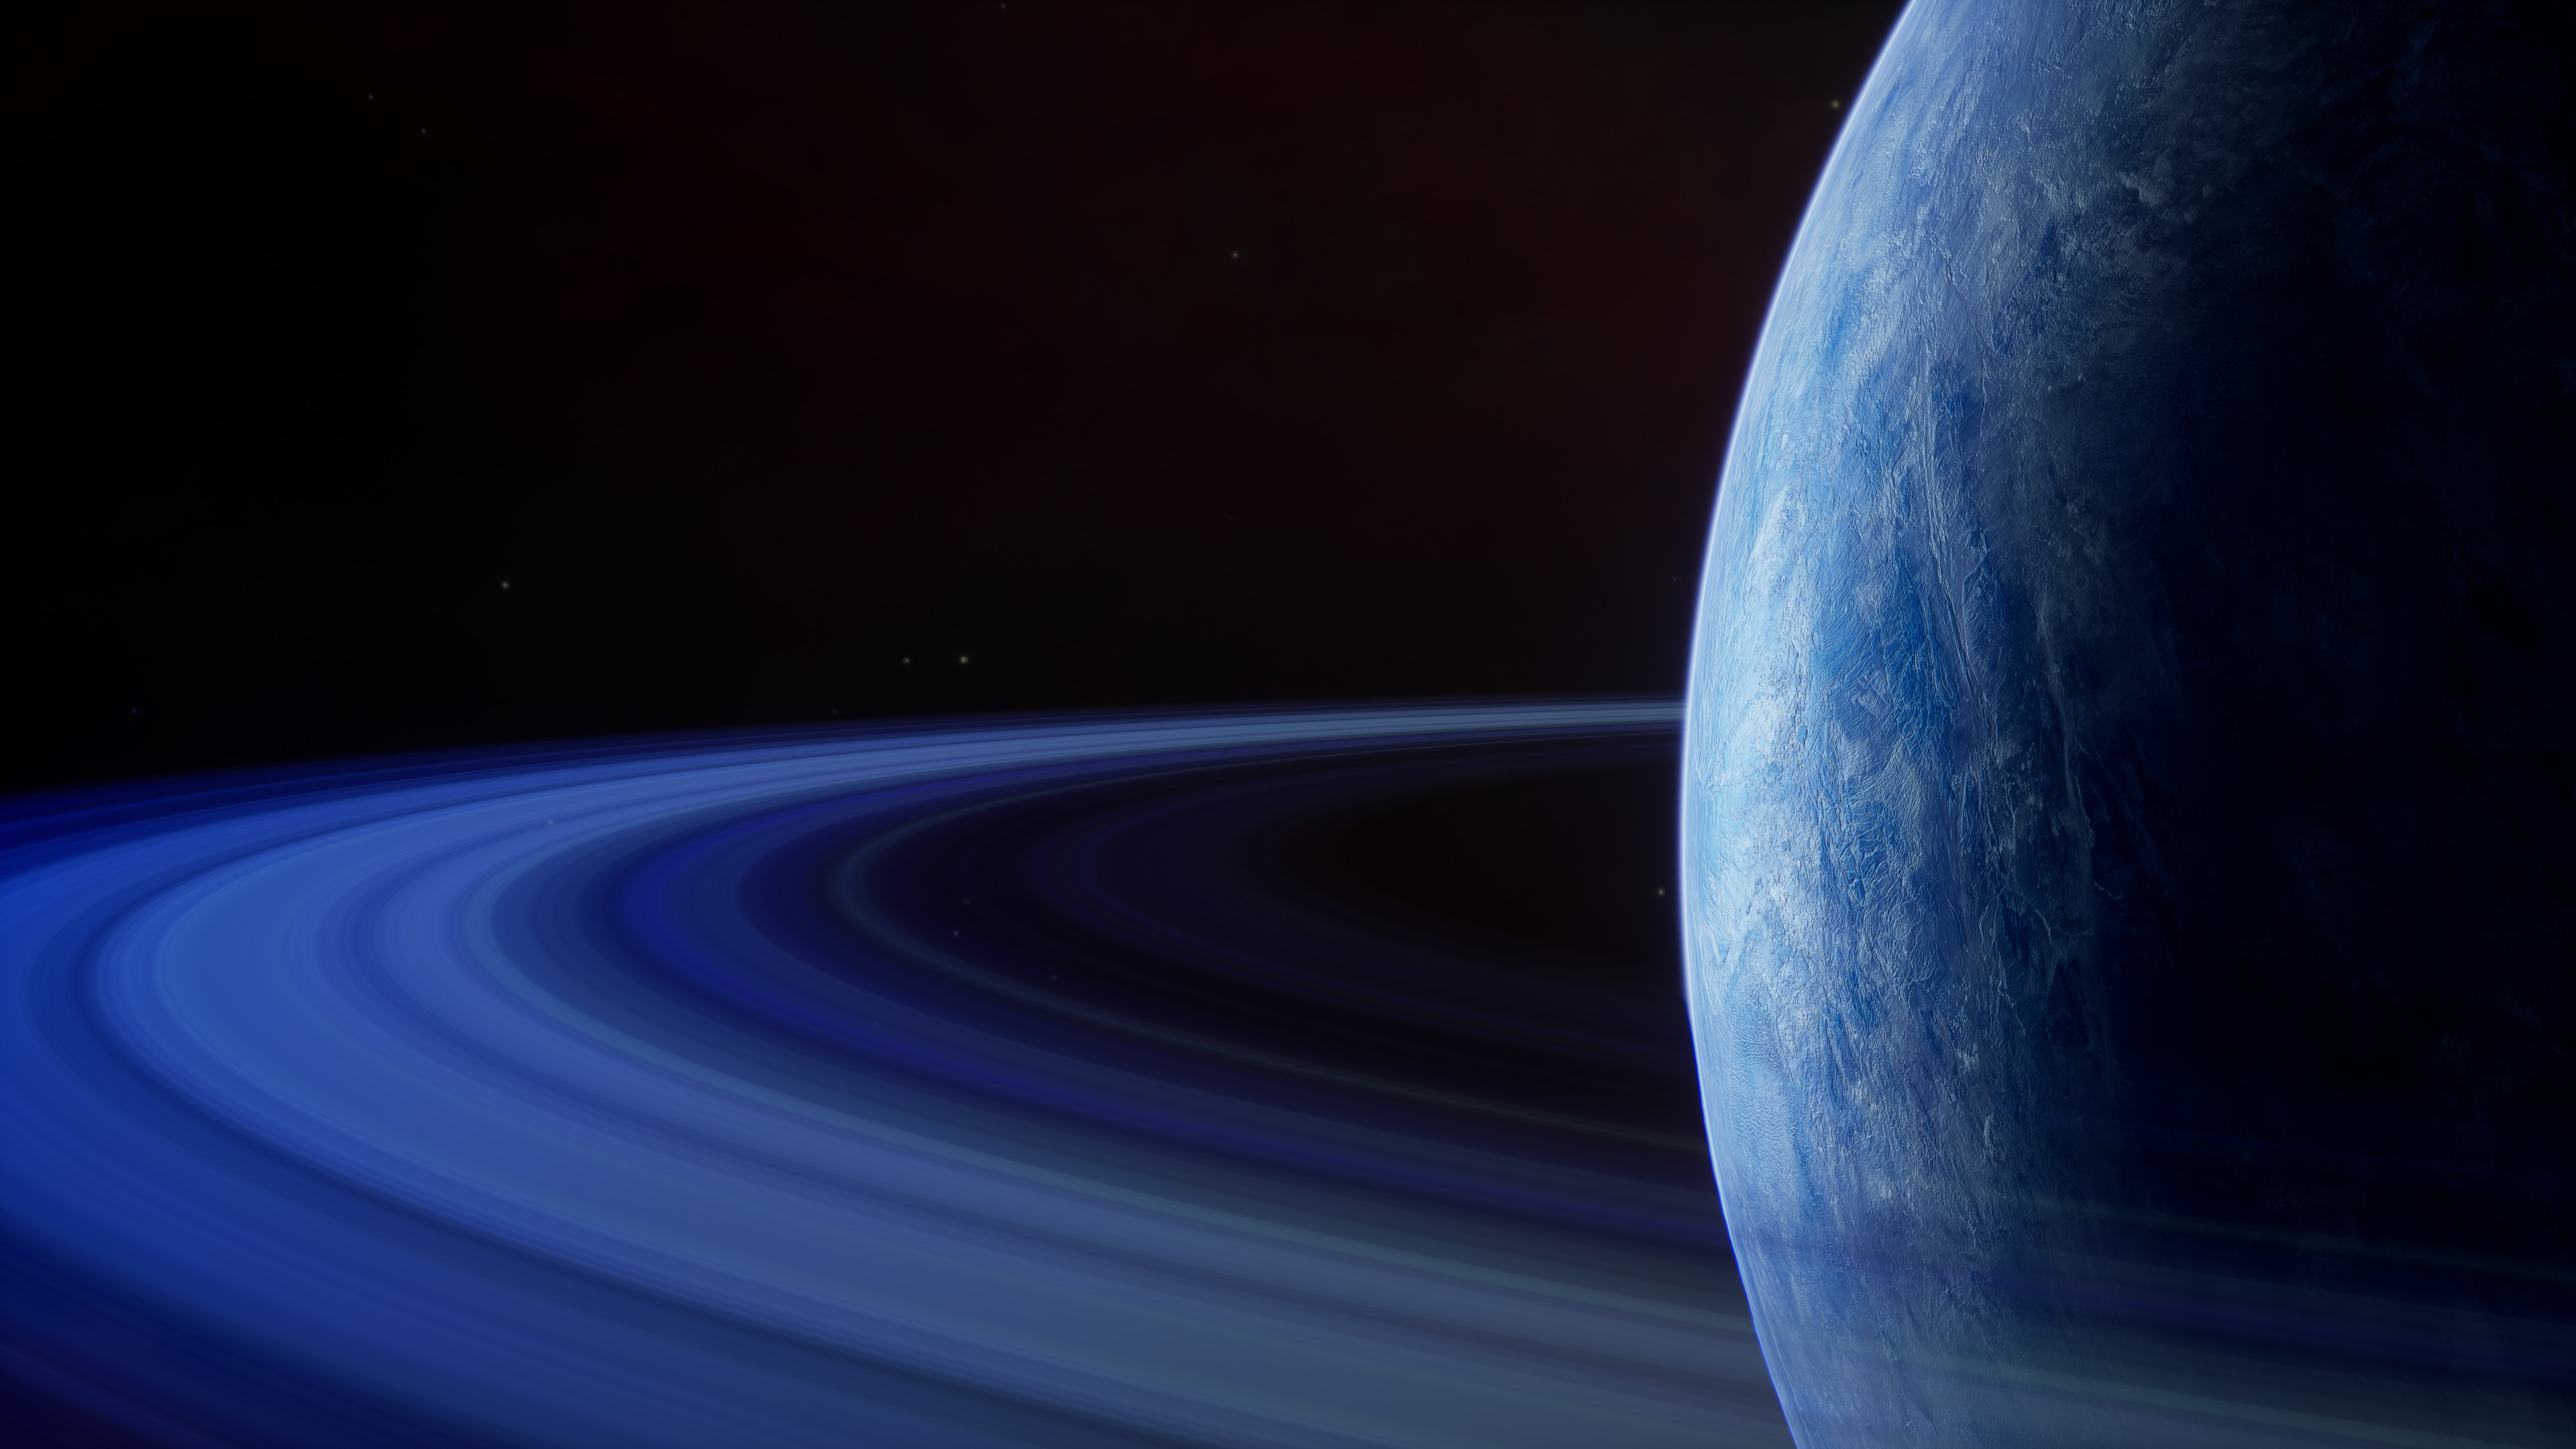
However, this planet isn’t solely about the frosty spectacle; it boasts an impressive ring system too. Rings around planets are made up of countless particles ranging in size from tiny, dust-like grains to large boulders, all orbiting the planet. The visual grandeur and complexity of such rings lend a unique charm to the overall aesthetics of the planet.
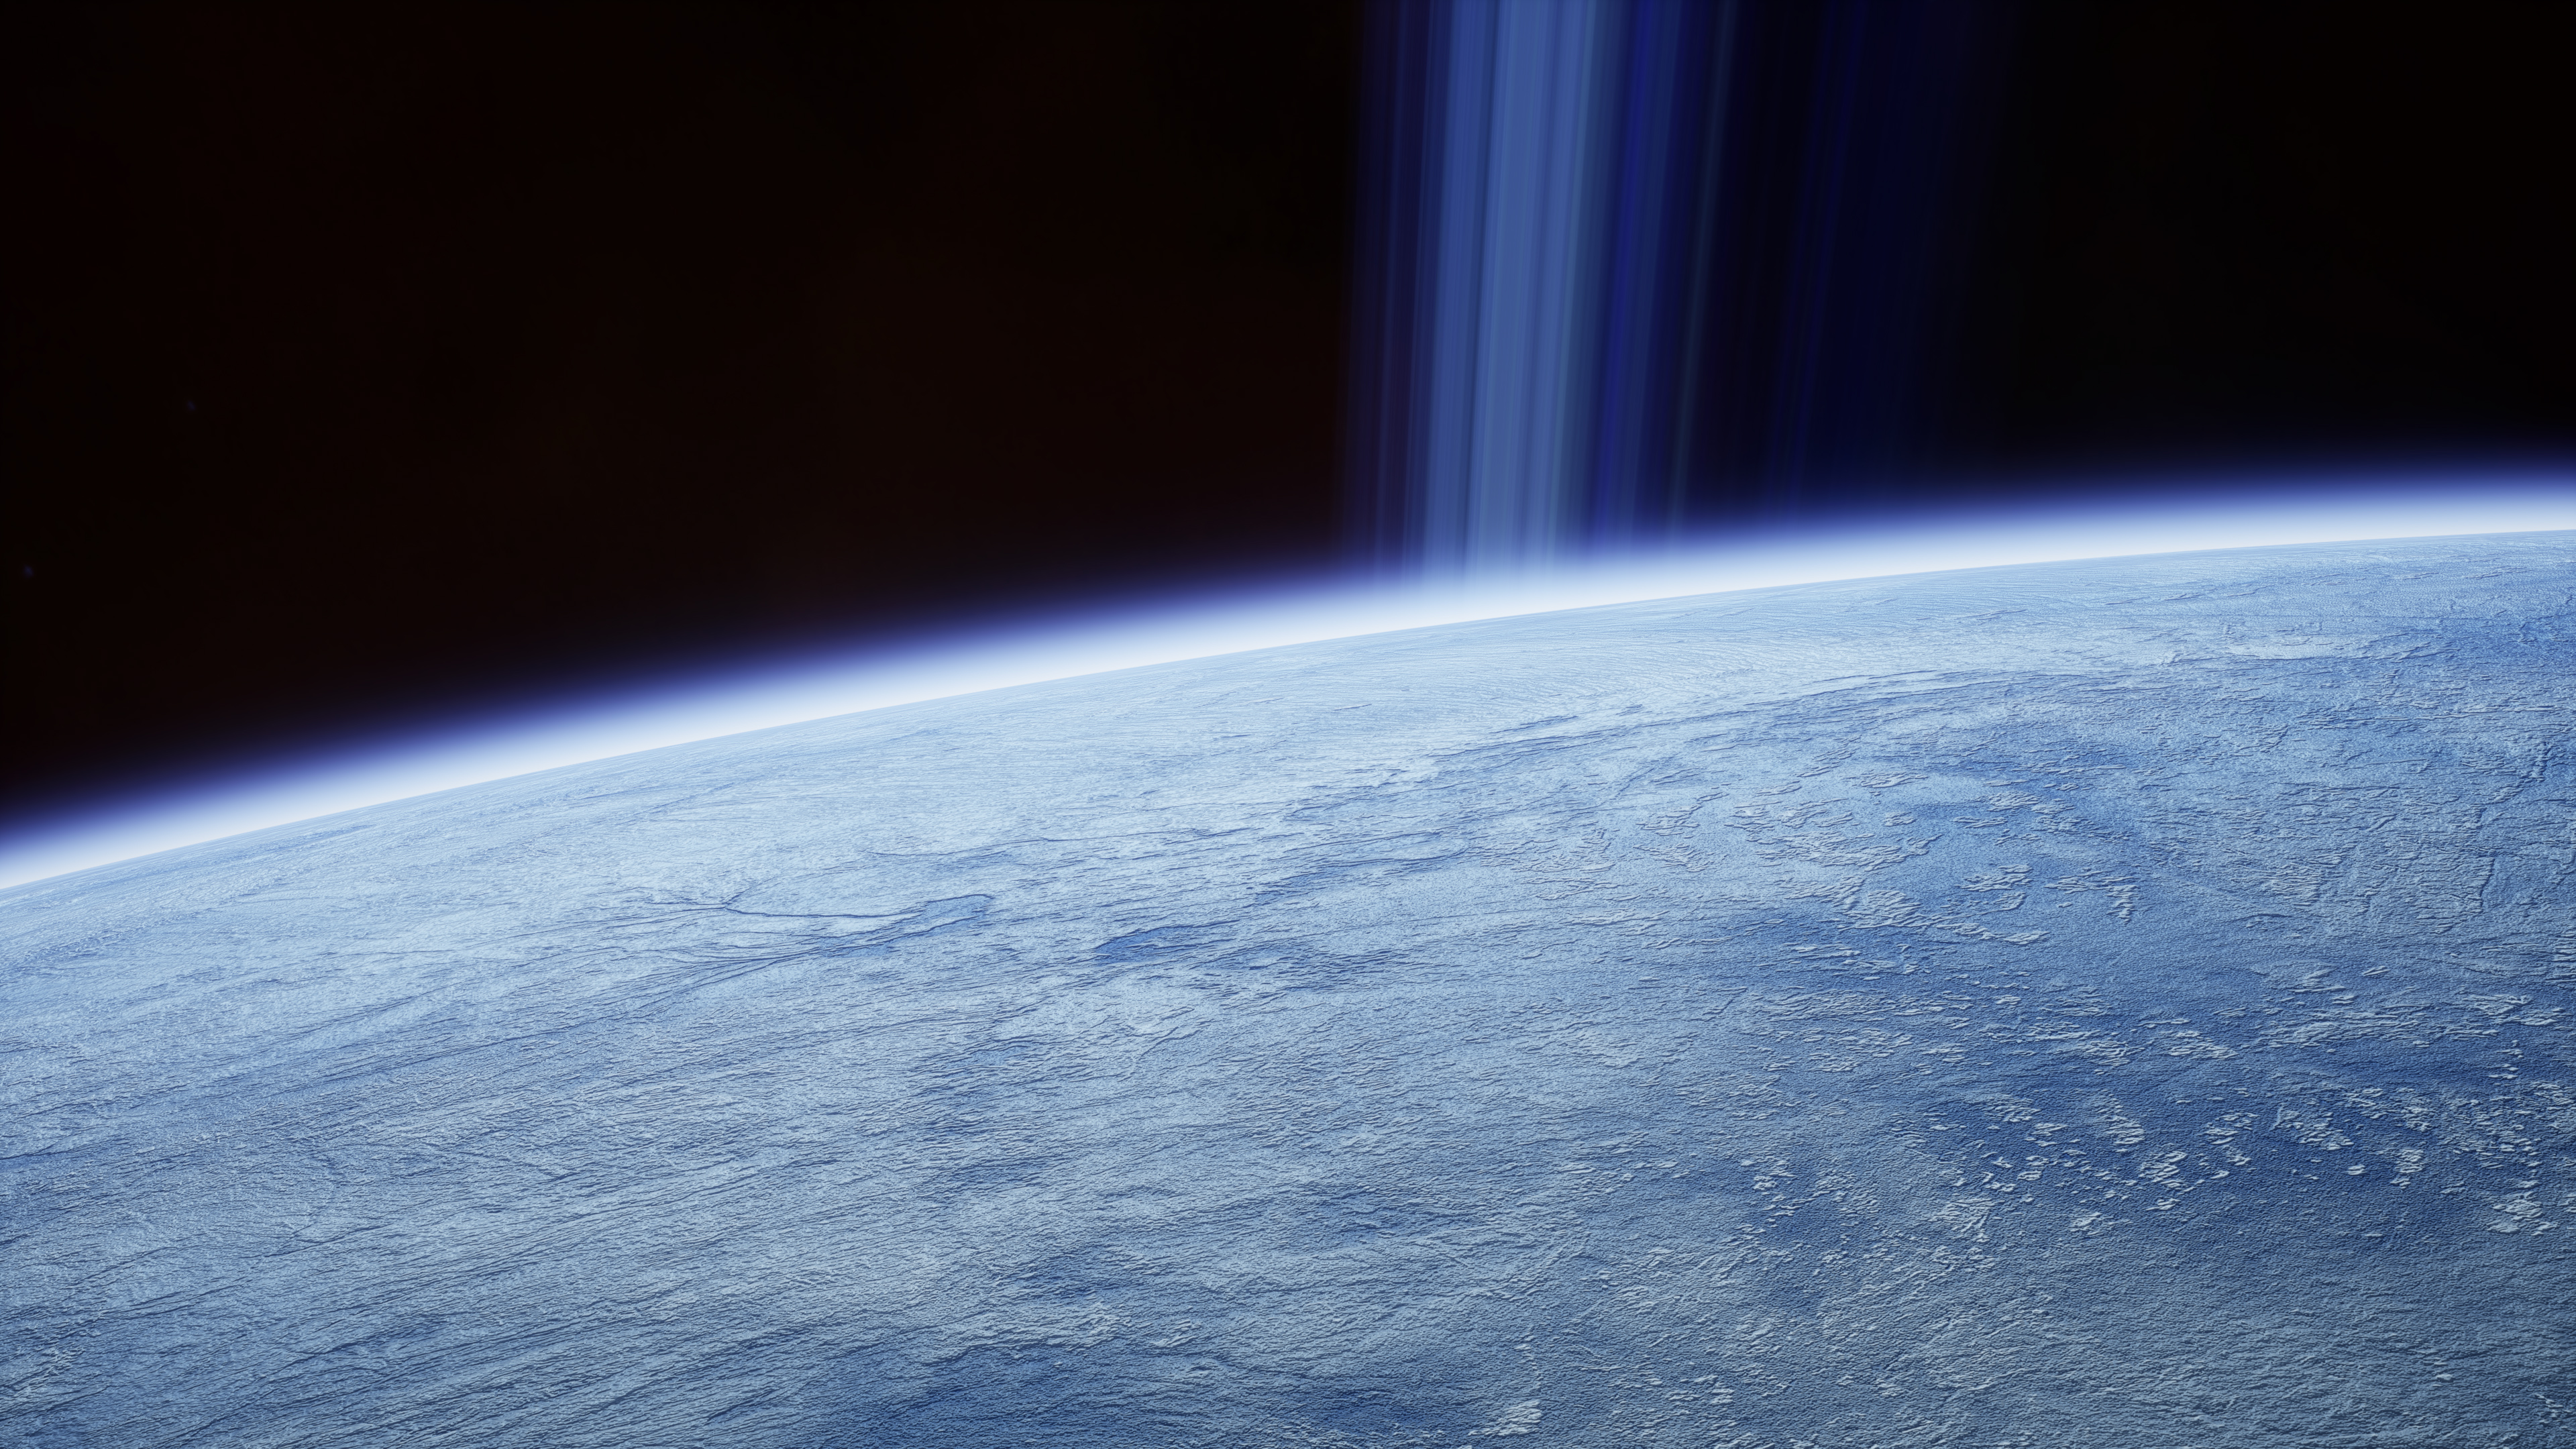
Another Frozen Planet
In this work, my artistic lens is once again trained on a rocky frozen exoplanet, this time punctuated by a striking ring system. This particular type of celestial body is envisaged as a terrestrial or rocky planet - similar to Earth, Mars, or Venus - but exposed to such freezing temperatures that its surface is completely covered in ice.
The freezing conditions on this rocky exoplanet have created an ethereal and stunning landscape. The planet is entirely encapsulated in ice, the solid form of water that occurs when it freezes at or below 0°C (32°F). The harsh, frigid conditions would lead to a world where every mountain, valley, and plain is a sculpture of ice, glittering and gleaming under the light of the planet’s star.
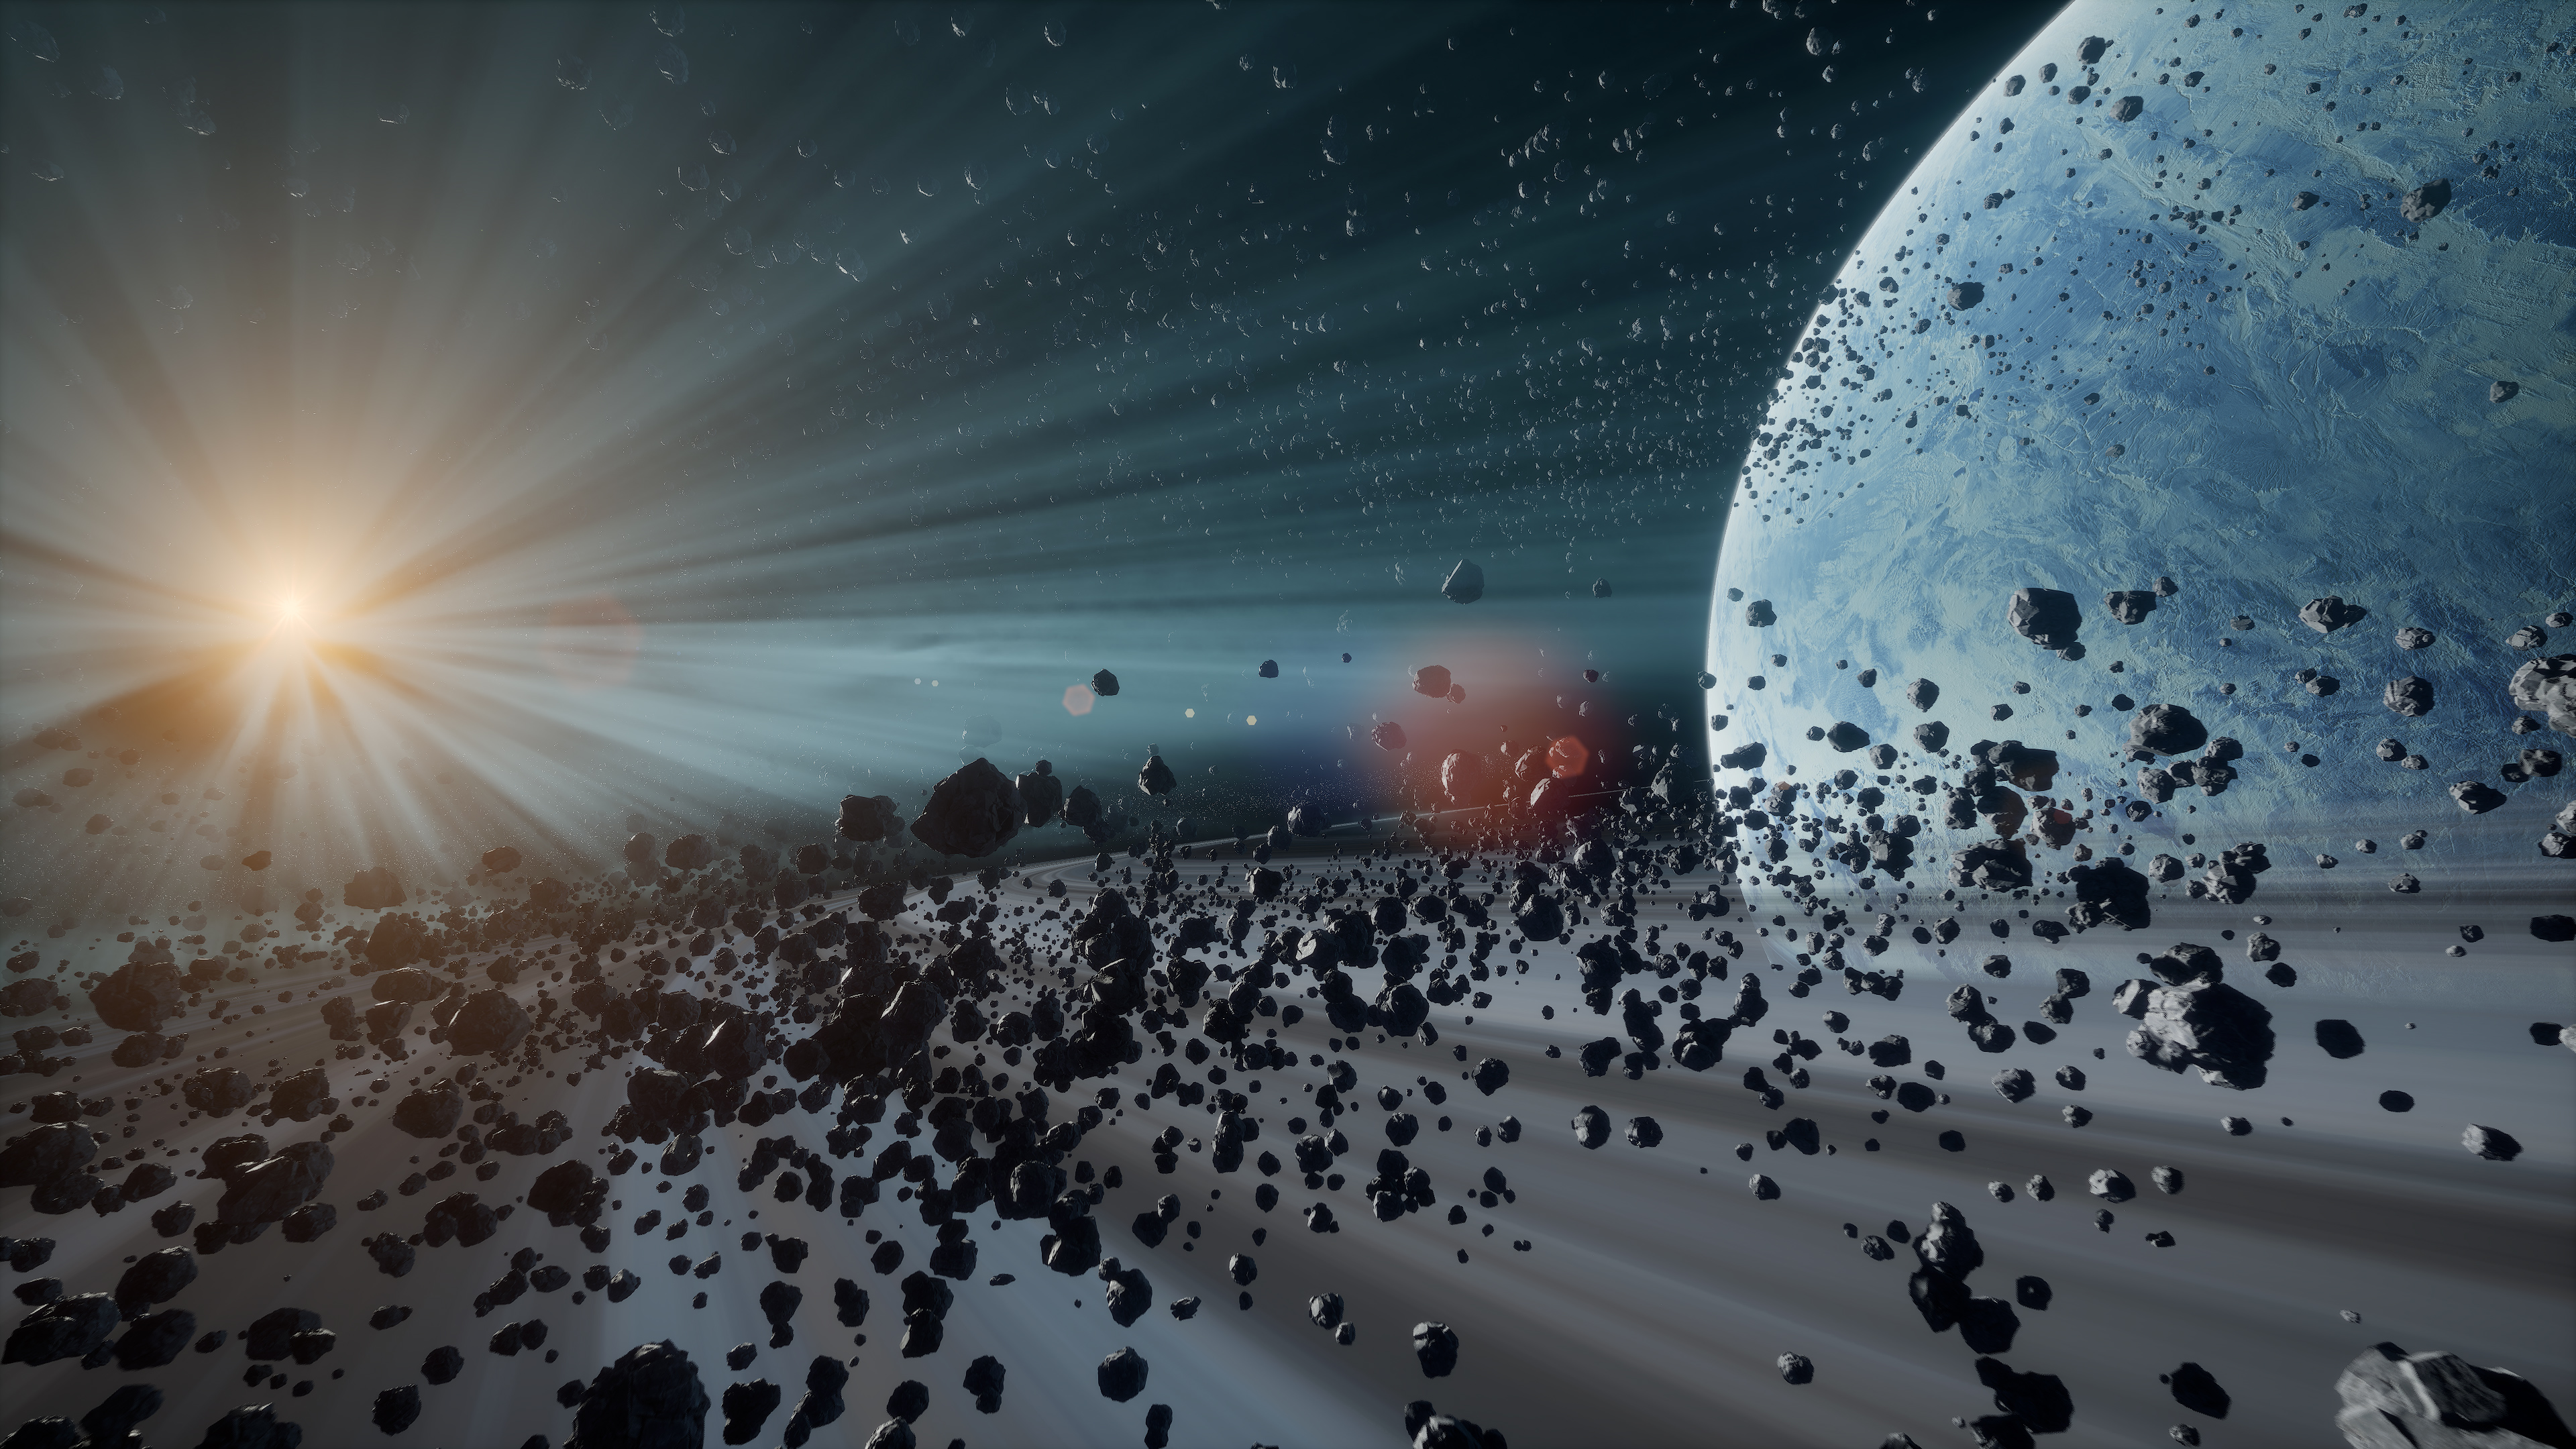
A ring system is a disc or a ring that orbits an astronomical object, composed of solid materials like dust and moonlets. The ring system adds another layer of intrigue to the frozen exoplanet. For this specific animation, I added a procedural ring around the planet, composed of numerous asteroids that formed the ring structure. The asteroids, a significant feature of the animation, were also procedurally generated, adding to the visual complexity of the scene.
One of the fascinating aspects of this project was the incorporation of “god rays” through volumetric clouds. God rays, or crepuscular rays, are rays of sunlight that appear to radiate from the point in the sky where the sun is located. These rays, streaming through moonlets, create columns of sunlit air separated by darker shadowed regions. The effect is particularly noticeable when the atmosphere is laden with dust or other aerosols.
The volumetric rendering of these god rays lends a divine, ethereal feel to the scene, amplifying the sense of awe and wonder that such a celestial spectacle would inspire.

Venus Evolution
My aim with this particular animation was to portray a journey through time, retracing the planetary evolution of Venus, from its current inhospitable state back to a time when it bore striking similarities to Earth.
Present-day Venus is characterized by its overwhelmingly dense atmosphere, primarily composed of carbon dioxide. This, combined with a persistent cover of sulfuric acid clouds, contributes to an intense greenhouse effect, making the planet the hottest in our solar system, even though it’s not the closest to the sun.
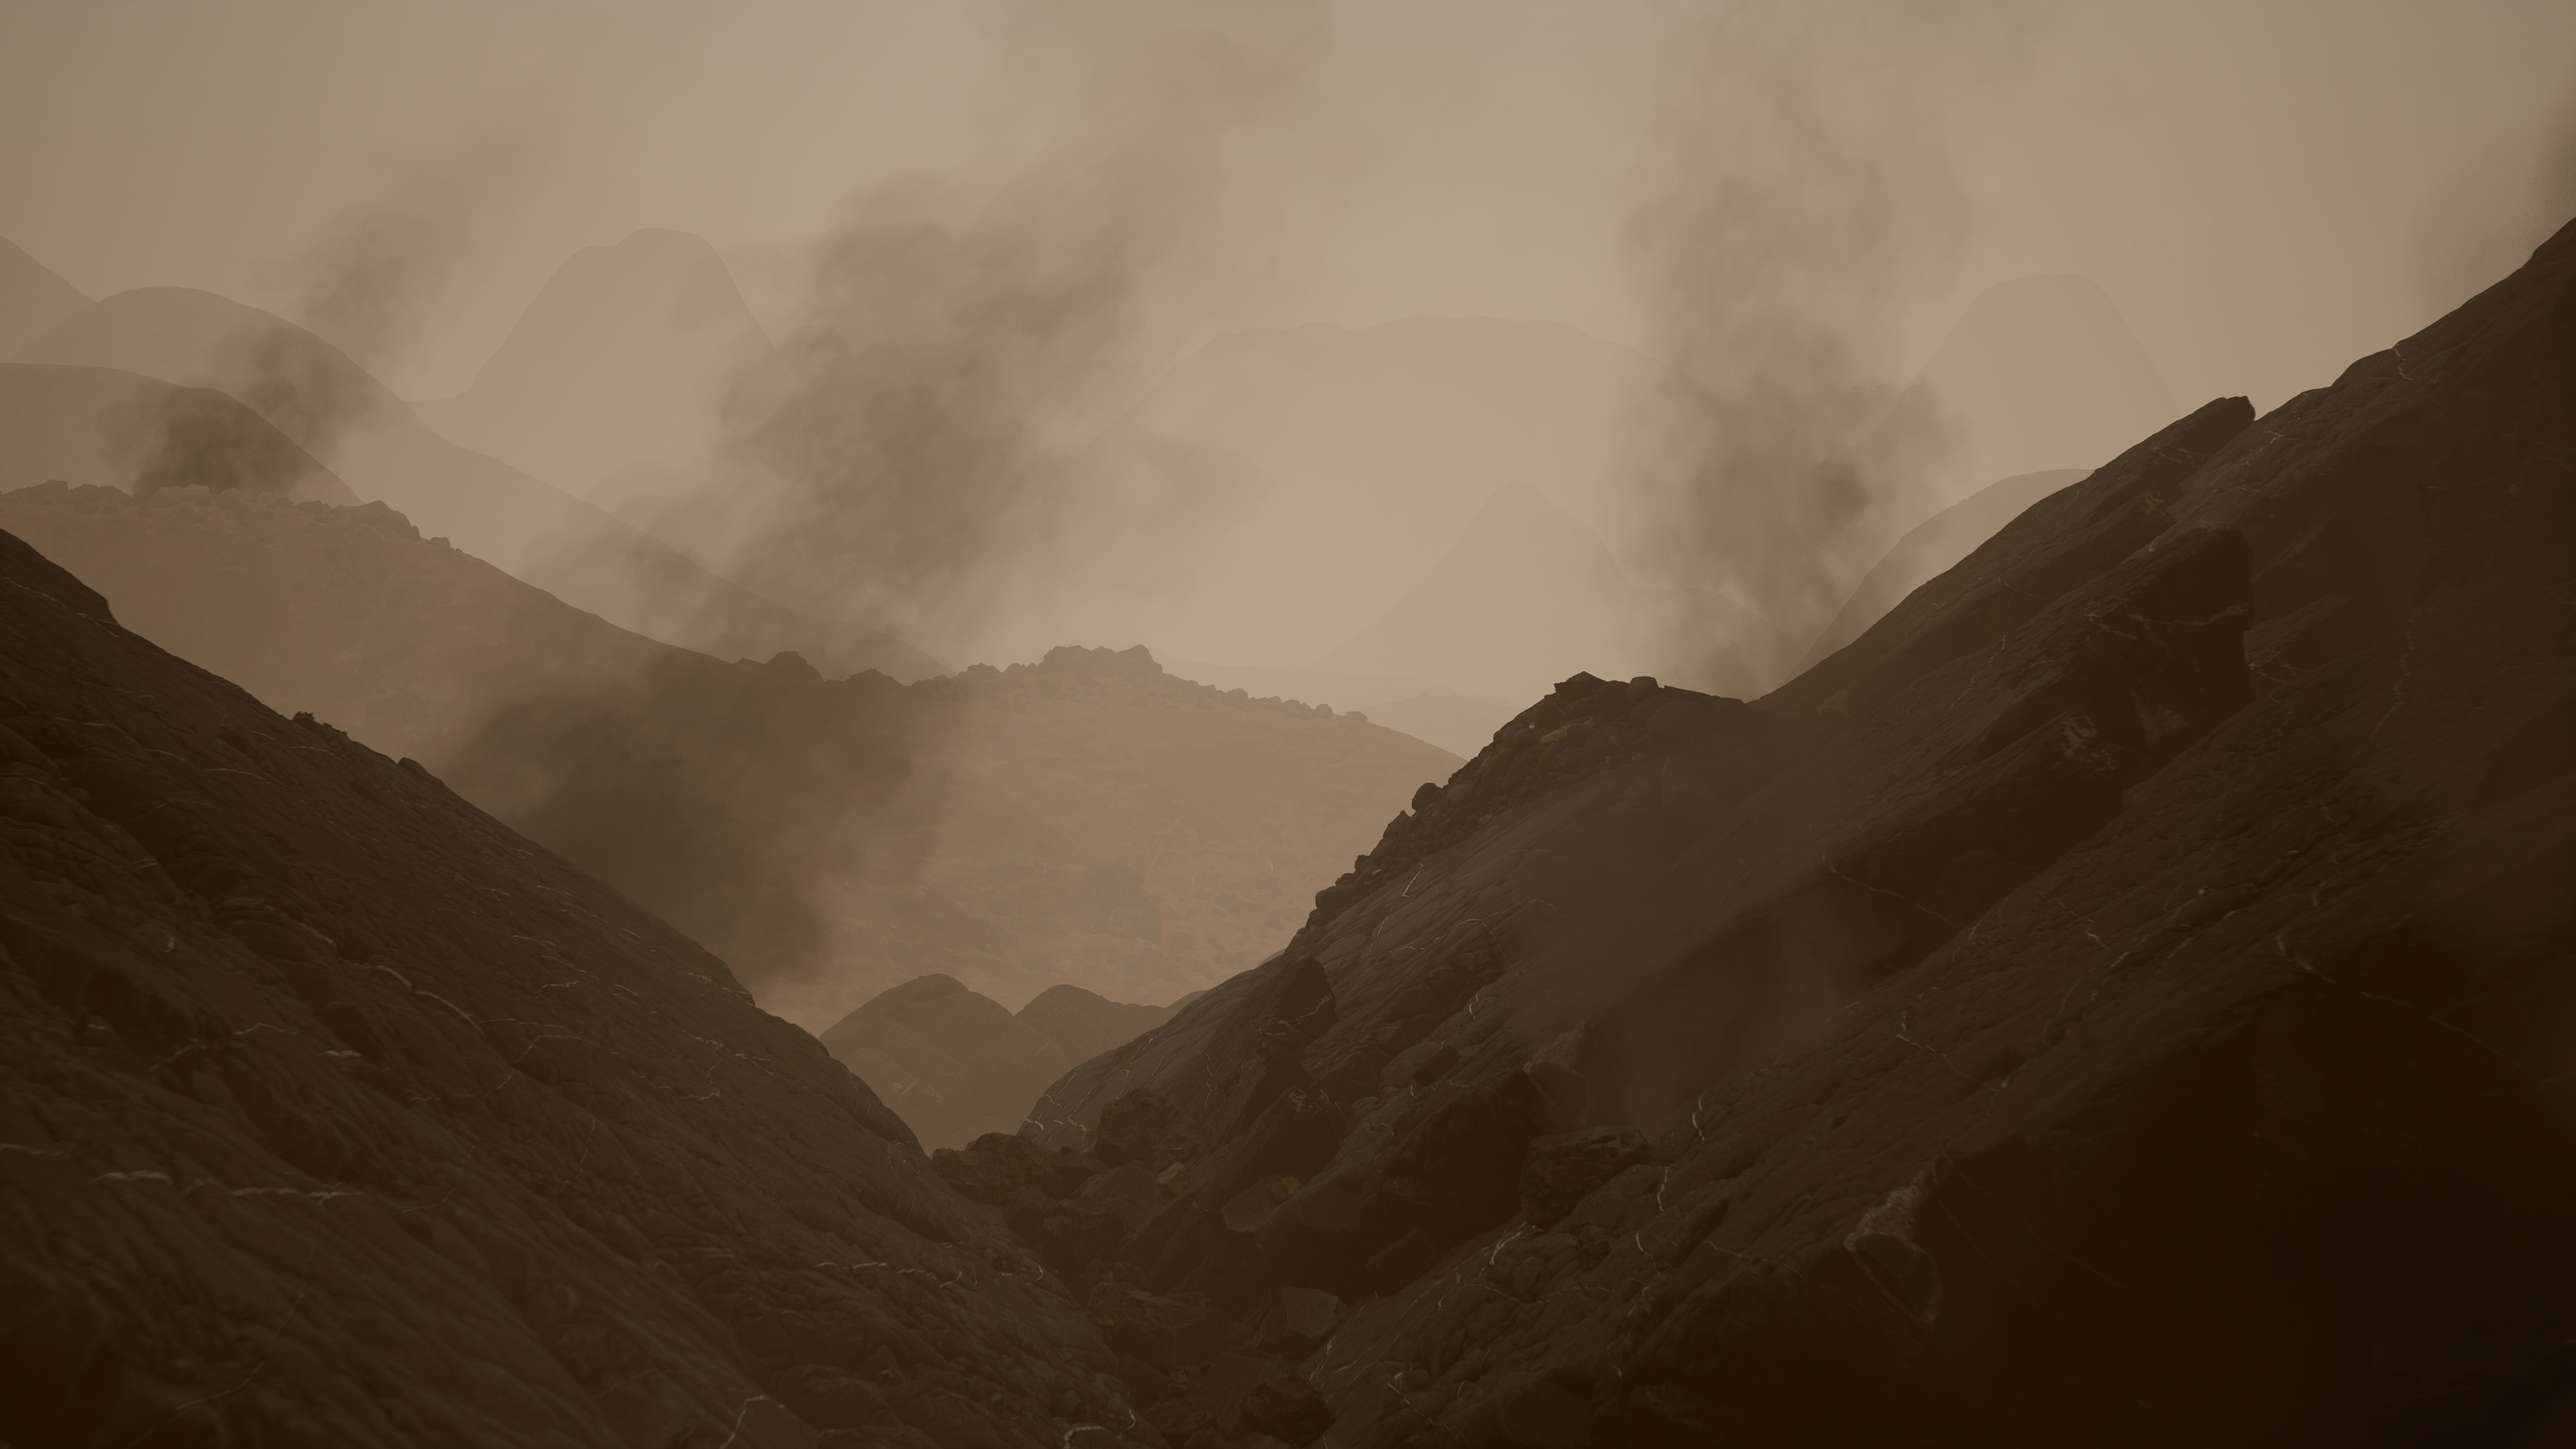
In the early epochs of Venus’s existence, the planet was believed to have possessed surface water in liquid form, potentially in quantities ample enough to constitute oceans. However, an uncontrolled greenhouse effect triggered the vaporization of this water, eventually leading to its expulsion into space by the solar wind.
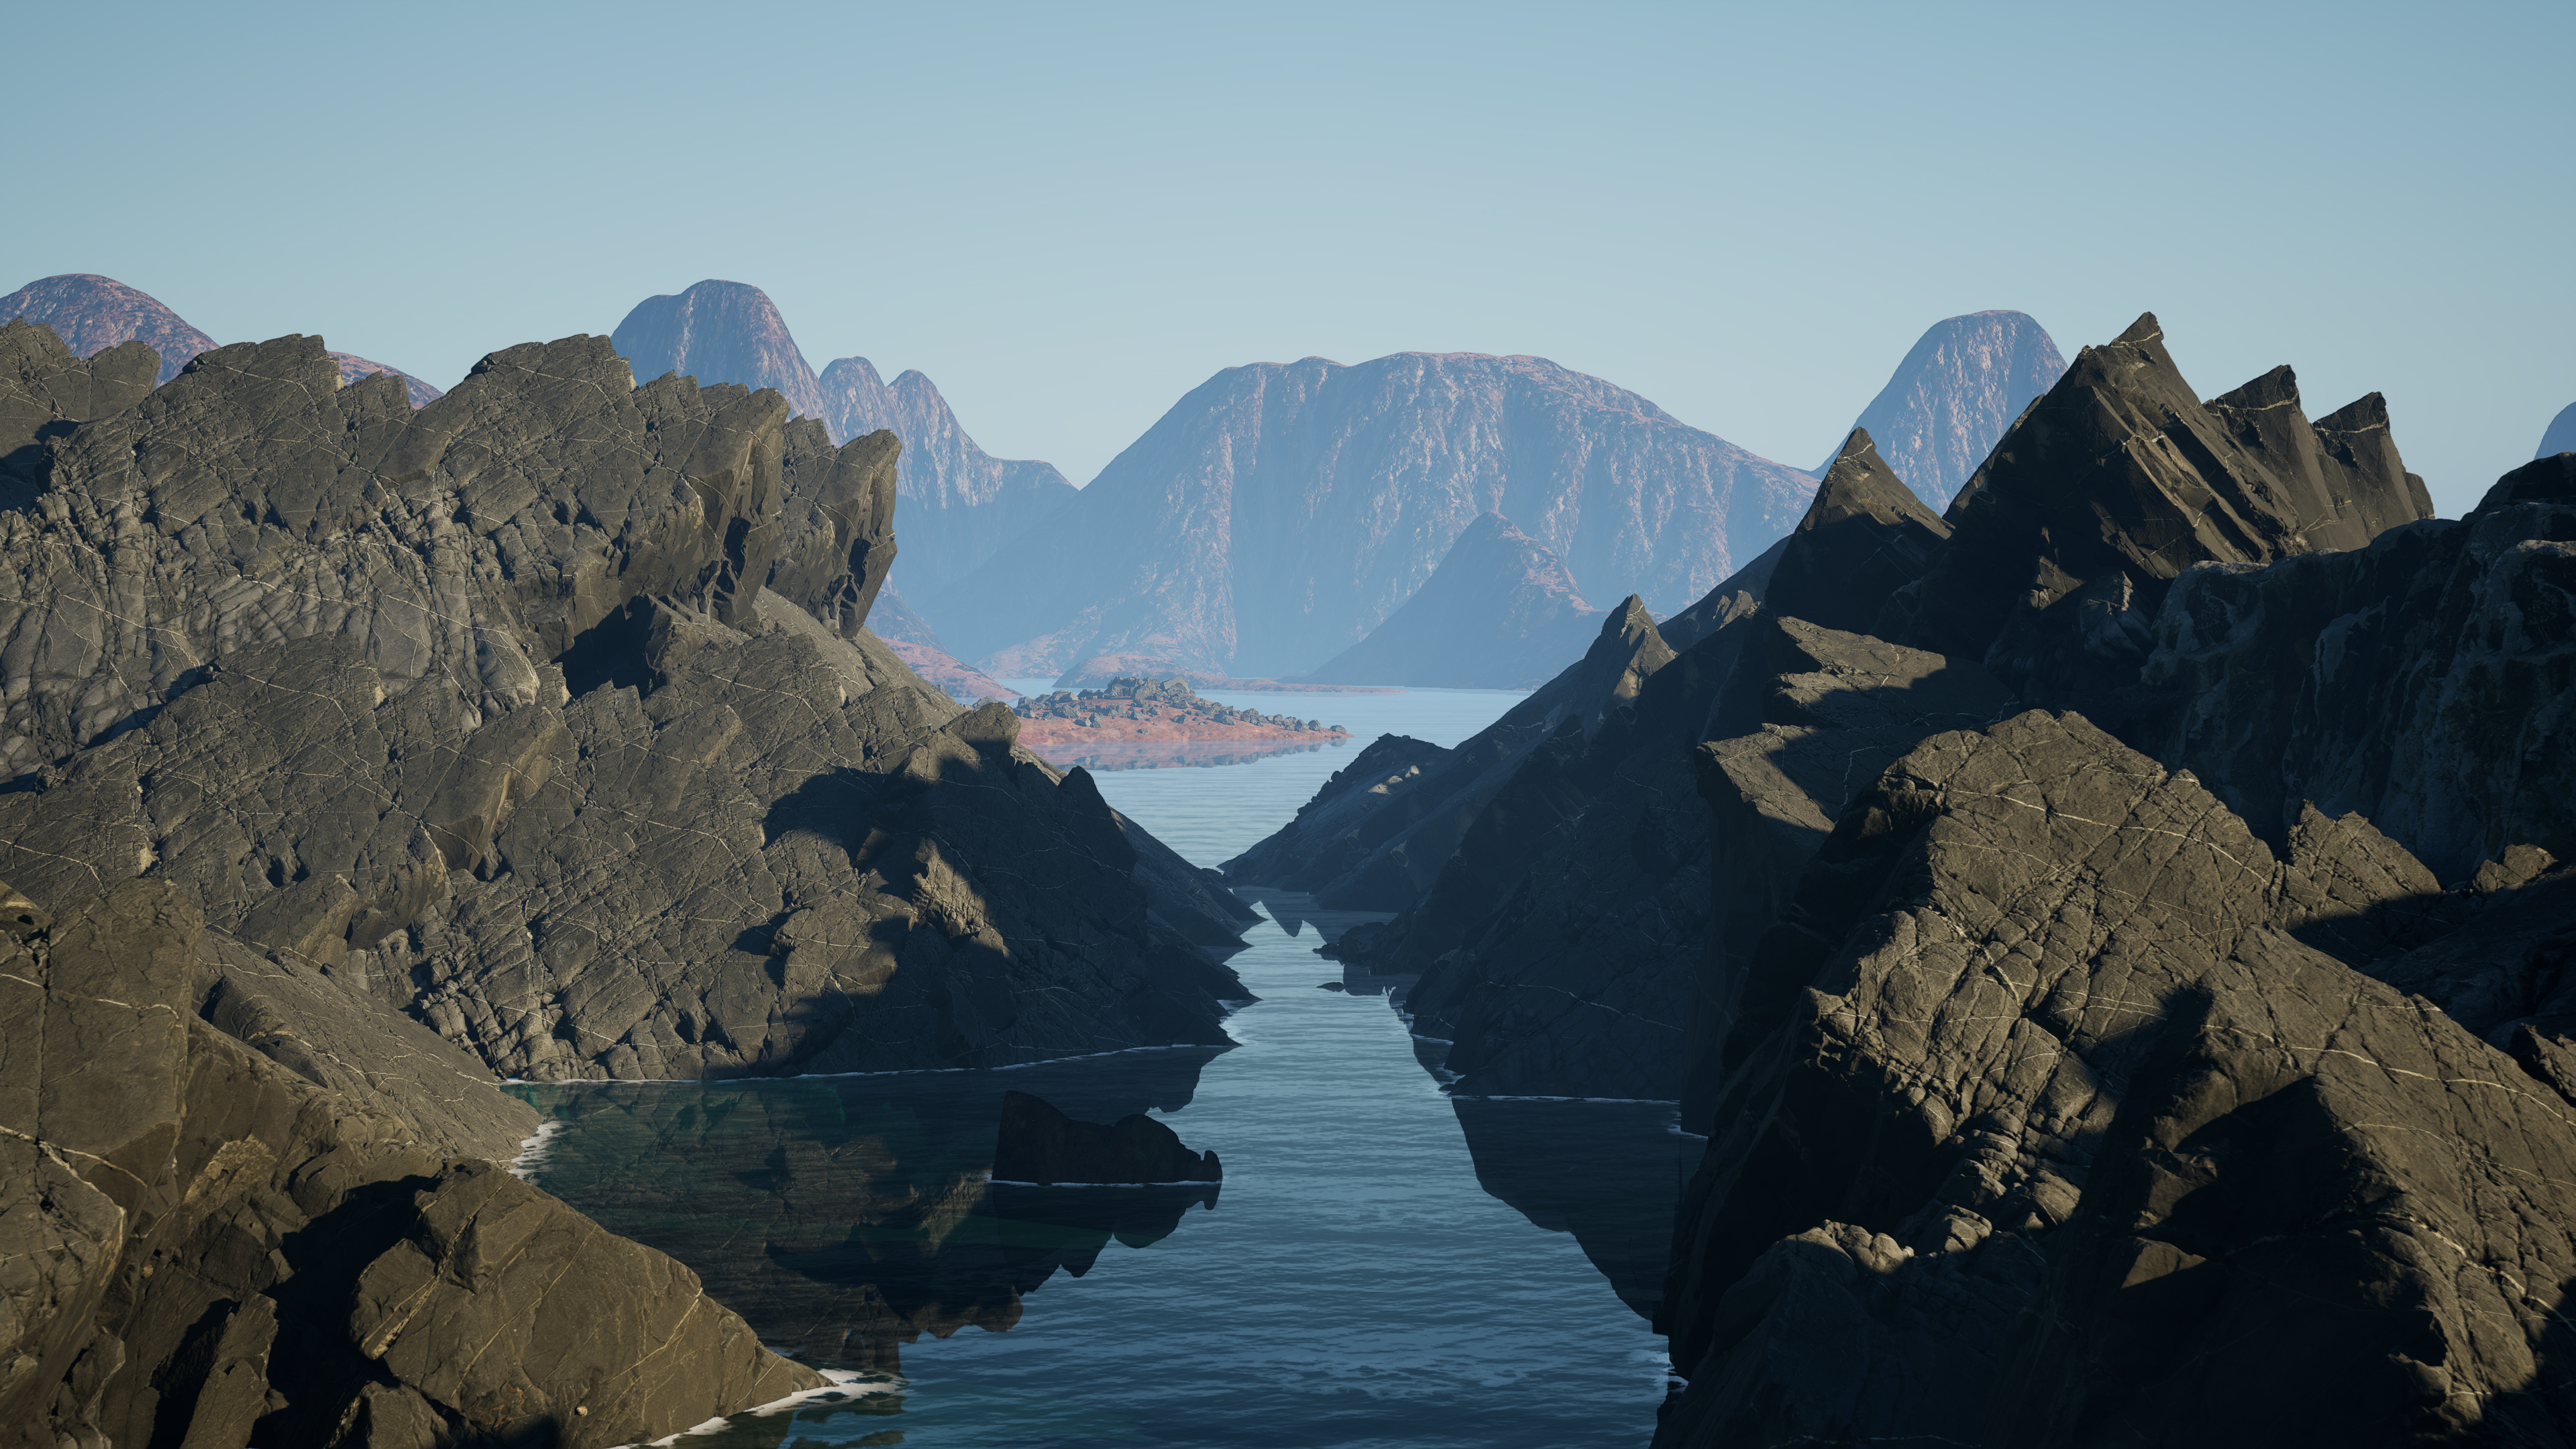
The creative process for this animation was quite intricate. I sculpted the landscape using World Creator, as I usually do. Subsequently, I dressed this digital terrain in UE5 with an auto-material — a multi-layered material based on the splat maps from World Creator.
To add realism and detail to the foreground, I supplemented the terrain with photogrammetry meshes from Quixel Bridge, thereby enhancing the geological formations.
In terms of camera work, I employed a basic dolly out technique, using a camera mounted on a rail. This technique enabled a smooth, controlled retreat, revealing more of the scene as the animation unfolds.
Once the primary animation sequence was locked down, I began working on the transitions within Ultra Dynamic Sky. I wanted to simulate the transformation from the arid and dusty conditions we see on Venus today to clearer sky conditions indicative of its past.
To symbolize the receding timeline and the presence of water in Venus’s past, I introduced a gradually rising water layer. The final touch was the adornment of the rock formations with smoke plumes. For this, I leveraged Embergen and the image plate technique I had previously described.
In all, this animation was a challenging yet fulfilling exploration of the transformation of Venus over time.
Earth Evolution
The goal with this animation was to visualize the fascinating transformation of Earth’s atmosphere over the course of its history. Rather than moving back in time like the Venus animation, this sequence progresses forward, capturing the remarkable changes in Earth’s atmosphere.
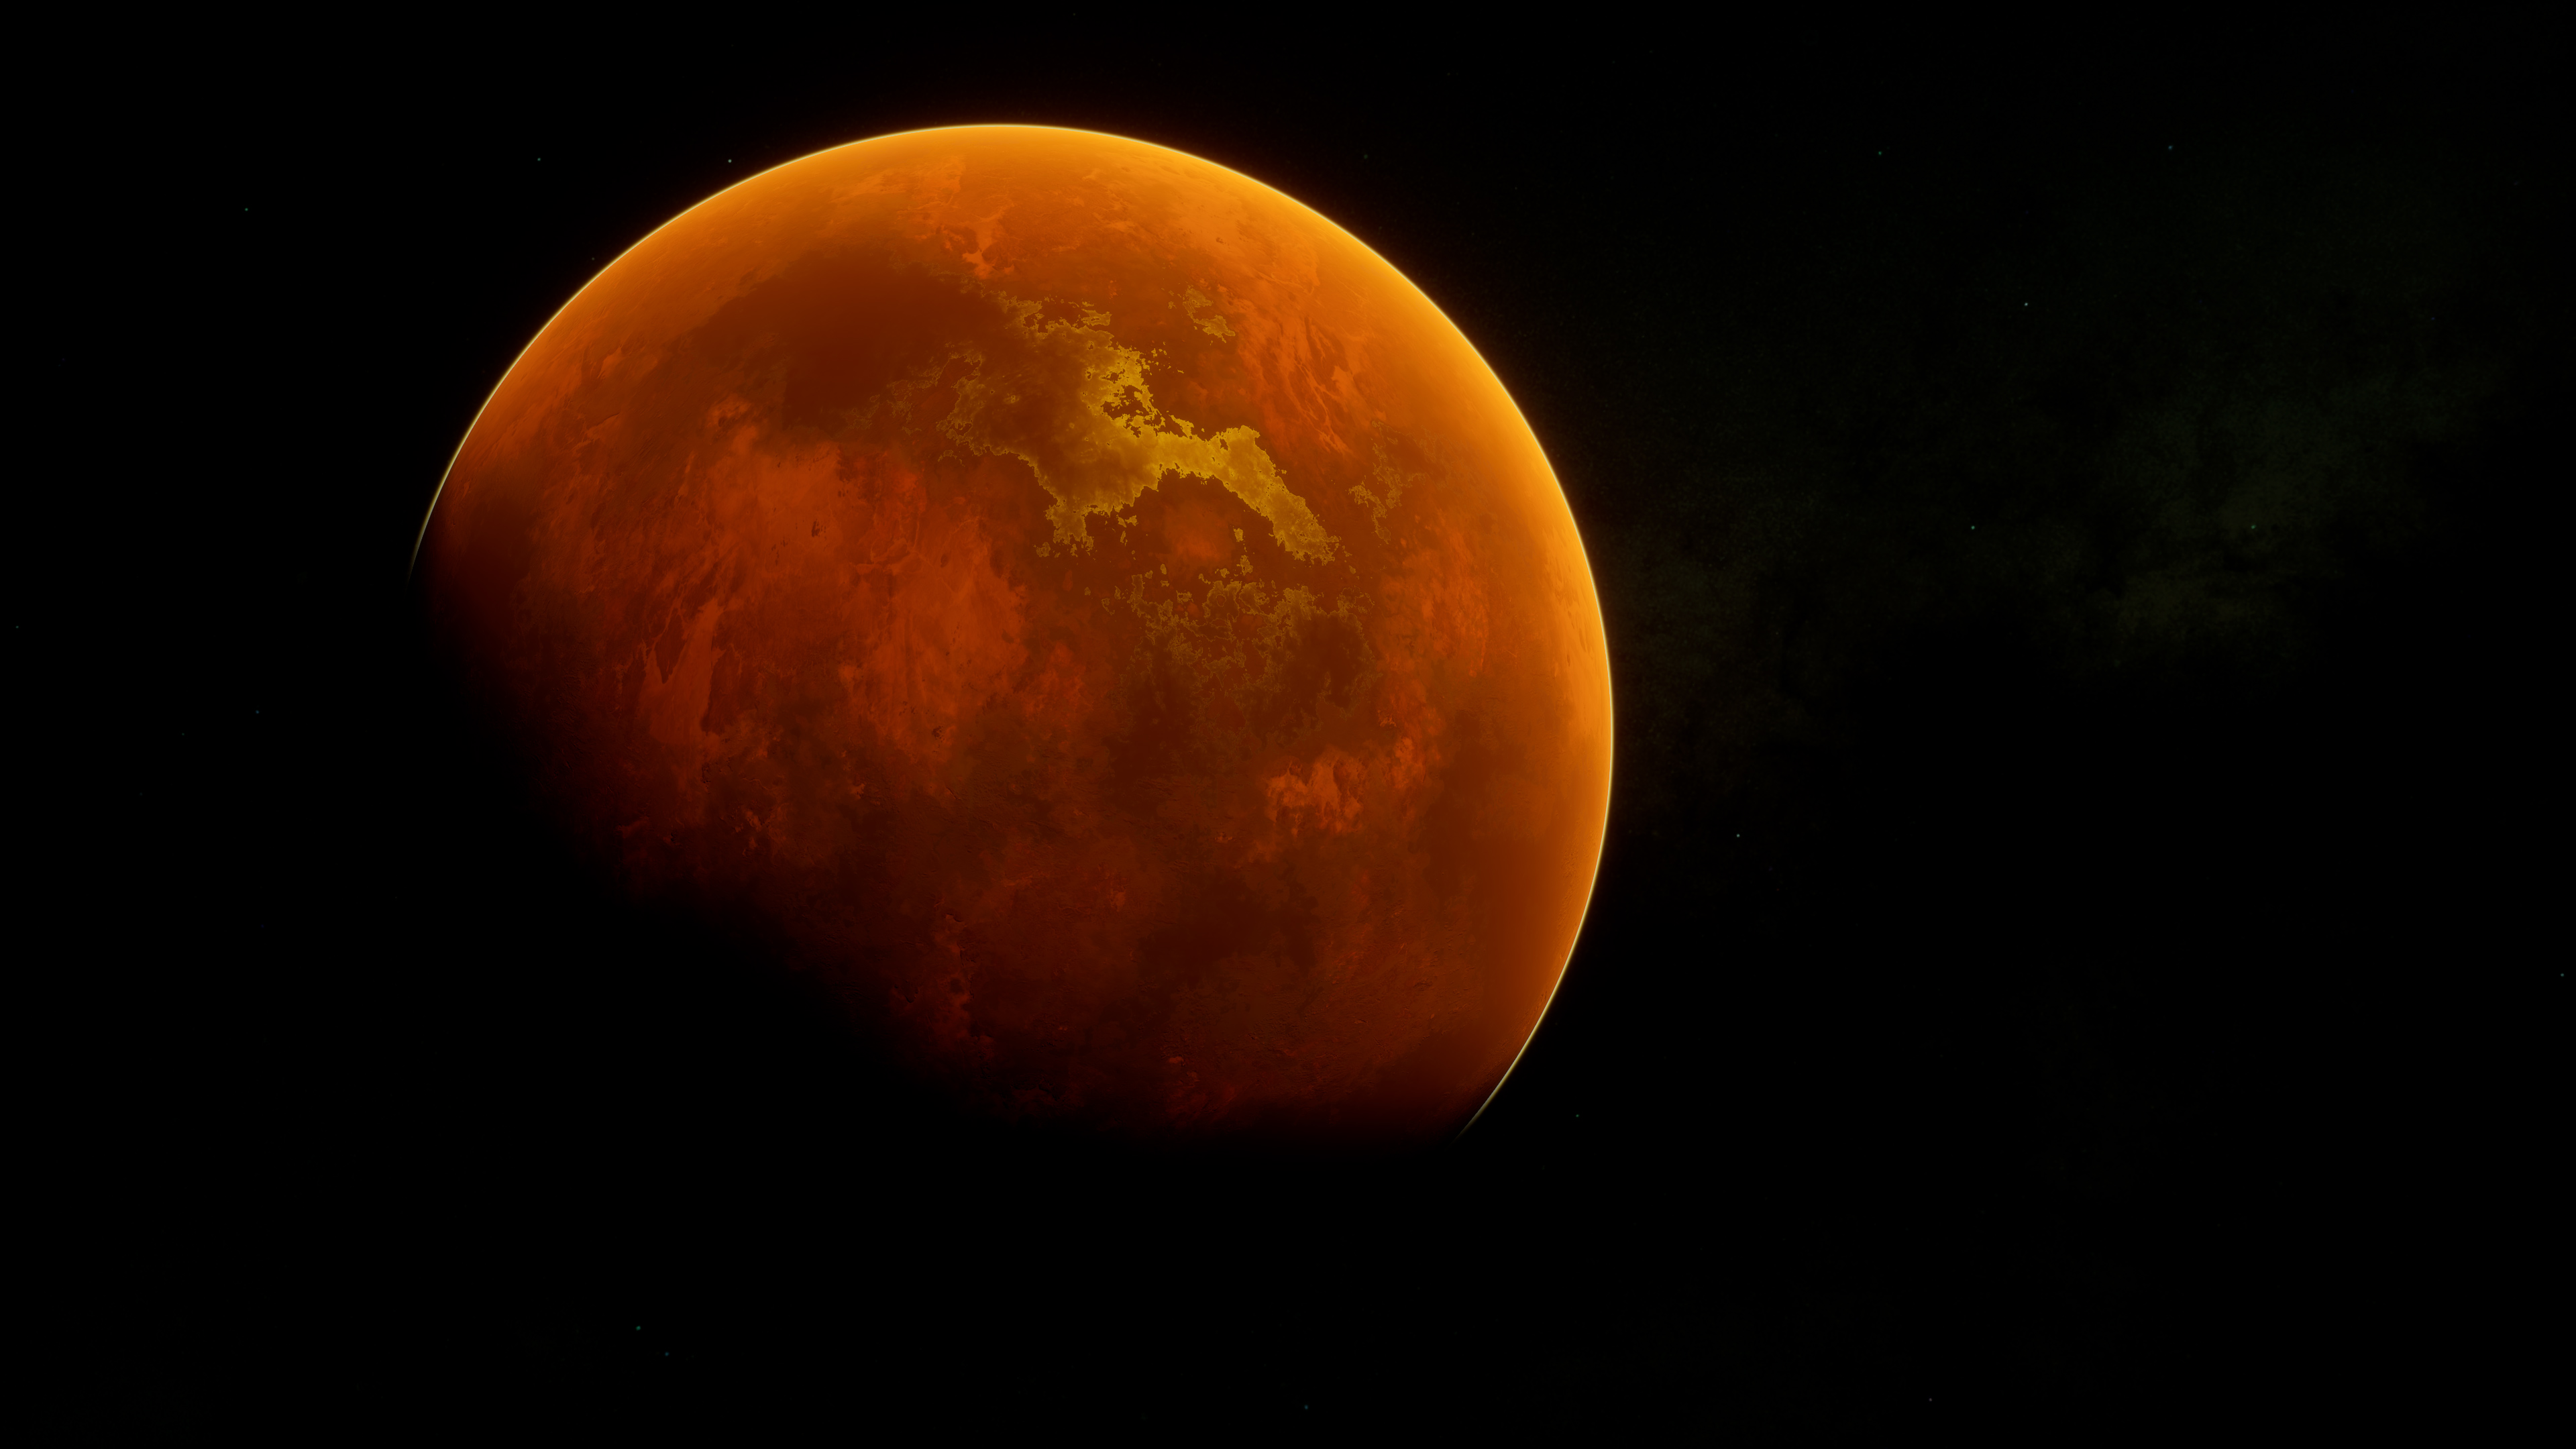
If we travel back billions of years in Earth’s history, we’d find an atmosphere predominantly composed of carbon dioxide (CO2), quite similar to what we observe on Mars or Venus today. However, our planet embarked on a unique path, one that would radically alter its atmospheric composition and foster the development of life.
Around 2.4 billion years ago, a pivotal event known as the Great Oxygenation Event (GOE) occurred. This was a period during which the Earth’s atmosphere began to accumulate oxygen, released by cyanobacteria performing photosynthesis. Before the GOE, most life on Earth was anaerobic, meaning it did not require oxygen for survival. However, the increase in atmospheric oxygen drove an evolutionary shift towards more complex, oxygen-breathing life forms, eventually leading to the biodiversity we see today.
The animation I created depicts this incredible transition. Starting from a version of Earth that bears resemblance to Mars, with a reddish CO2-dominated atmosphere, it shifts to show the emergence of a blue atmosphere, rich in oxygen, alongside the formation of oceans and rivers.
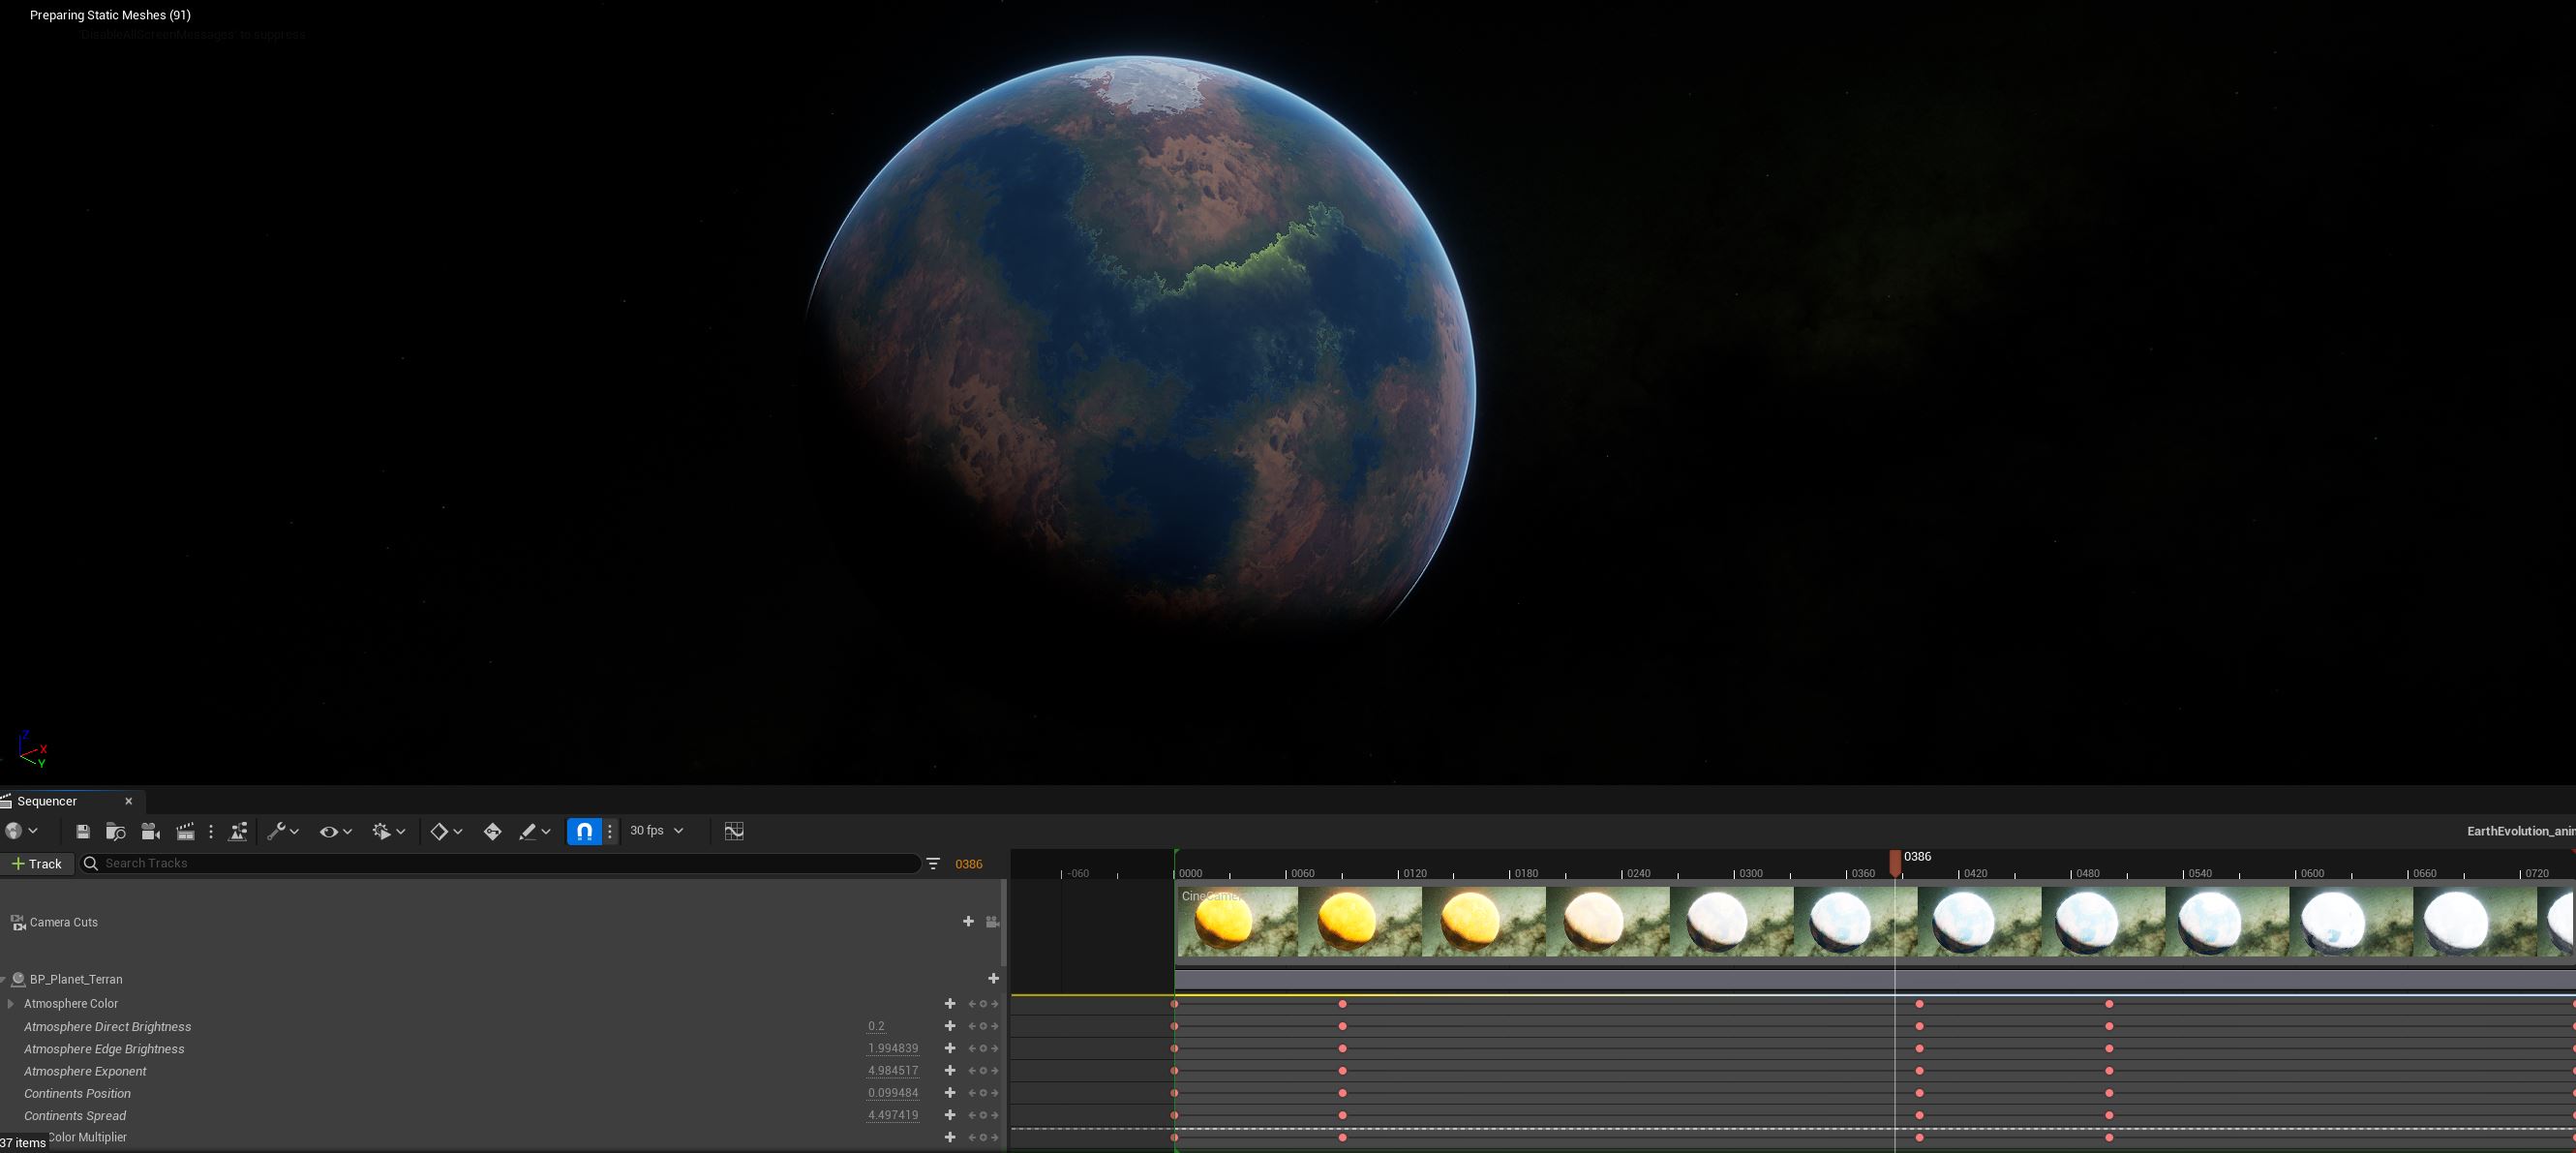
Crafting this animation required a substantial adjustment to the parameters of the Space Creator Pro Blueprint, ensuring that they could be animated and rendered effectively using the sequencer. This detailed sequence brought to life a sequence that encapsulates Earth’s journey from a barren, Mars-like planet to the lush, blue world teeming with life that we know today.
Exoplanet in Binary Star System
The intention behind this animation was to supplement a conversation by the interviewer about the effects of stellar energy on an exoplanet. To bring this idea to life, I decided to visualize a potential scenario of a planet existing in a binary star system, using Proxima-b might as an inspiration.
Proxima Centauri b, often simply referred to as Proxima-b, is a captivating exoplanet that resides within the habitable zone of Proxima Centauri, a red dwarf star. Proxima Centauri is not a solitary star, though—it’s part of the wider triple star system of Alpha Centauri, and holds the distinction of being the star nearest to our Sun.
There’s a degree of mystery and intrigue surrounding Proxima-b due to its potential to harbor life. Depending on its makeup, this exoplanet could range from being akin to Mercury, possessing a significant core, or could be a water-rich world. The latter would require specific conditions early in its history, but isn’t outside the realm of possibility.
Therefore, the visual representation I’ve created is not entirely speculative, but is grounded in scientific plausibility. The landscape in this animation employs photogrammetry assets from the Brushify demo level. The planet is imagined with an expansive water ocean, simulated using Fluid Flux, and a beach scattered with rocks bordering a serene sea. As we observe the horizon, we’re treated to a mesmerizing sunset, courtesy of a major star and its smaller companion. To the right, a massive moon looms, adding another element to this alien skyline.
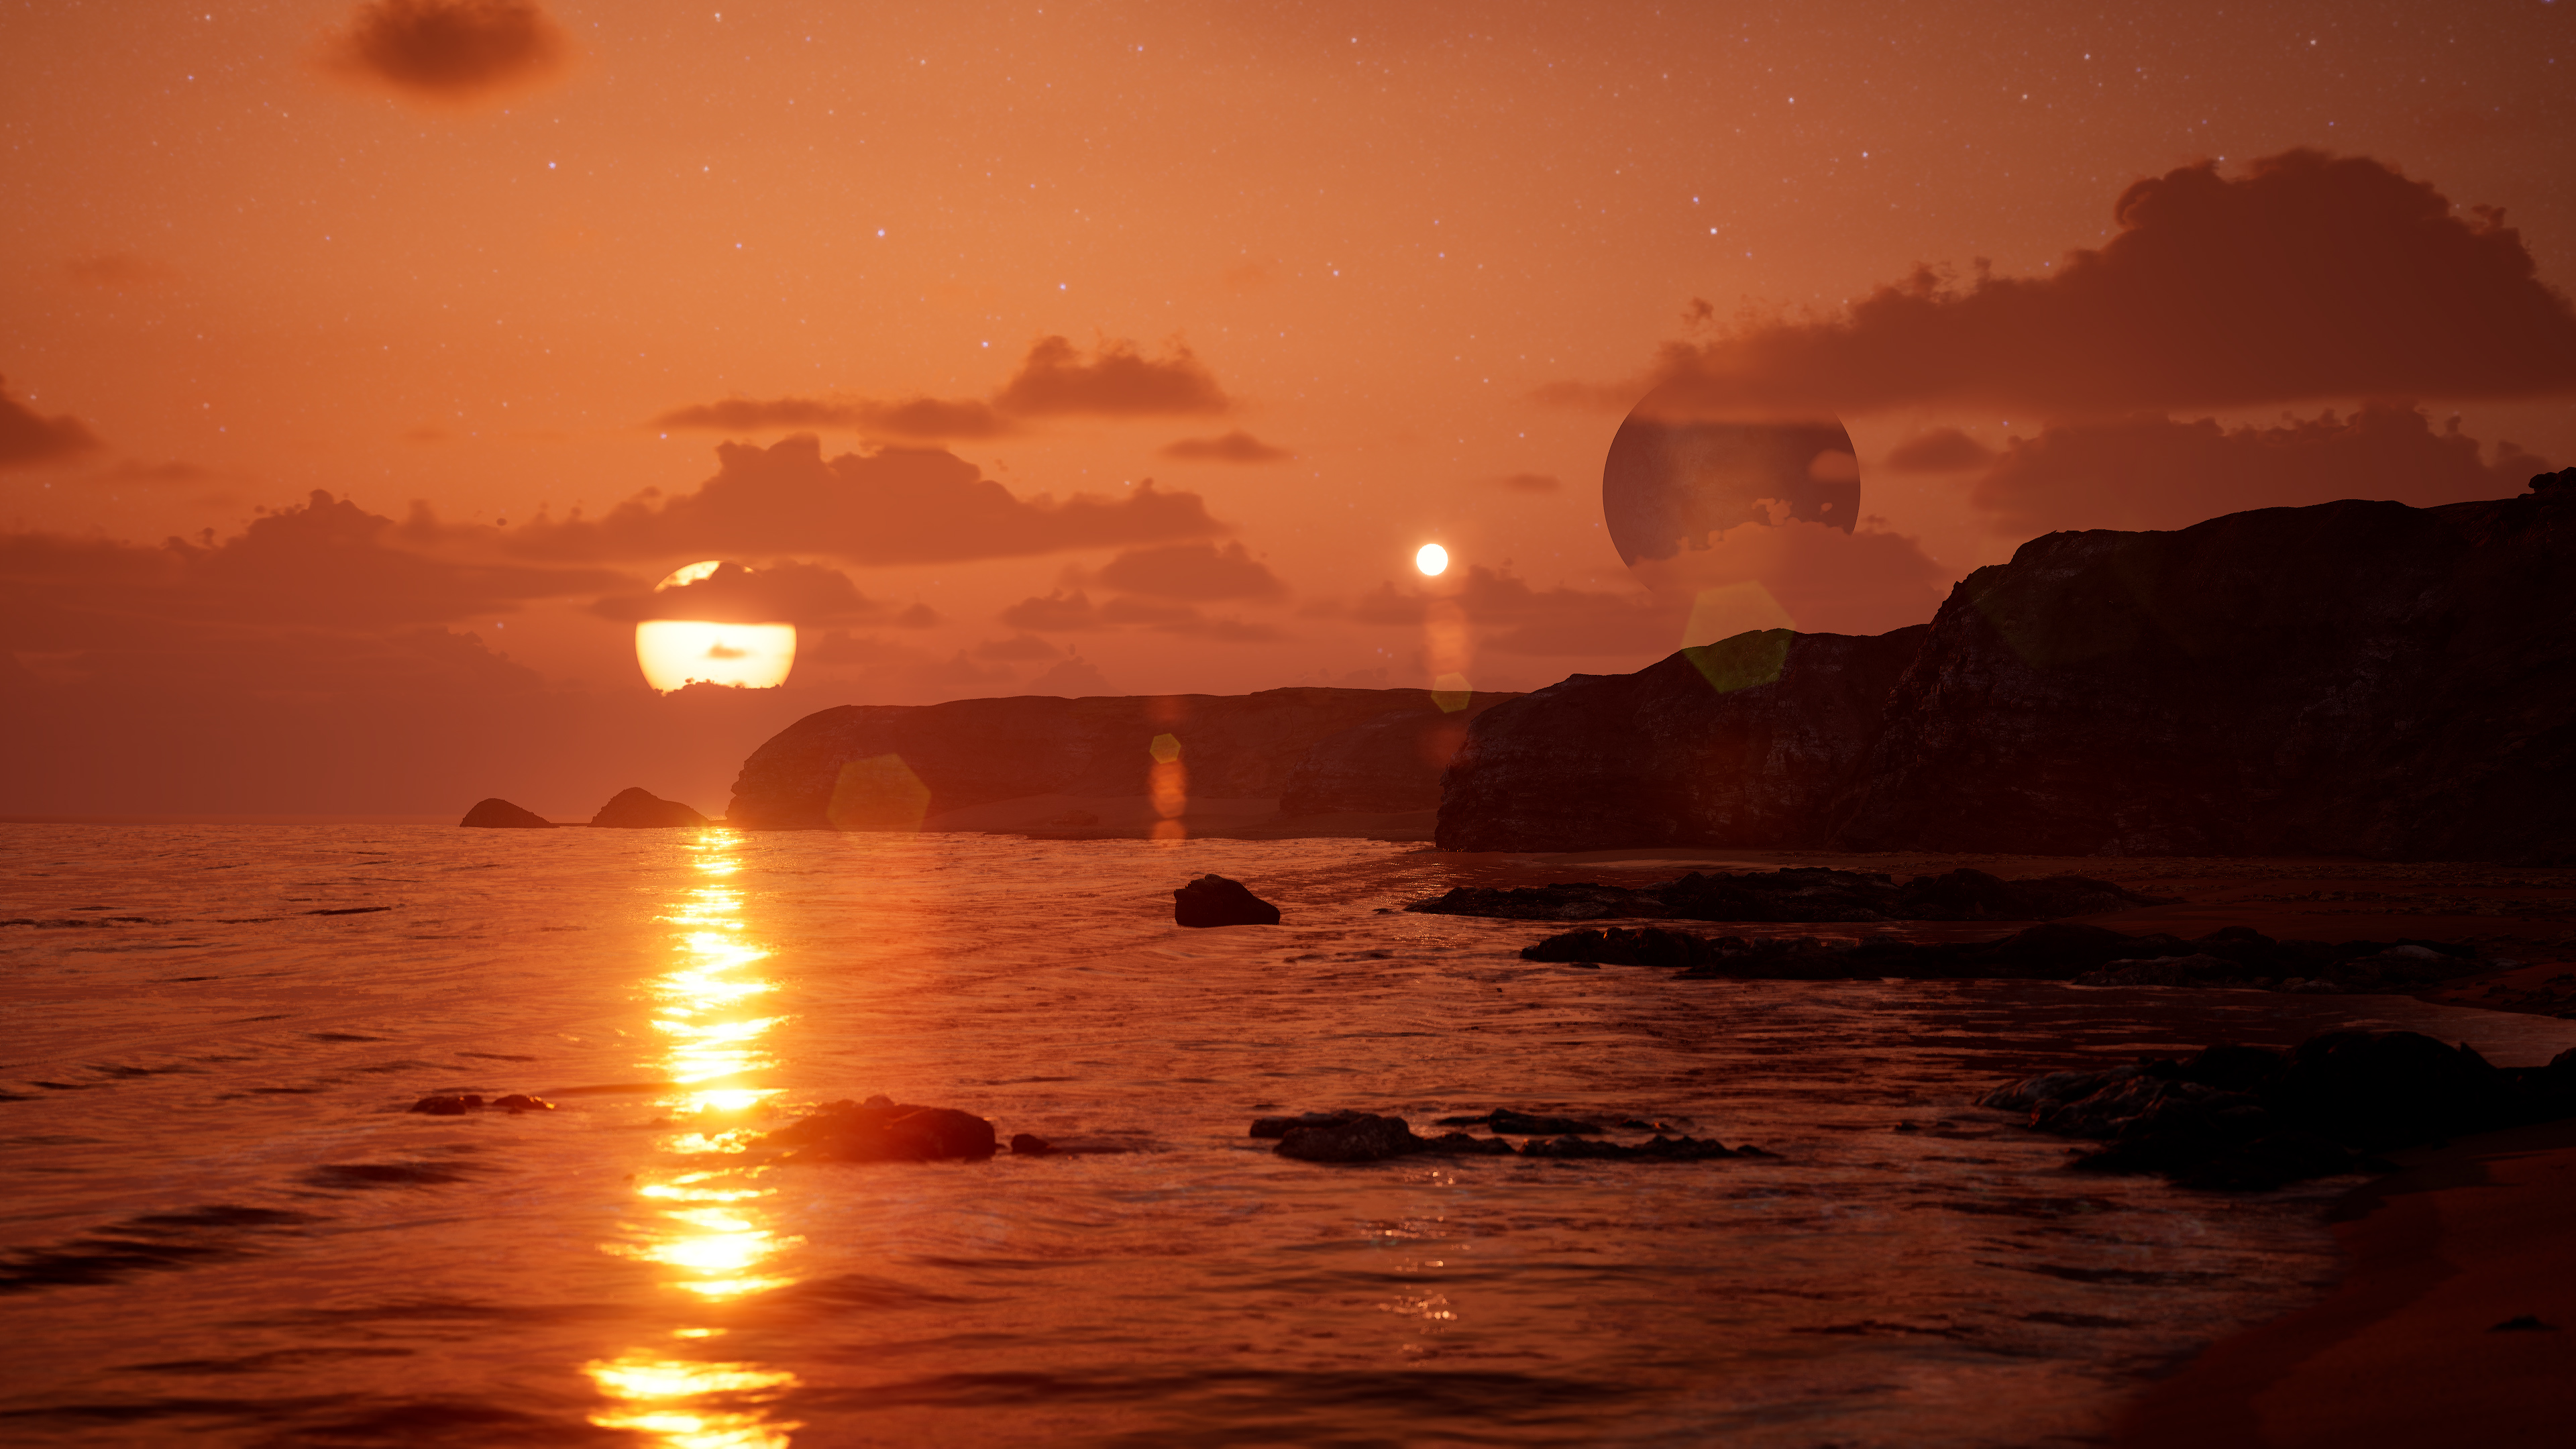
One of the most captivating aspects of creating this animation was achieving a lifelike handheld camera movement. By connecting my iPhone to Unreal Engine via a virtual camera, I was able to physically interact with the virtual space, manipulating the pan, tilt, and location of the camera by moving my phone in real space. It felt almost as if I were physically present within this virtual world, stirring my curiosity about the potential of experiencing this with 3D goggles.
Despite the realistic handheld camera movement creating a unique and immersive experience, this feature did not make the final cut for production, as the client preferred a more traditional tilt shot. Nonetheless, the process of setting up and operating the virtual camera was an immensely rewarding experience, broadening the scope of possible camera techniques for future projects.
Lava Planet
This animation aimed to visualize a ’lava’ planet, a name coined for an exoplanet that resides so close to its parent star that its surface essentially melts, creating extensive oceans of lava. As the moniker suggests, these celestial bodies experience extraordinary temperatures, transforming their rocky surfaces into a liquid state. These planets offer scientists a unique yet challenging environment to study, considering the severe heat and inhospitable conditions they possess.
The animation commences with our planet eclipsing its star. As the camera gracefully orbits the planet, the host star gradually comes into view. To achieve this, I utilized the Space Creator Pro once again. Notably, you can observe the lava’s luminescent features even on the dark side of the planet.
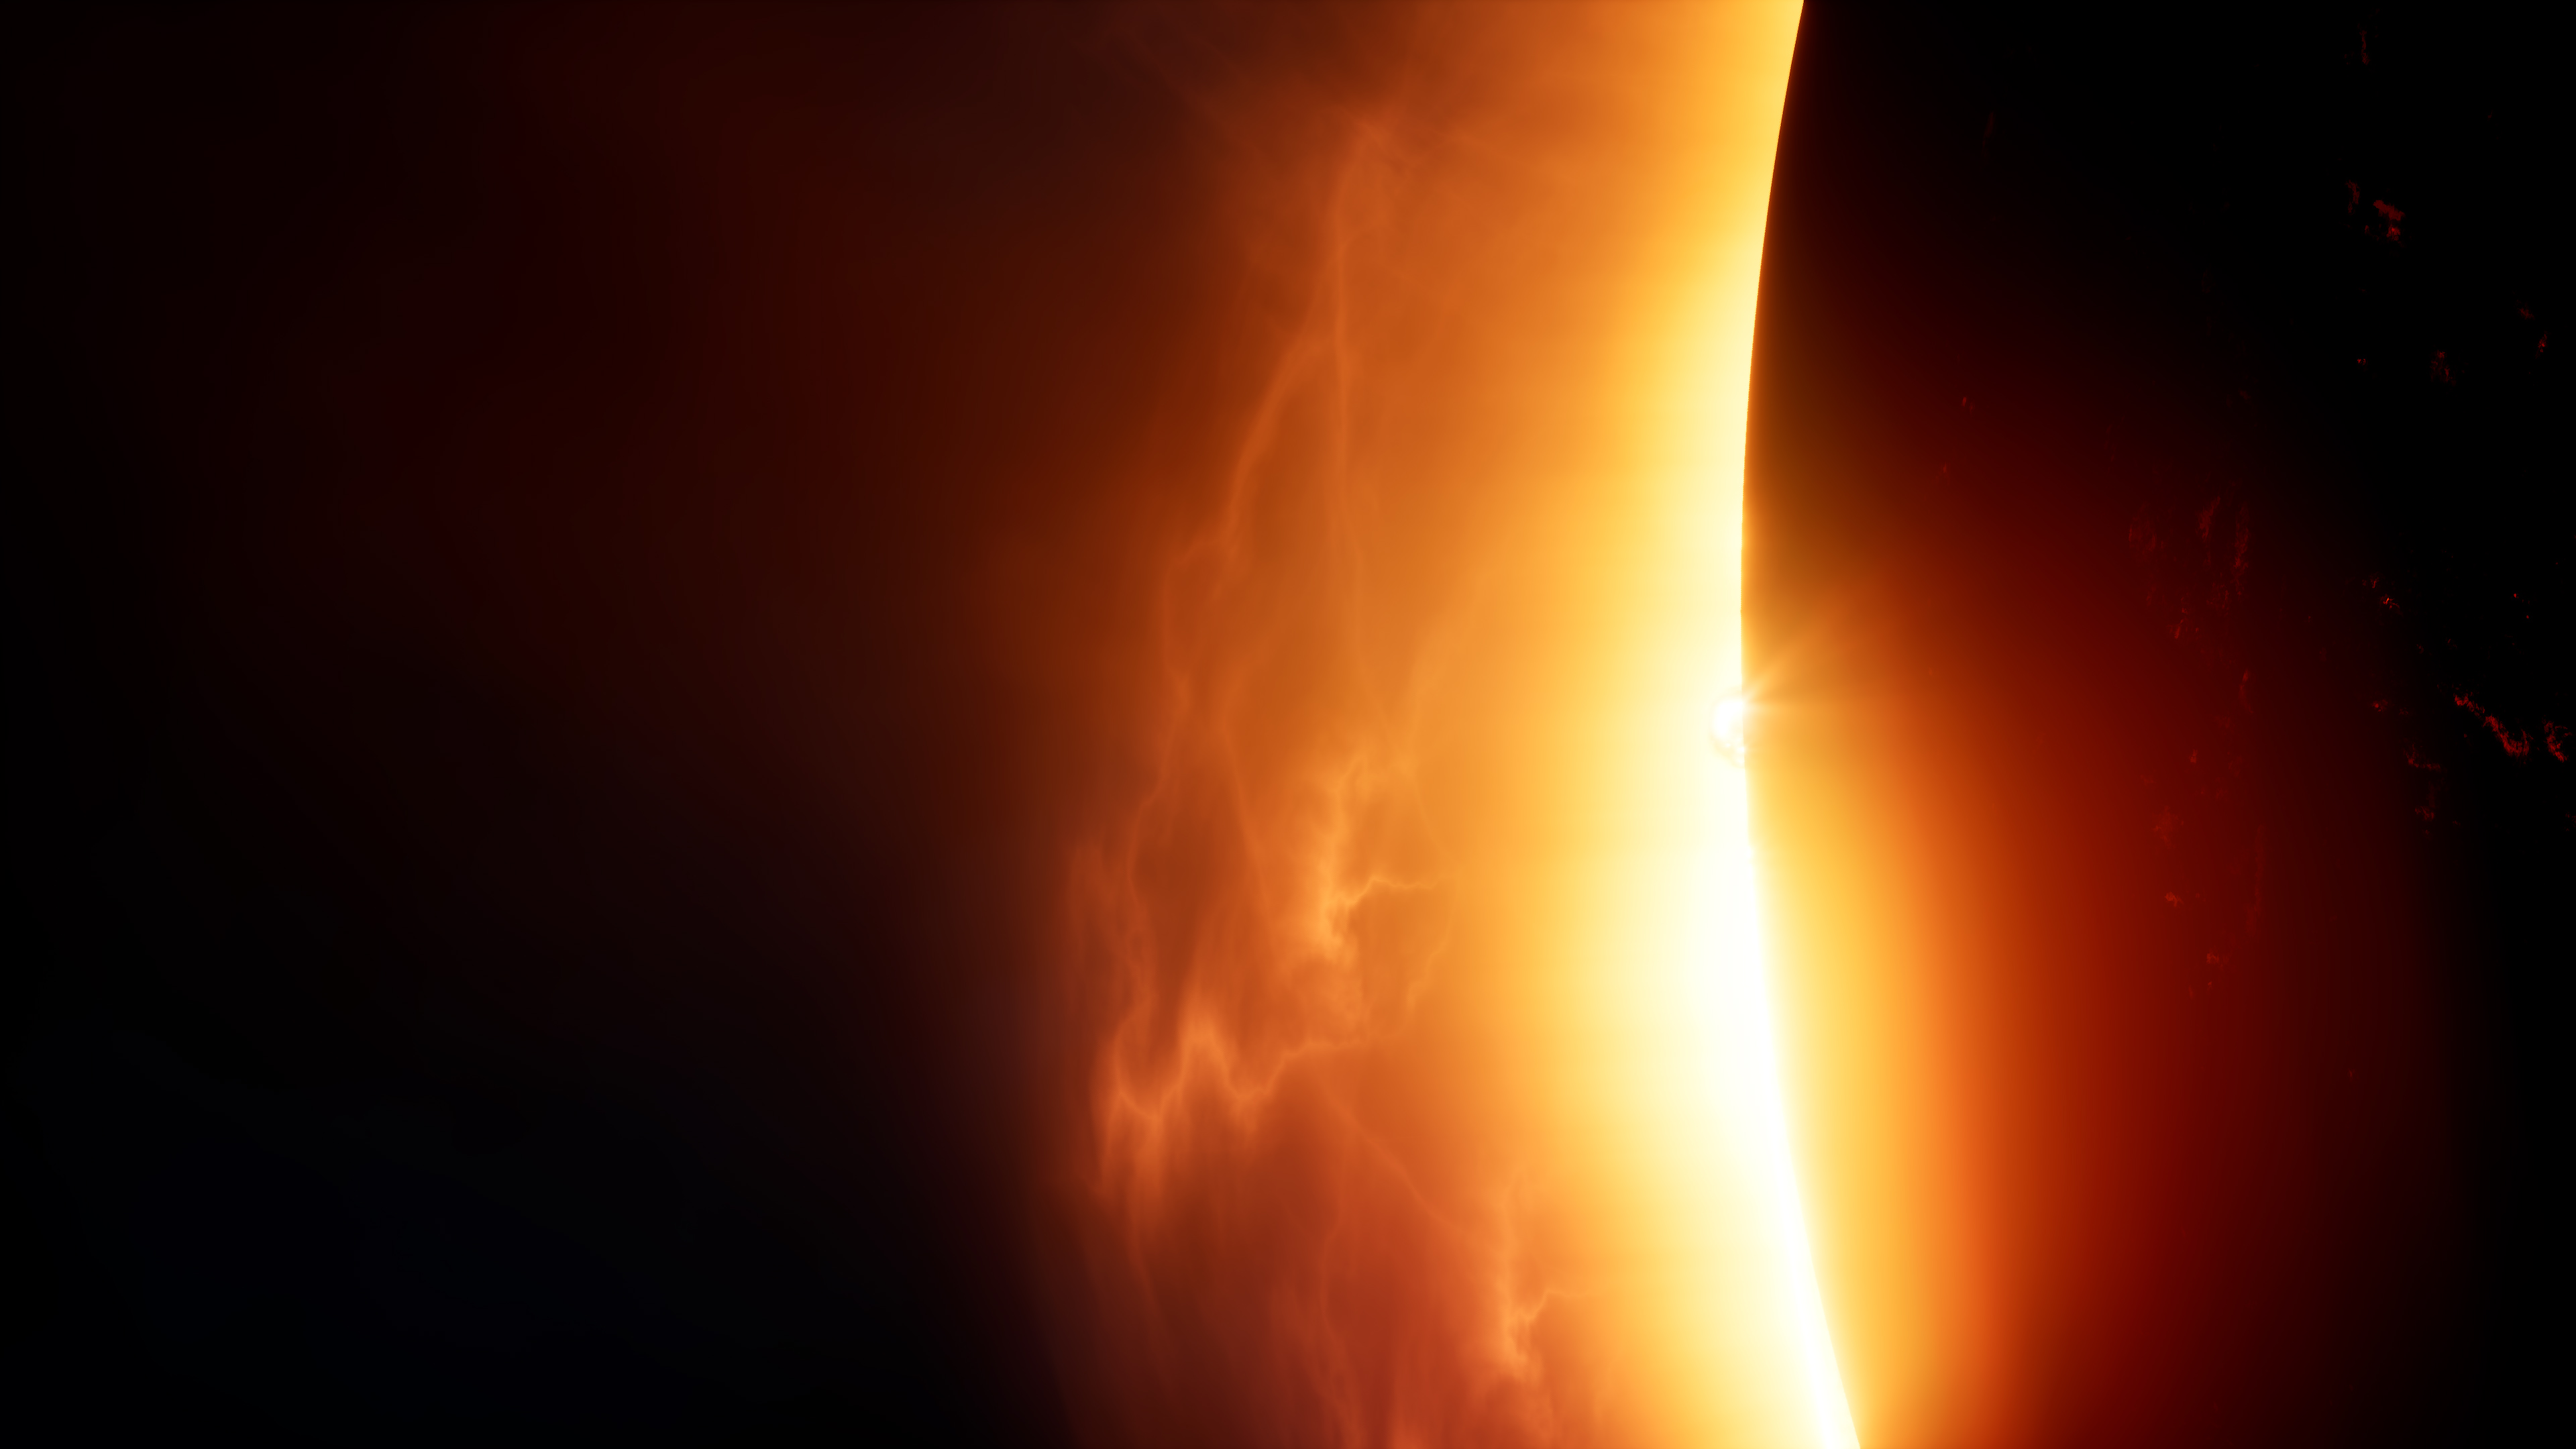
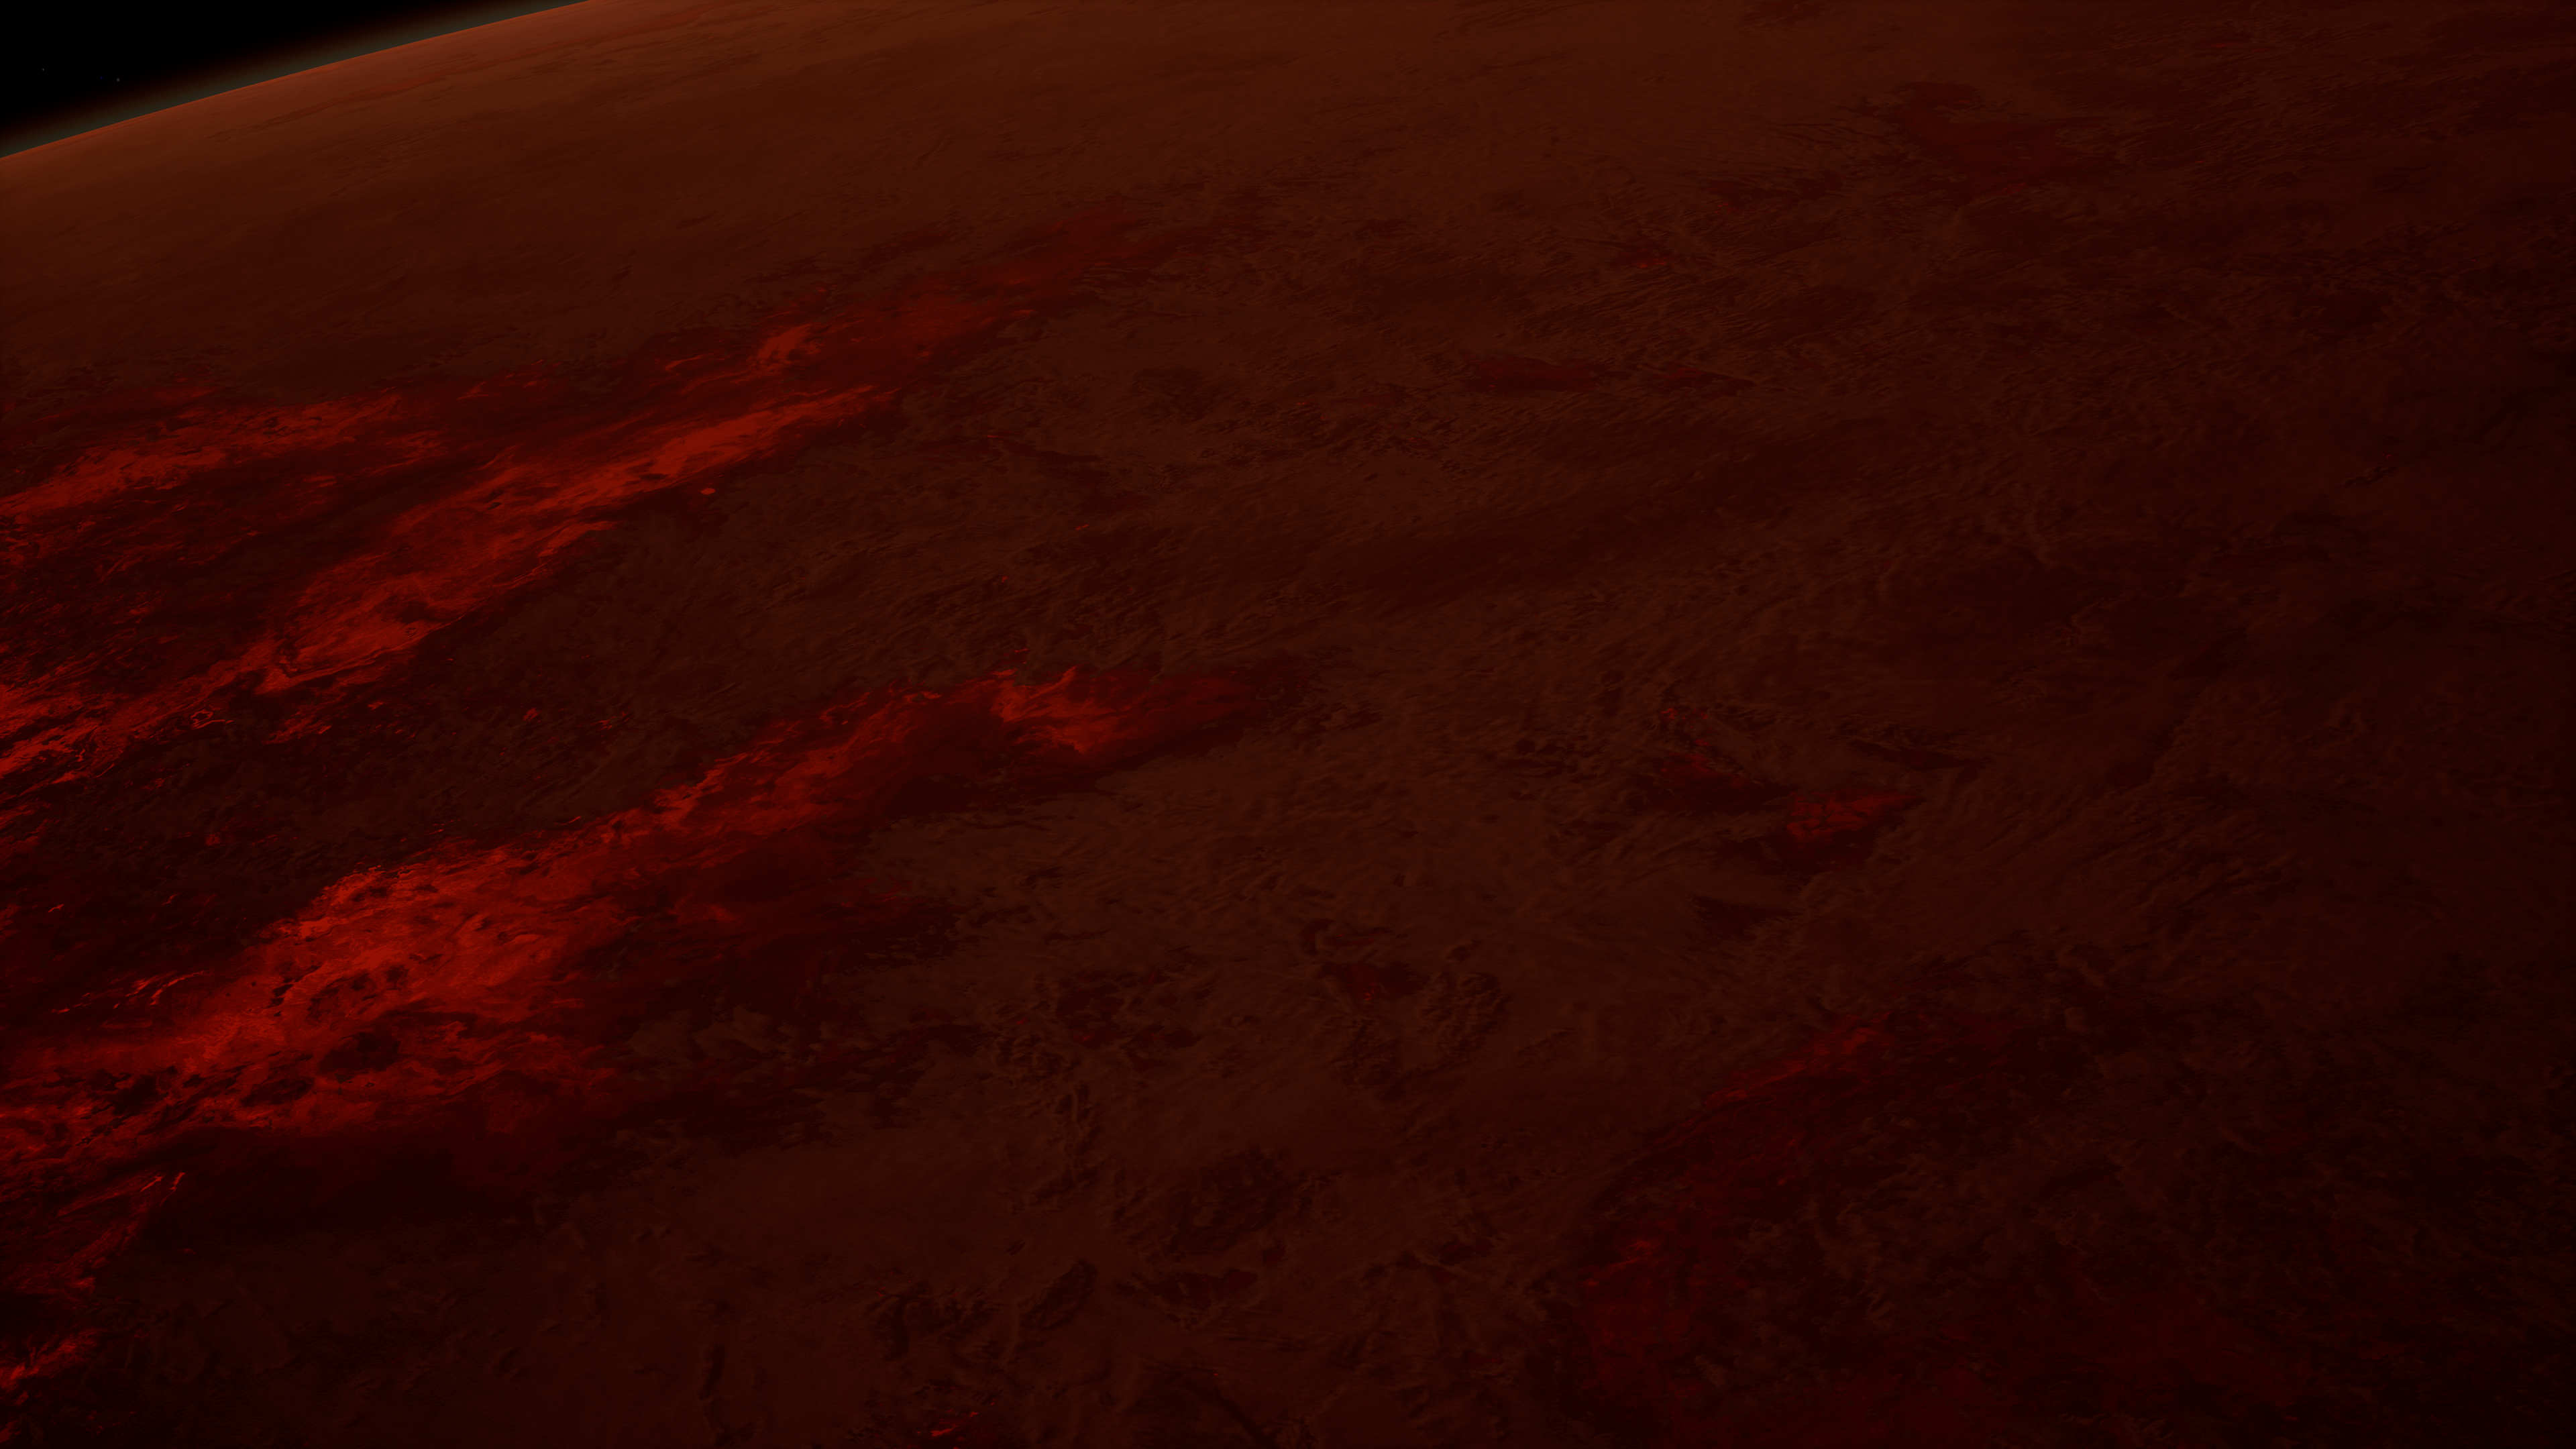
Following this, we embark on a flight over the planet, at a safe distance of hundreds of kilometers. This reveals the distinctive geology and molten characteristics of this liquefying rocky planet. For this phase, I took full advantage of Space Creator Pro’s capability to generate custom procedural planets.
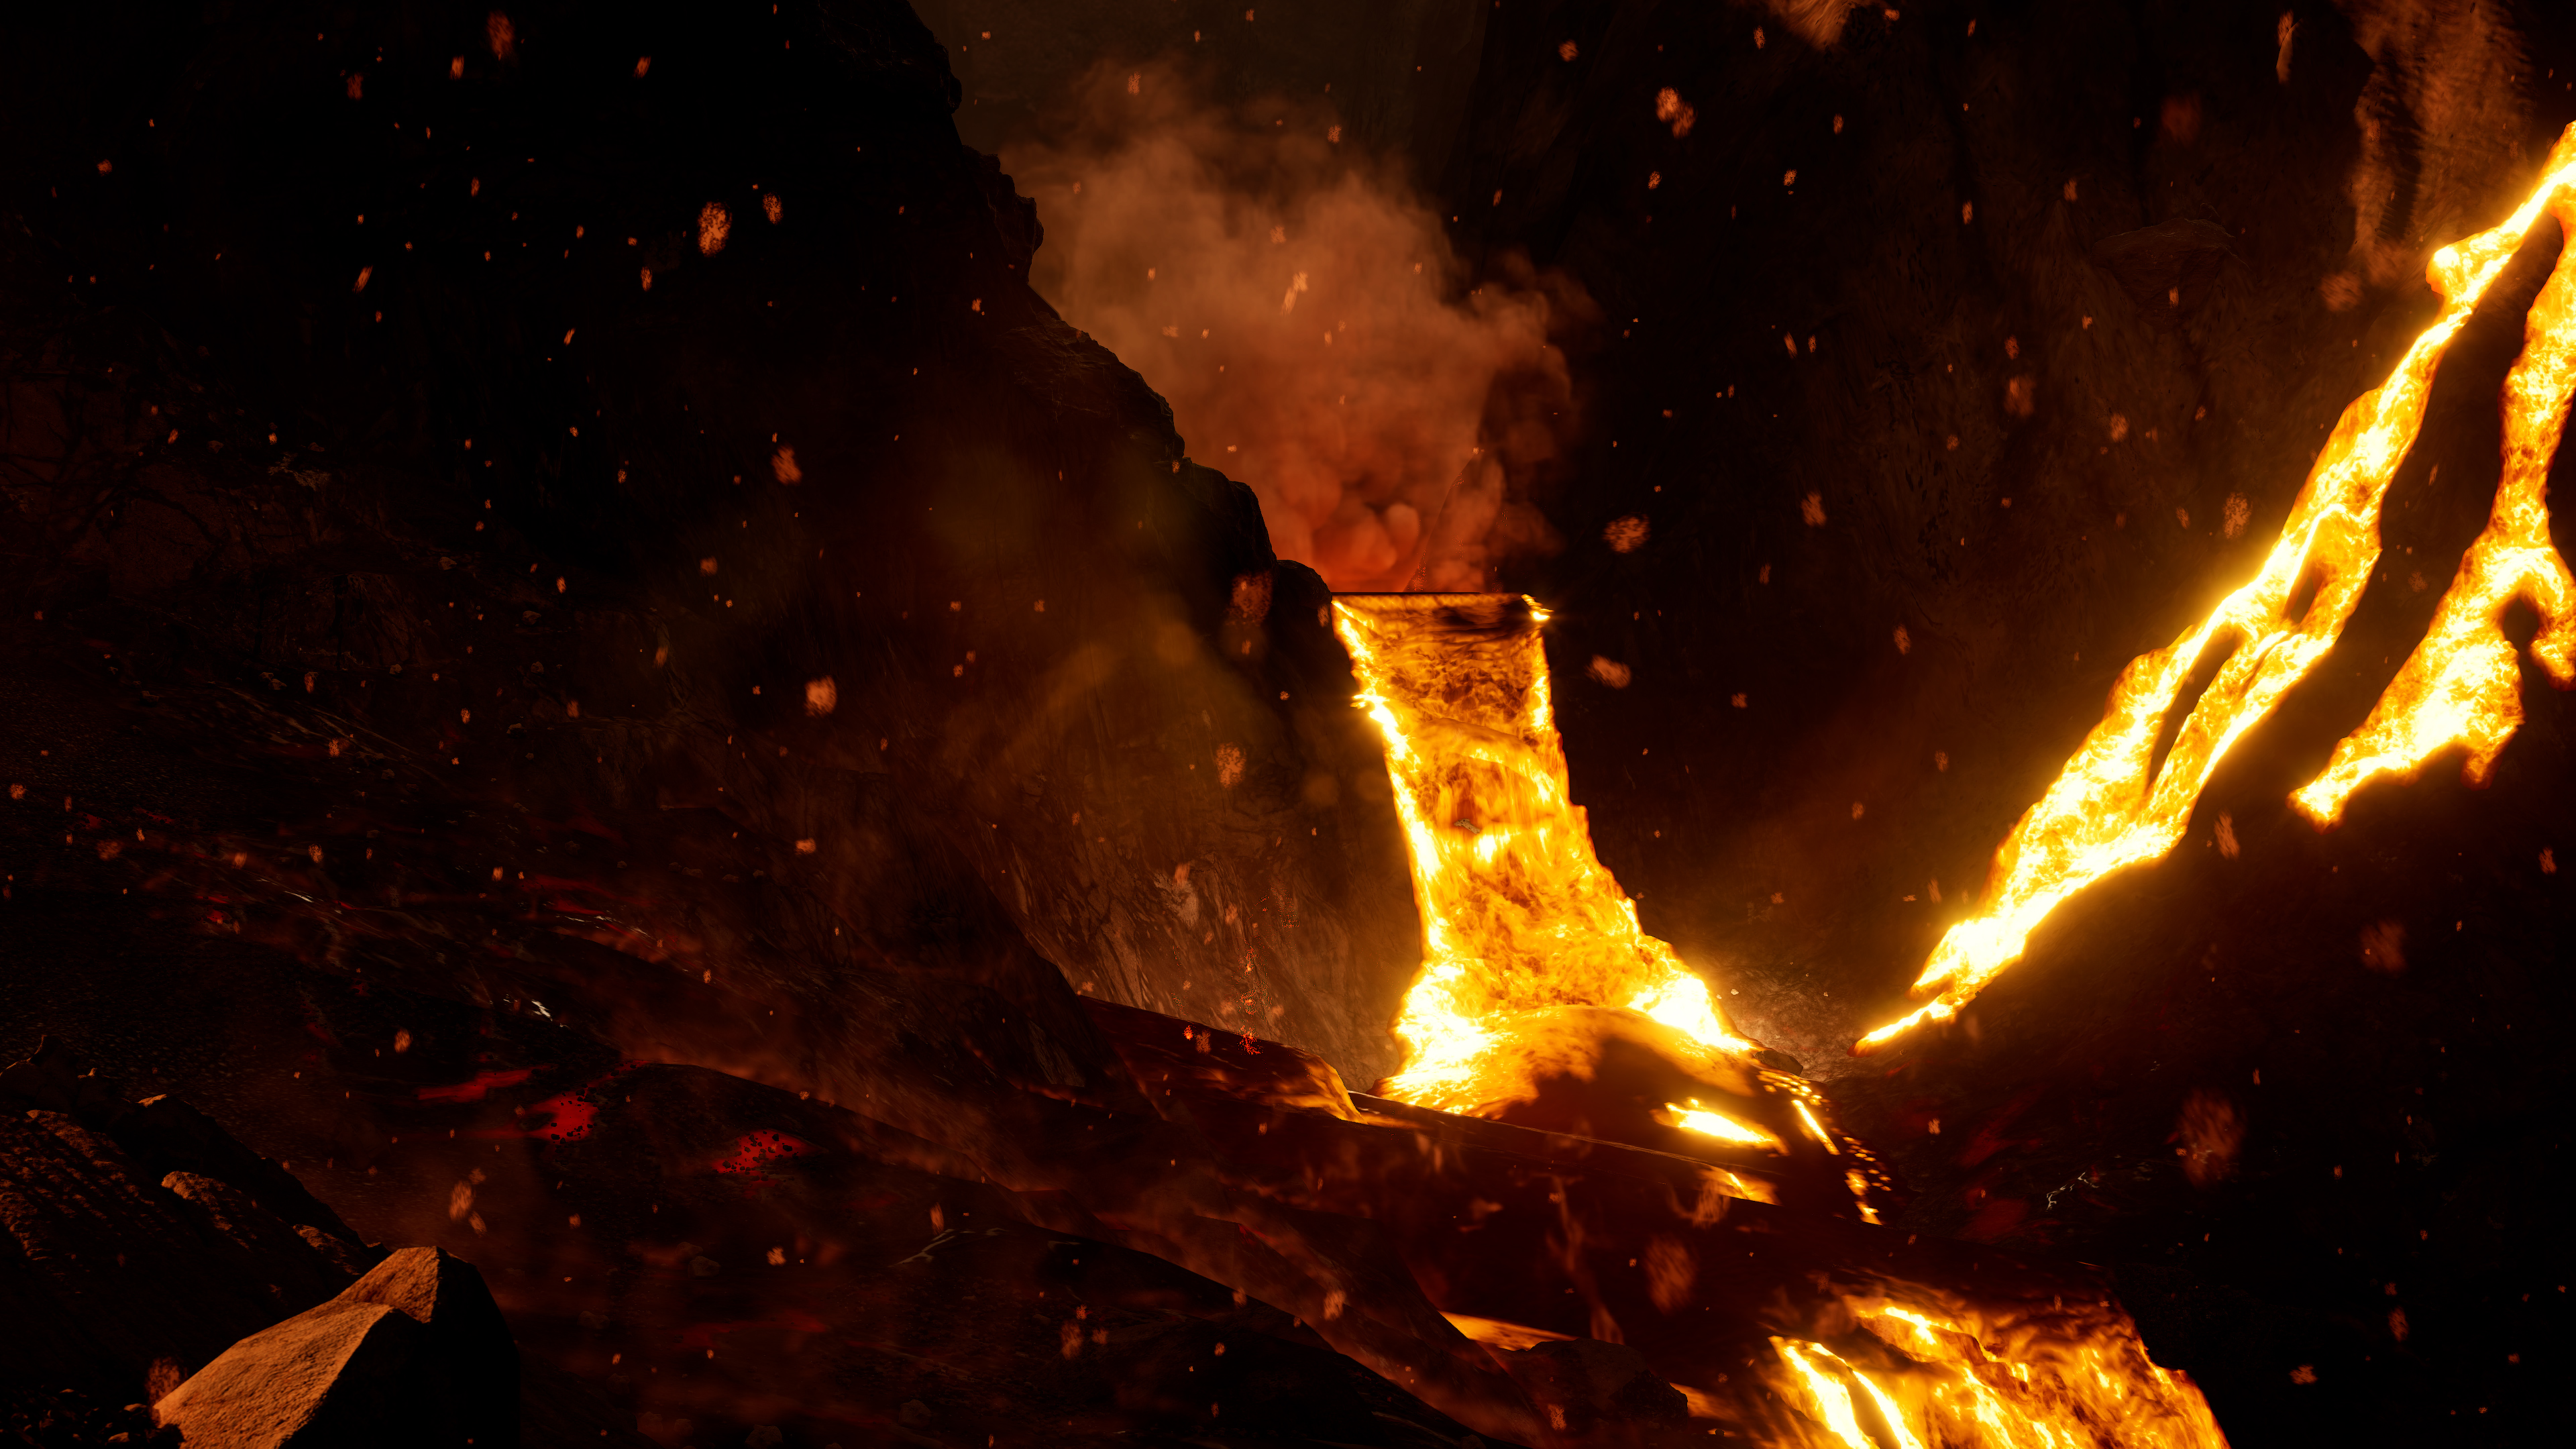
The next animation is quite complex, featuring a local landscape with flowing lava rivers. In the background, you can observe a volcano from which the lava originates. The animation depicts two rivers of lava, one flowing from a mountain ridge on the right, merging into the main lava river.
My creation process started with World Creator, which I used to mold steep mountains and volcanoes. I then developed an auto-material utilizing rock textures from volcanic regions, primarily Iceland. I filled the landscape with photogrammetry rocks from Quixel Bridge and animated a dolly in sequence with a rail-placed camera.
Finally, I added an effect that resembles ash falling from the sky, achieved by modifying the size and color of a snowfall preset in Ultra Dynamic Sky.
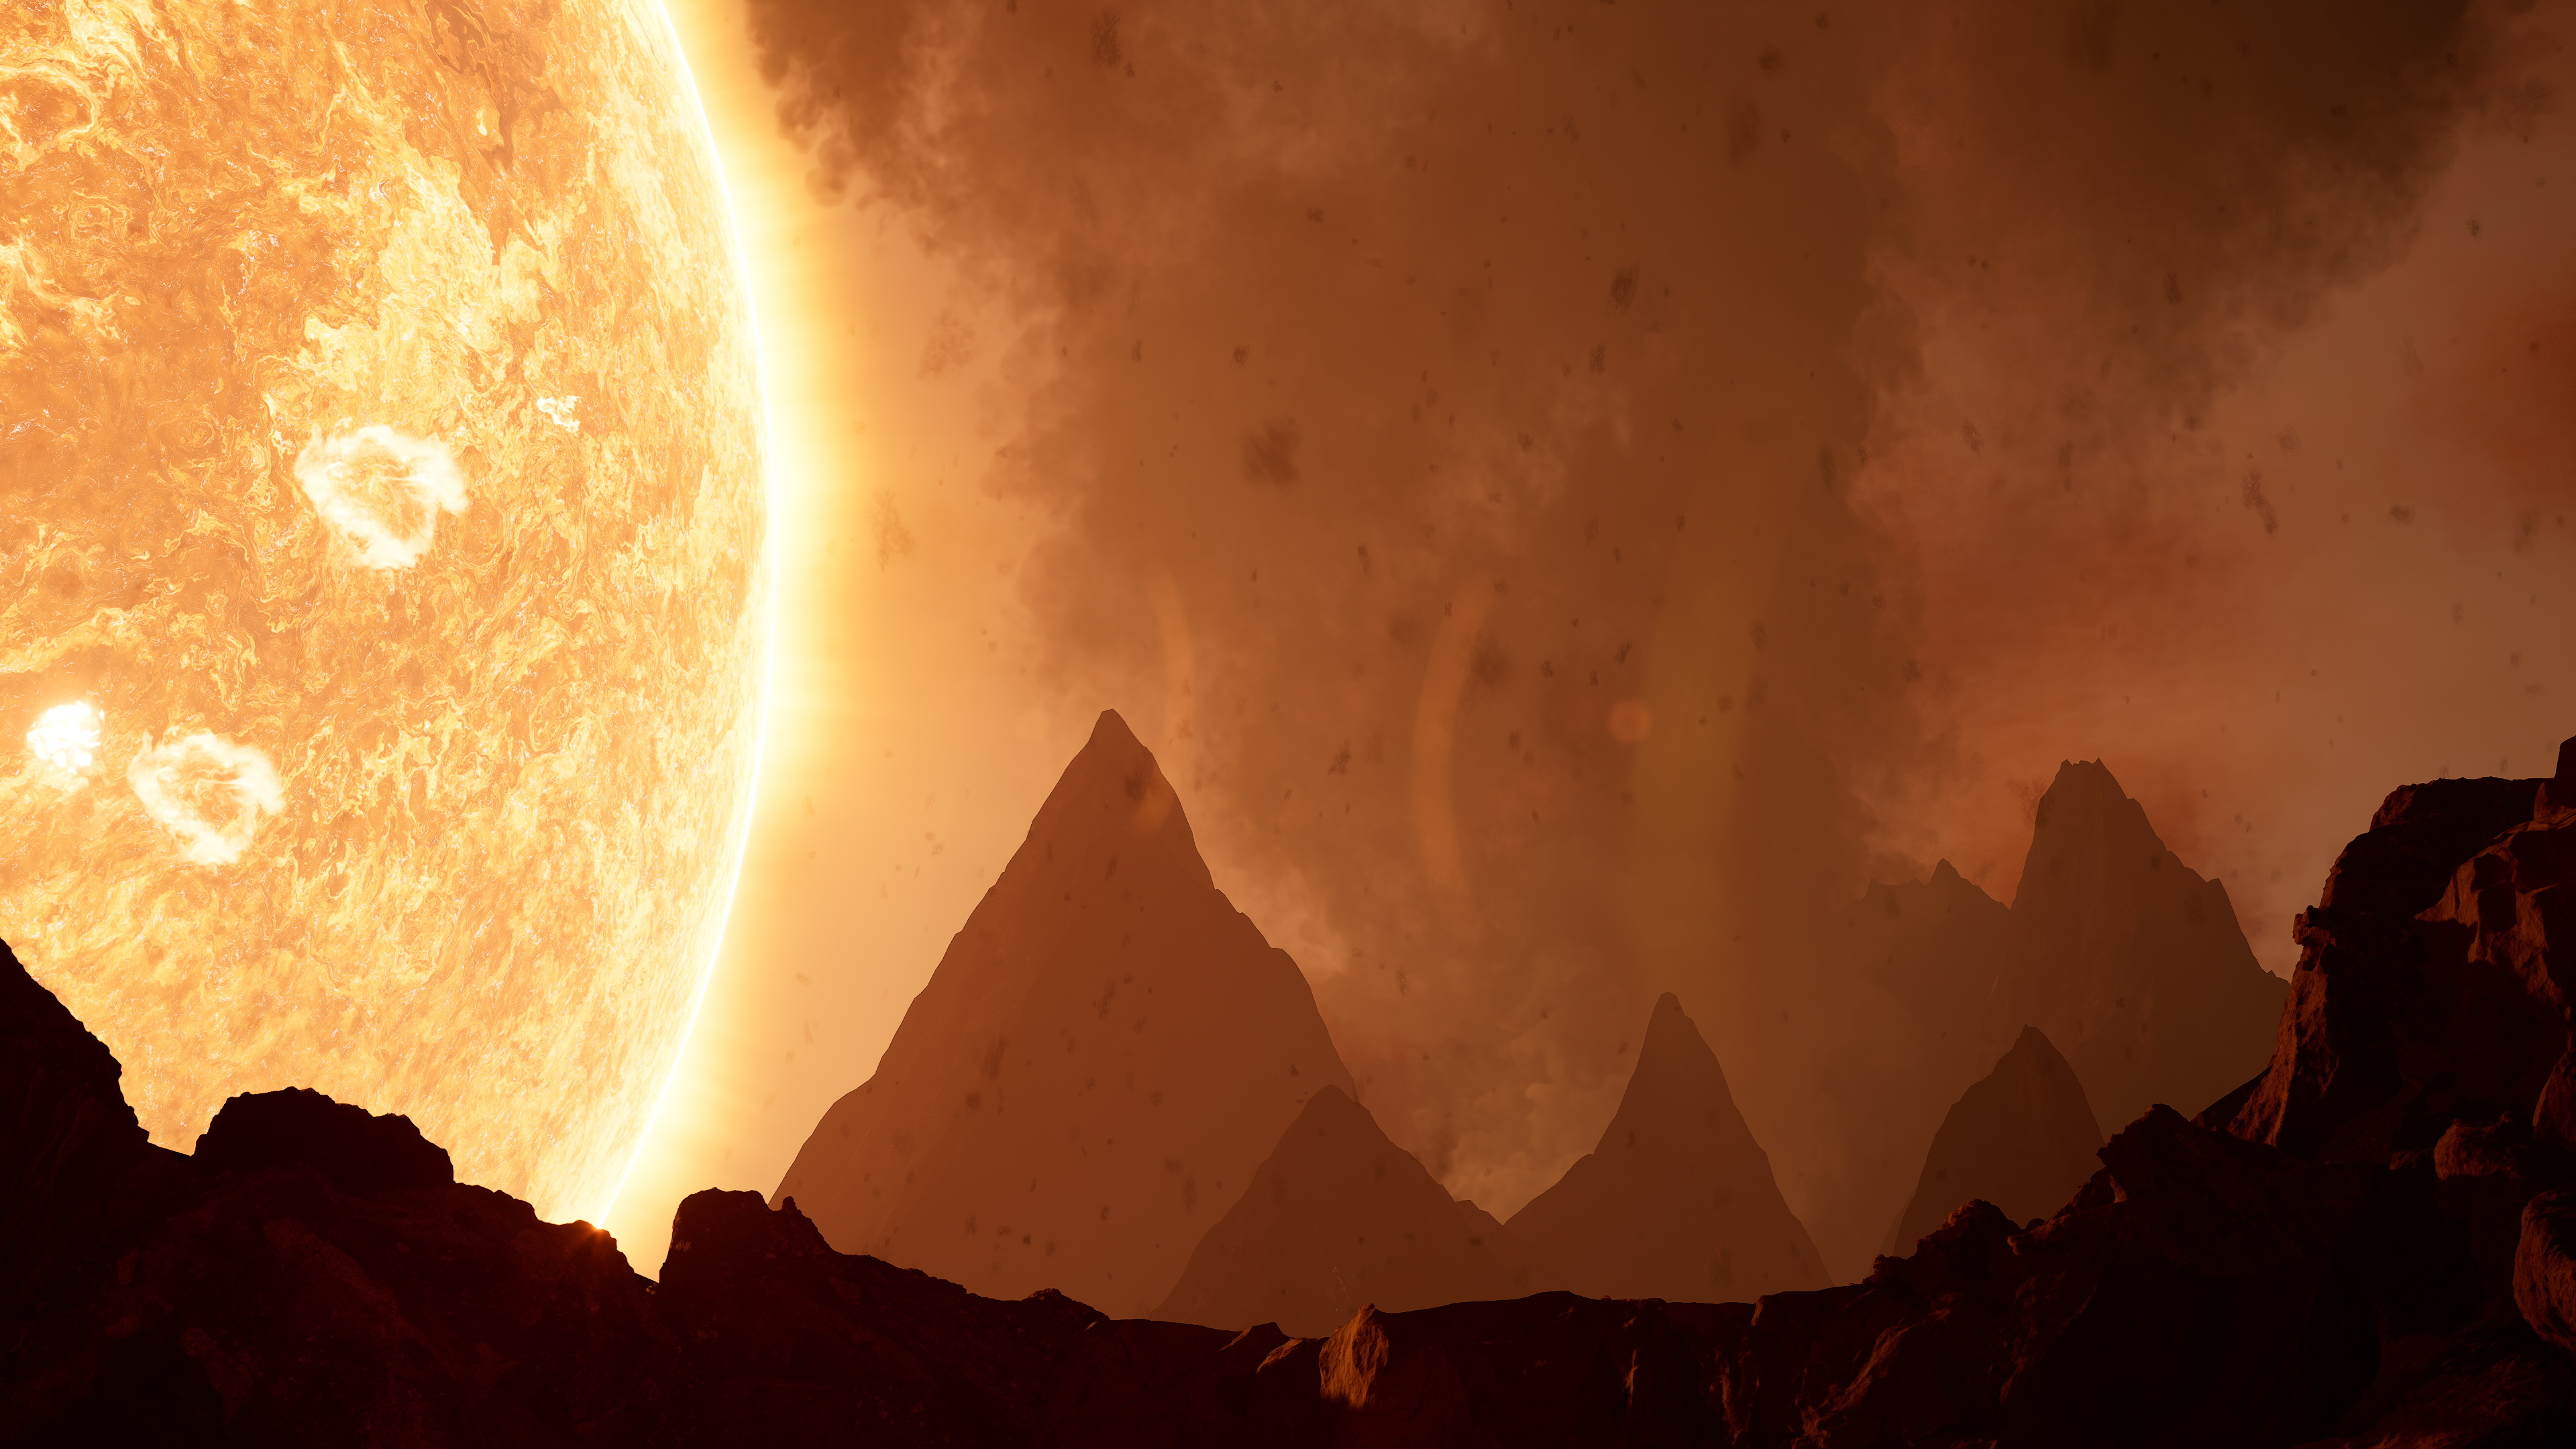
The subsequent animation once again emphasizes the proximity of our planet to its parent star. It starts at the edge of a volcanic crater, gradually dolling in. In the background, we see an enormous orange star showcasing a variety of solar activities like coronal ejections and explosions. In the mid-ground, we see a volcano that just erupted, ejecting lots of thick smoke in the air.
A notable tip for your workflow: when exporting your landscape from UE5 to Embergen, there’s no need to translate all assets to zero coordinates in UE5. Once in Embergen, you can simply translate everything so that you move the region where you want to simulate the smoke to zero coordinates in Embergen.
Diamond Planet
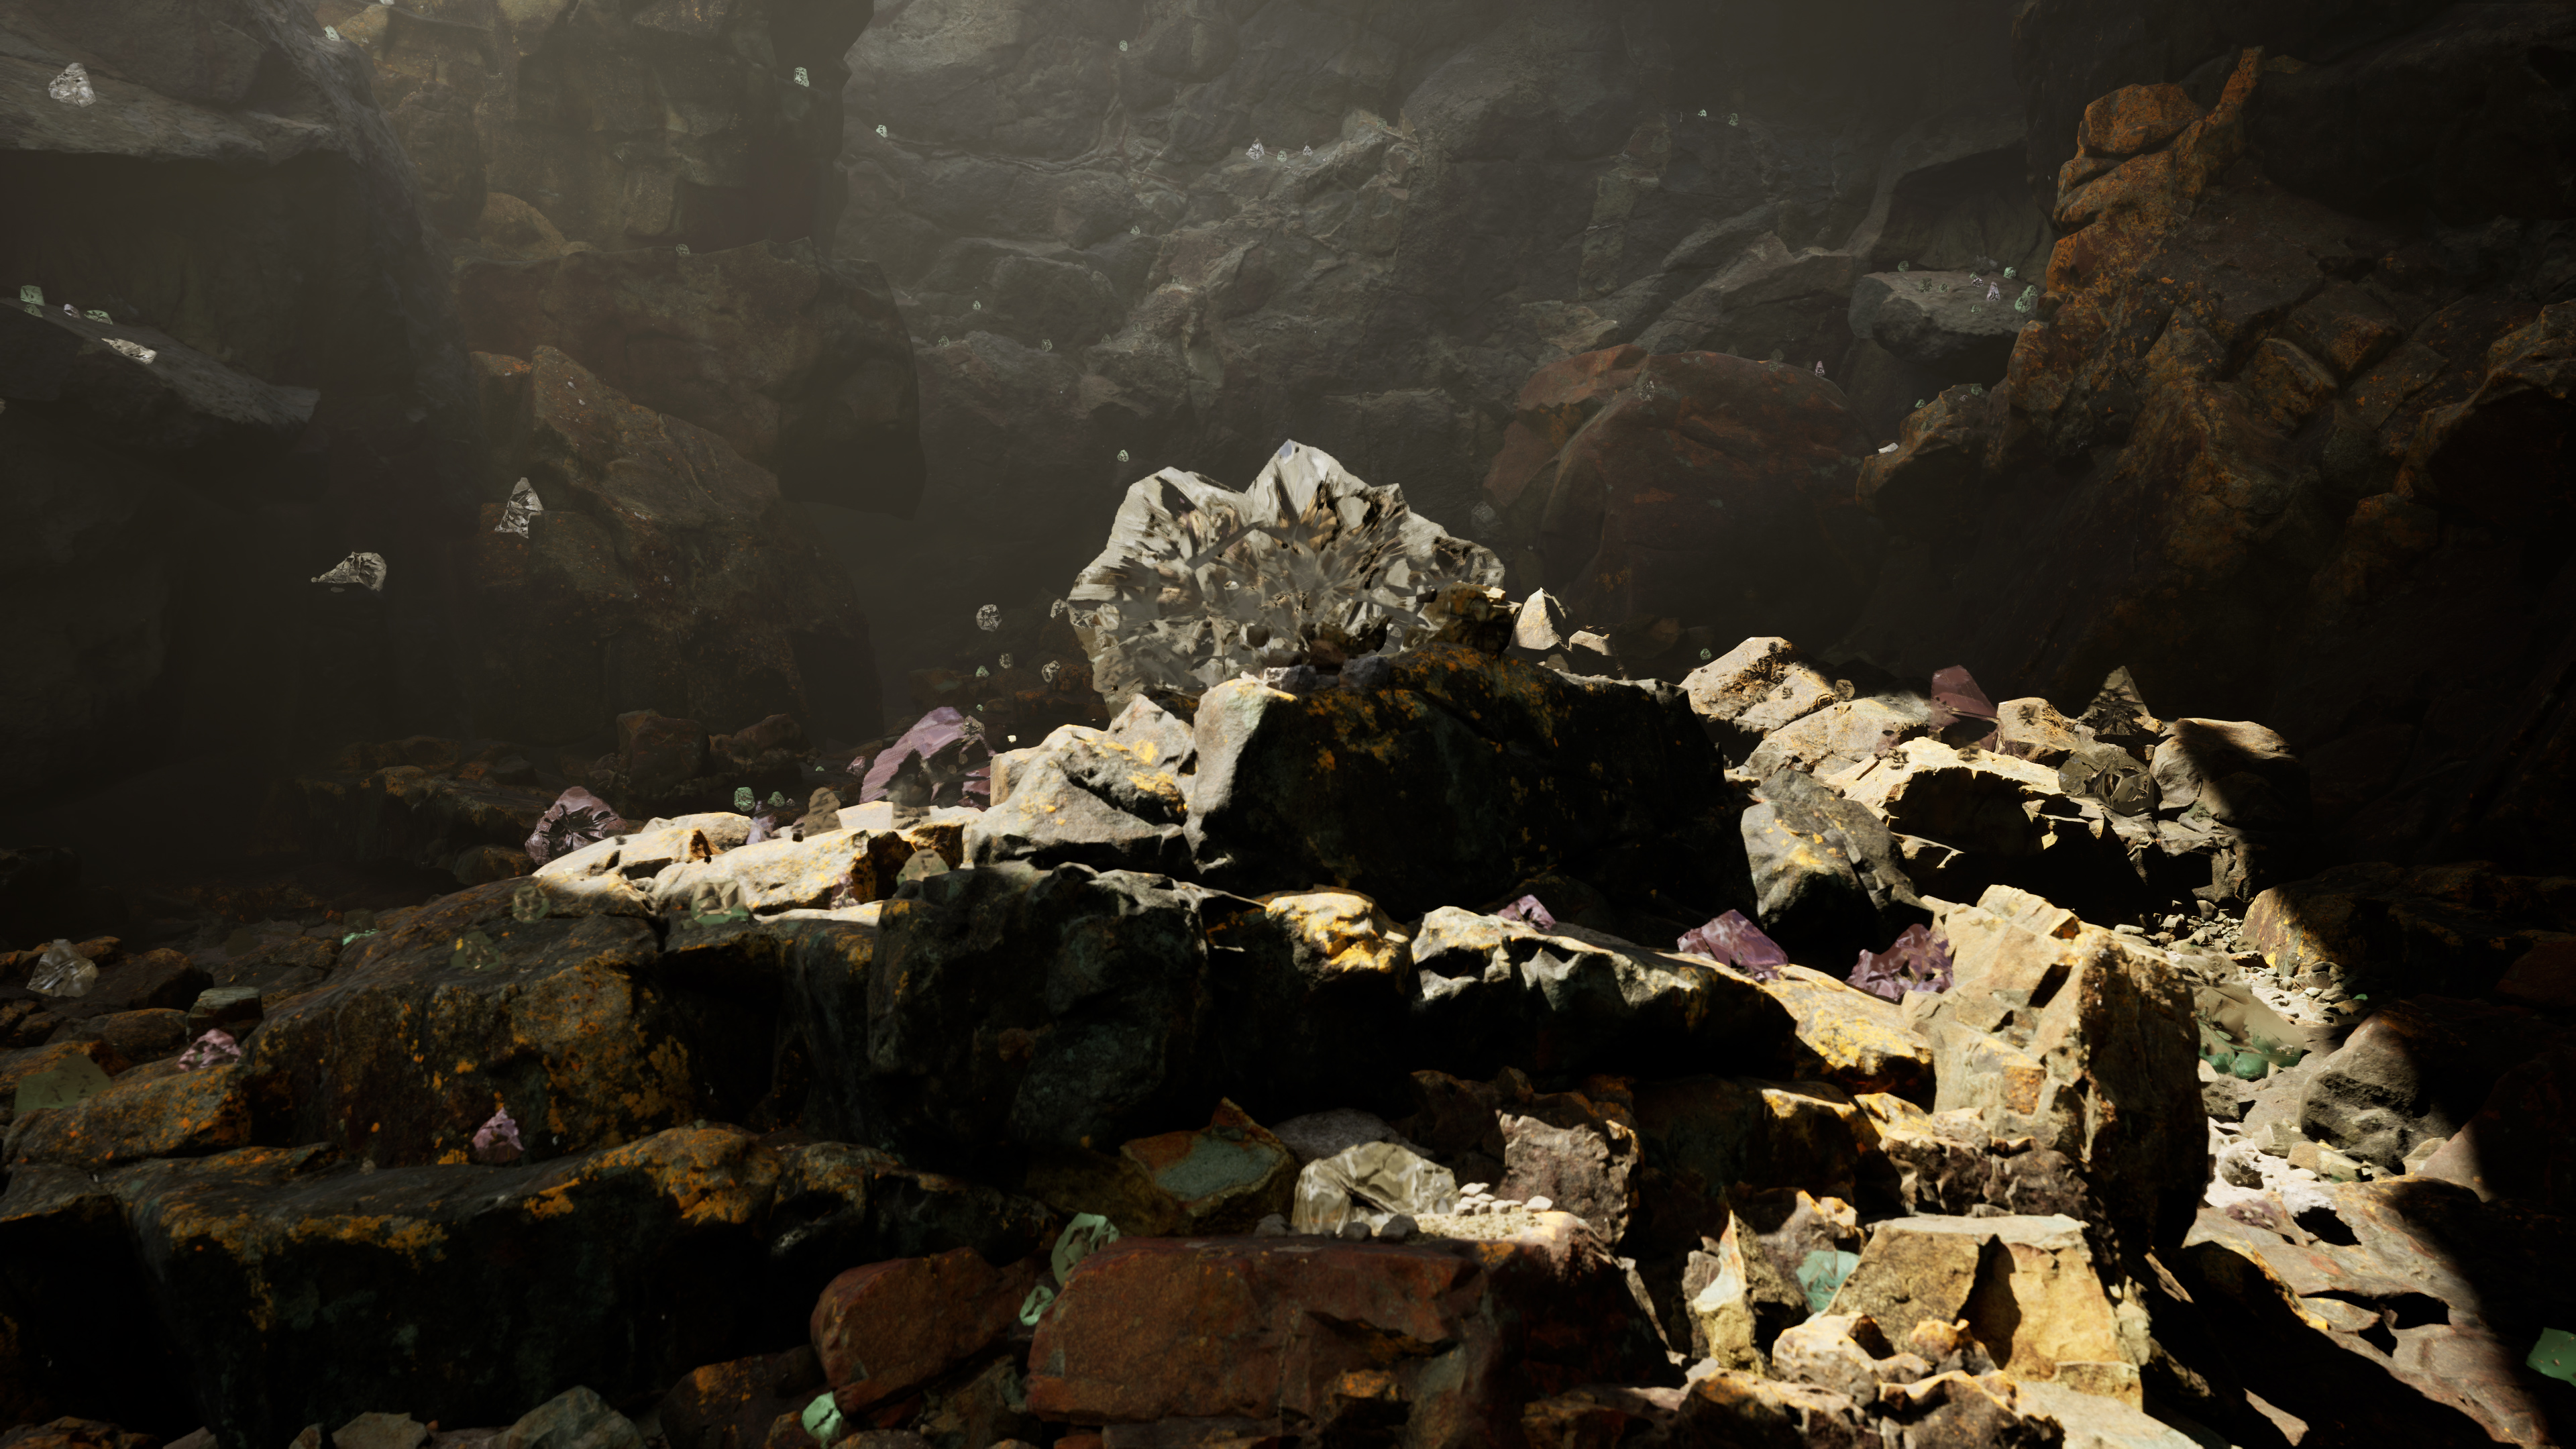
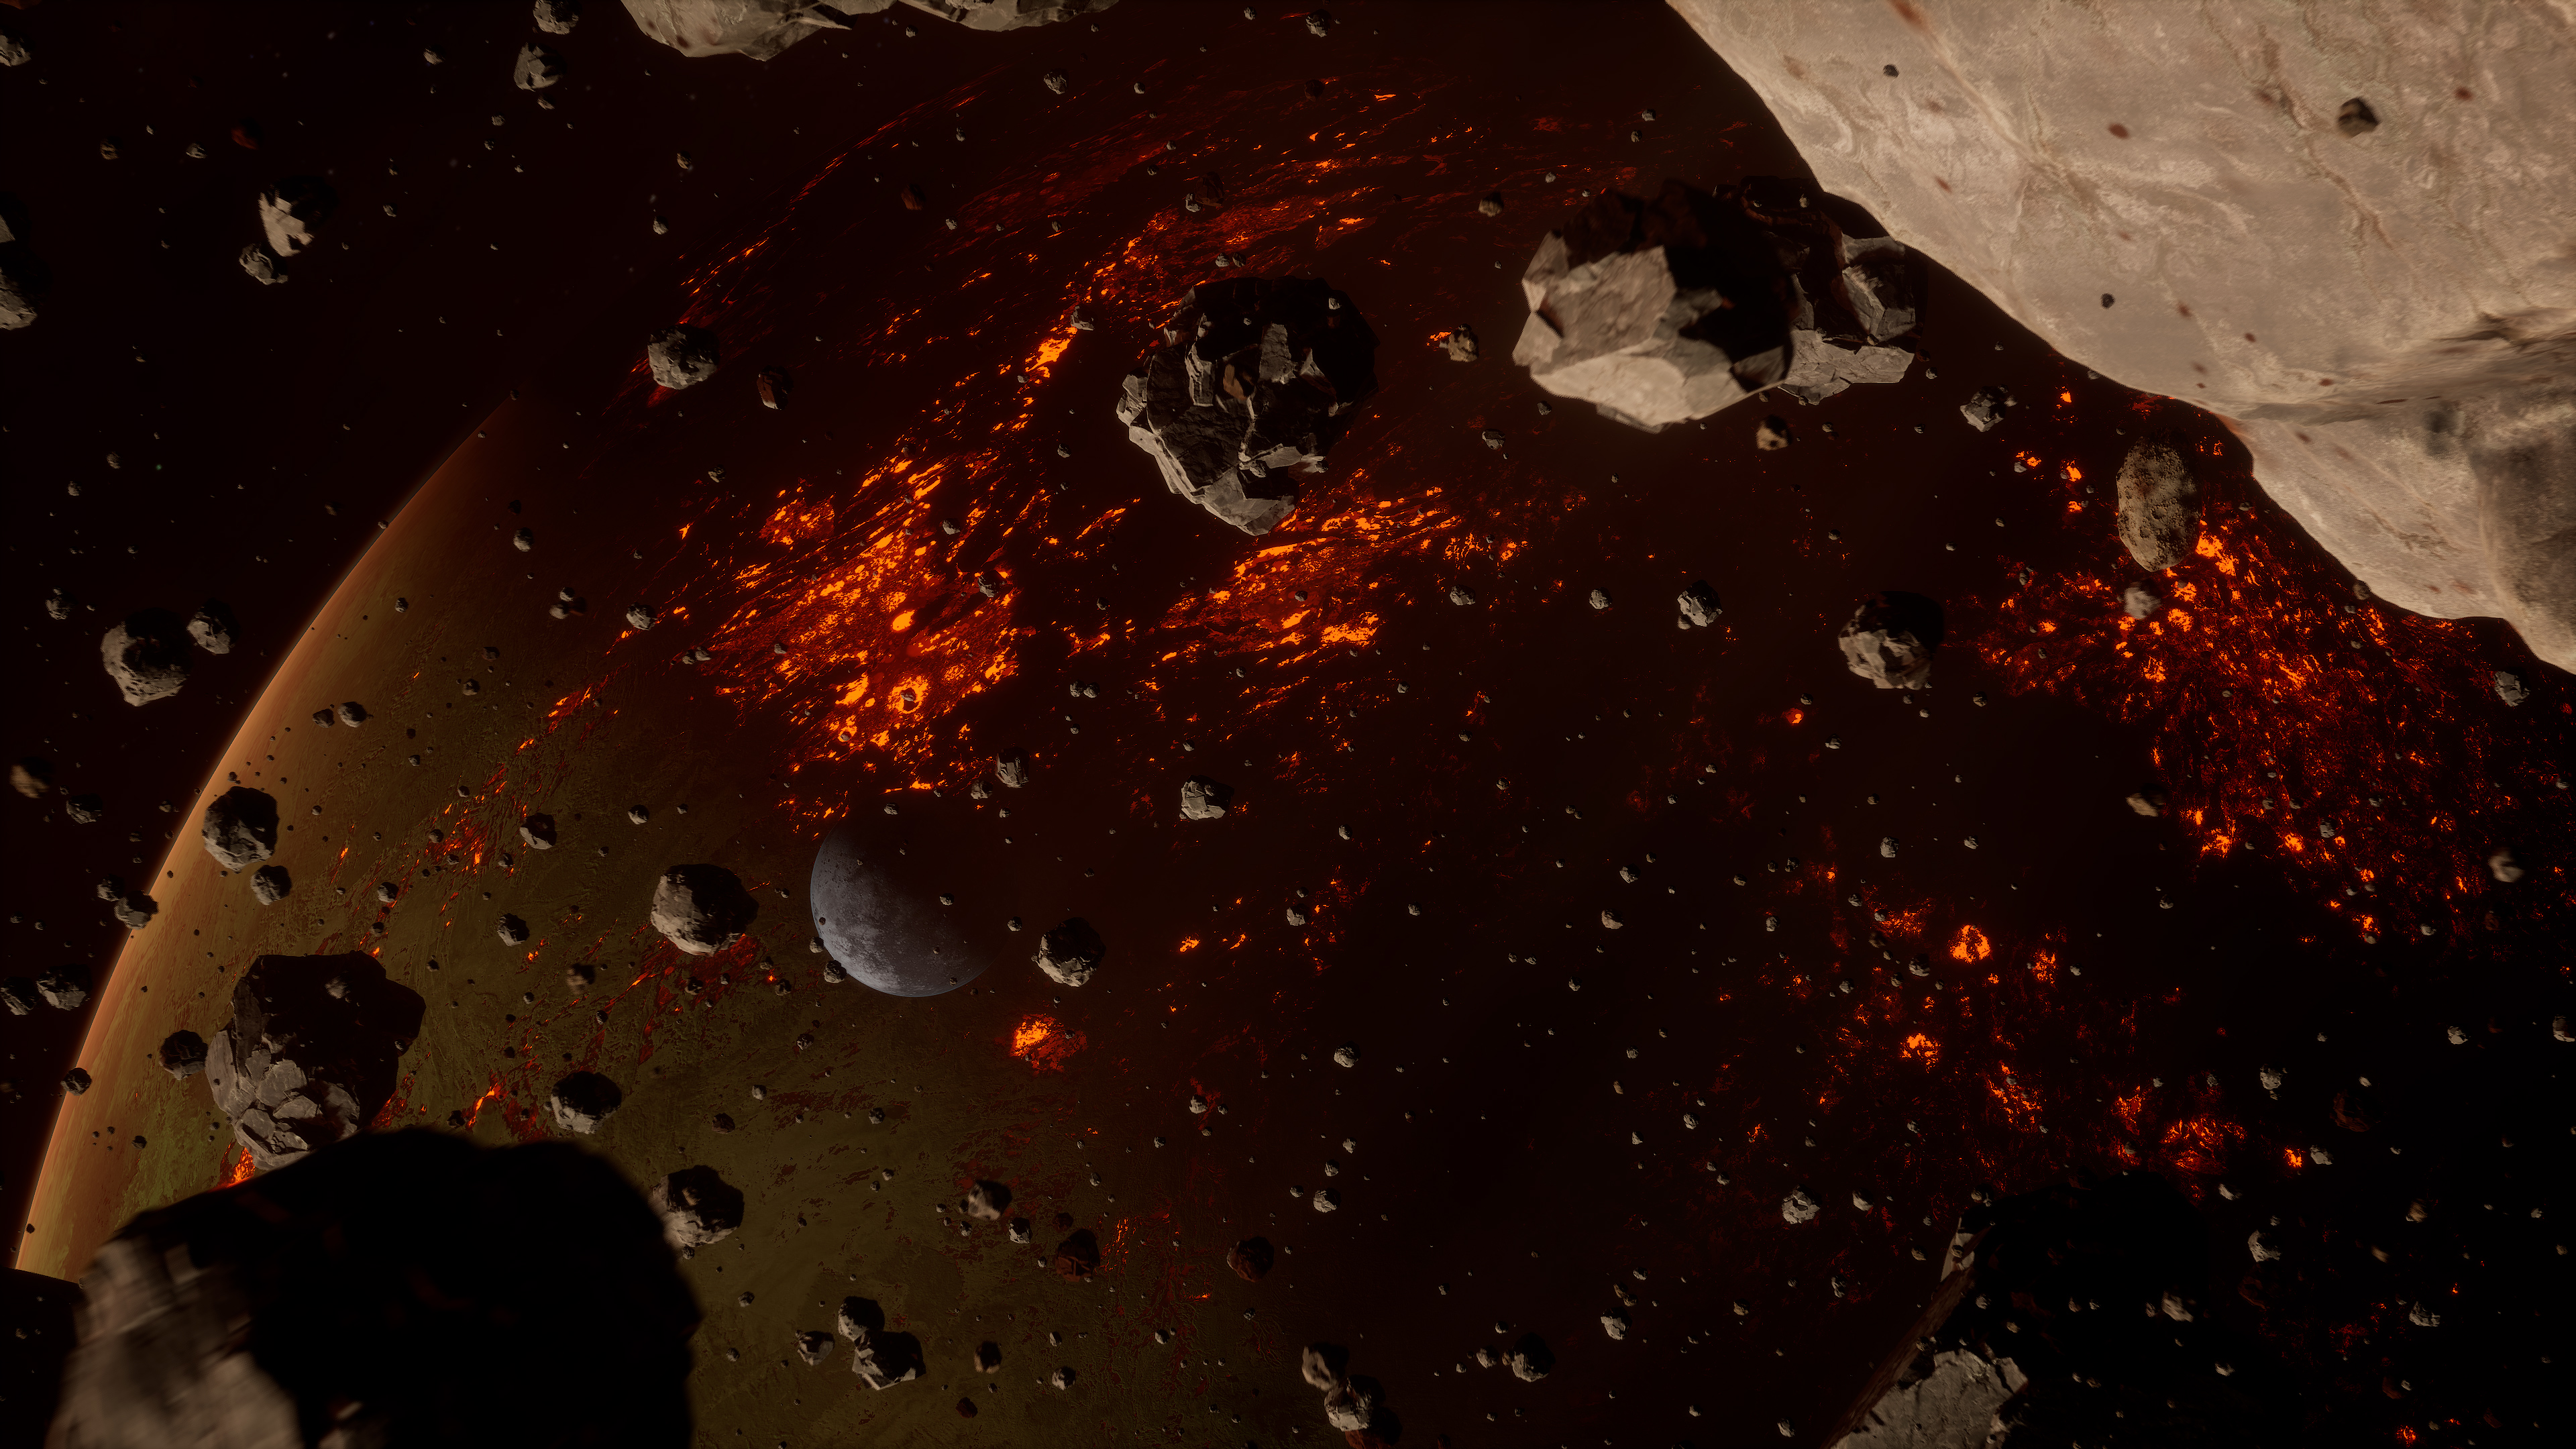
The concept for the final animation was directly inspired by recent scientific discoveries, specifically those surrounding the intriguing exoplanet named 55 Cancri e. Hailed as a “super-Earth,” it’s a planet whose mass overshadows Earth’s but remains lower than that of ice giants like Uranus and Neptune. A blend of extreme temperature reaching up to 3,900 degrees Fahrenheit (2,150 degrees Celsius), combined with the planet’s high density, has led scientists to speculate that 55 Cancri e is significantly composed of diamond.
As we begin the animation, we embark on a spectacular journey, flying through a cloud of asteroids that encircle our imagined diamond planet. I brought this scene to life using Space Creator Pro.
Next, we transition to an intricately detailed cave scene. I’ve modelled this cave using photogrammetry scans of volcanic rocks. Coinciding with the release of UE5.2 beta version, I decided to test the new materials creation process in Visual Studio. The introduction of Substrate Material in Unreal Engine 5.2 was a significant improvement, giving me the ability to create highly realistic and complex materials by layering different materials and applying individual shading models.
In the context of our diamond planet, I designed a material that flaunted a base layer of metal with a glossy clear coat layer on top. The result was a material that strikingly resembled real metal with a clear coat finish.
The cave is generously sprinkled with gleaming gems that I meticulously designed from scratch using Blender. For the gem material, I created a new translucent Substrate Material. But I hit a snag when trying to add a touch of realism by covering the diamond meshes with dirt using decals. Currently, it seems you can’t add decals to translucent materials, presenting a limitation I had to work around.
For reference, decals are graphic images or textures applied to a surface within a 3D environment. They can represent anything from graffiti, dirt, worn-out paint to bullet holes, helping in adding extra detail and realism to a scene.
However, the placement of the diamonds in the cave was achieved using the foliage mode in Unreal Engine, which allowed me to ‘paint’ my custom gem meshes onto the cave’s surfaces.
